Got a spare RasPi knocking around? Why not hook it up to your all-in-one and use it as a handy print and scanner server? I have previously tried to get my multifunction printer/scanner working with OpenWrt, but ran into difficulty with the scanner. Having tried it with the RasPi, I'm pleased to report that it's as easy as Pi ;) Print server capability is provided by the Common Unix Printing System (CUPS), and scanner capability is provided by Scanner Access Now Easy (SANE). Here's my ninja RasPi chilling out discretely down the side of a bookcase: 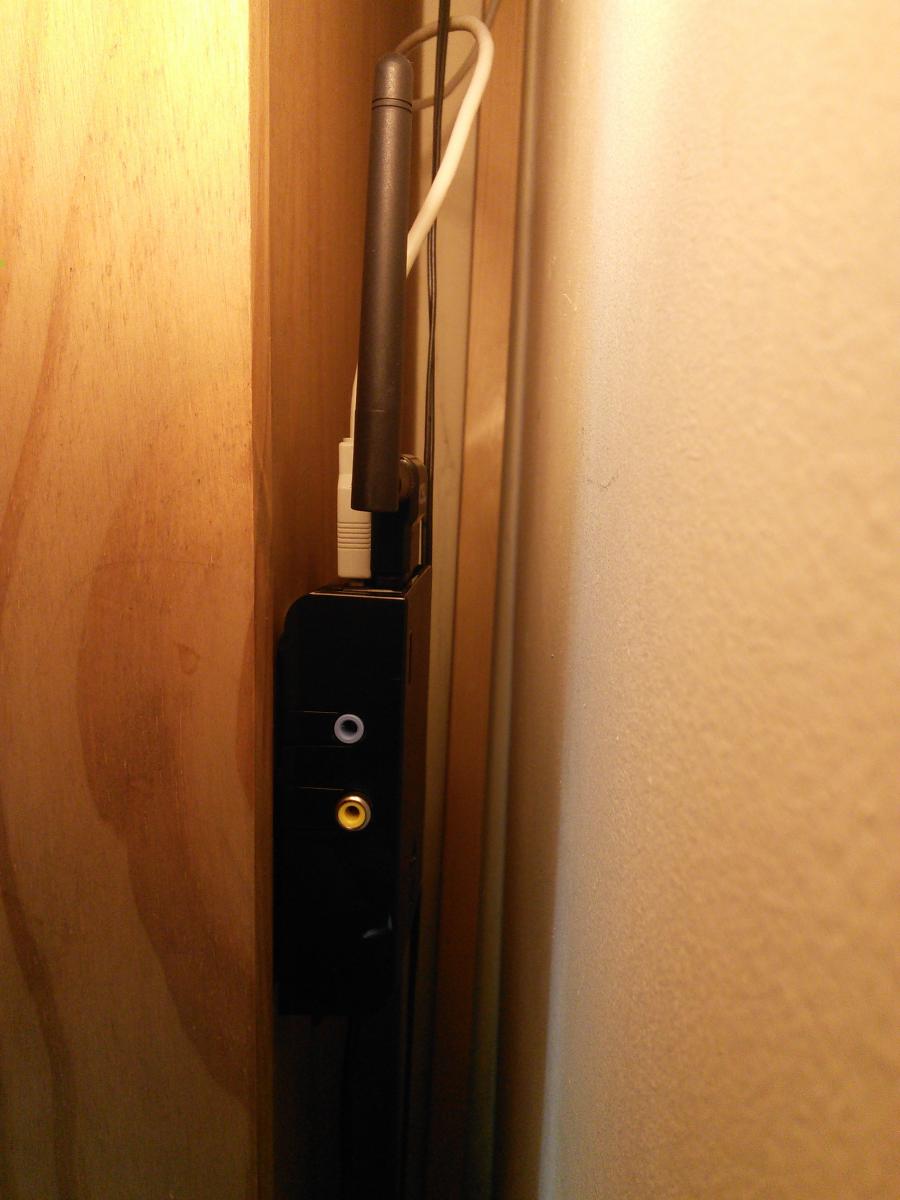 My all-in-one is a HP Deskjet 3050a. Before you start, it's a good idea to check that your device has supported drivers. HP devices are generally well supported by the Free and Open Source HP Linux Imaging and Printing (HPLIP) package, which is in the repos - you can check HP devices on this page to be sure. Other manufacturers also have supported devices, some of which will require proprietary drivers. A good place to check the Linux support of other devices is openprinting.org.
Printing
First we'll set up the Pi as a print server. I'm assuming you're doing this "headless", i.e. without a monitor using SSH. Some of the steps would be easier with a monitor, but this method will work regardless.
Server configuration
First, install the printer drivers. For HP printers, the package hplip is in the repos:
sudo apt-get update
sudo apt-get install hplip
And CUPS:
sudo apt-get install cups
To add a printer your user needs to be a member of the linux printing administration group lpadmin. On my previous Raspbian installations, I found this to be the case by default but I set up the print server again recently and I had to add myself to the group. I think this may be one of the differenced between a NOOBS installation and a standard Raspbian image. You can check which groups your username is a member of using the groups command:
pi@print-server ~ $ groups
pi adm dialout cdrom sudo audio video plugdev games users netdev input spi gpio
As you can see, lpadmin is not in the list, so we need to add pi to the lpadmin group with this command:
sudo usermod -a -G lpadmin pi
Now reboot the pi:
sudo reboot
and check again:
pi@print-server ~ $ groups
pi adm dialout cdrom sudo audio video plugdev games users netdev lpadmin input spi gpio
Good! Now connect your printer's data cable into one of the RasPi's USB ports. CUPS administration can be done via a web interface, but remote access (i.e. not localhost) is turned off by default. To enable remote administration, we first need to edit the cups config file via SSH. The CUPS configuration file is at /etc/cups/cupsd.conf. The first change we need to make is to allow connections from other machines on the network. Look for this line:
Listen localhost:631
Change it to this:
Port 631
Add these two lines:
BrowseRemoteProtocols CUPS dnssd
BrowseAddress @LOCAL
Find the server root Location statement, and edit it to match this one to enable shared printing:
<Location  />
  Order allow,deny
  Allow all
</Location>
Now find the /admin Location statement, and edit it to match this one (i.e. comment or delete the Order allow,denyline inside). This will allow access to the admin pages:
<Location /admin>
</Location>
Find the /admin/conf locaiton block and delete the Order allow,deny, which will enable access to the configuration files. Now reload the CUPS daemon to make the changes:
sudo service cups reload
Now go to a web browser and type the IP address or hostname of your Pi, followed by :631 (port 631), for example https://192.168.1.151:631 or https://print-server:631 You should see a page that looks like this: 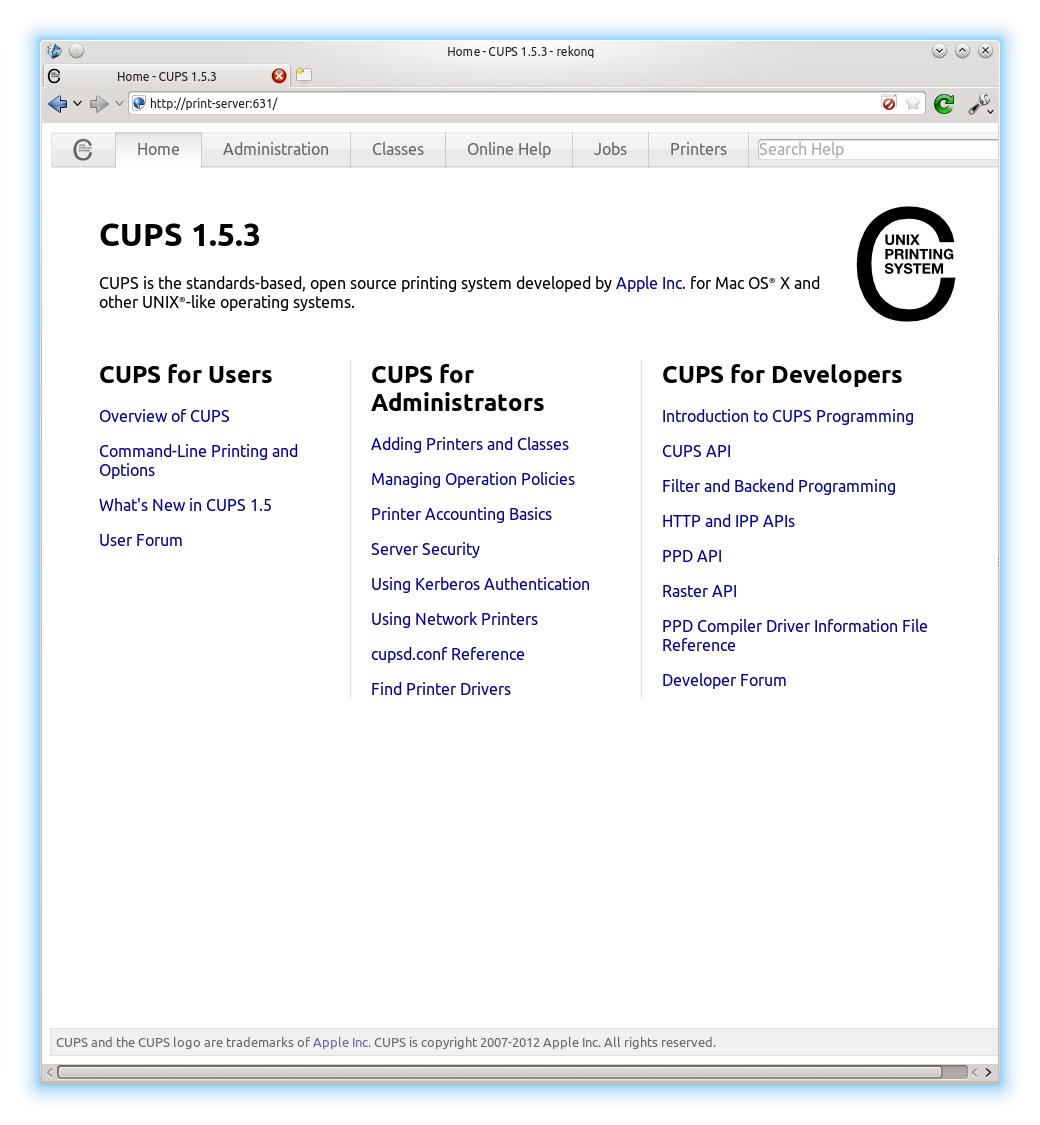 Click on the administration tab and you will see a page like this:
 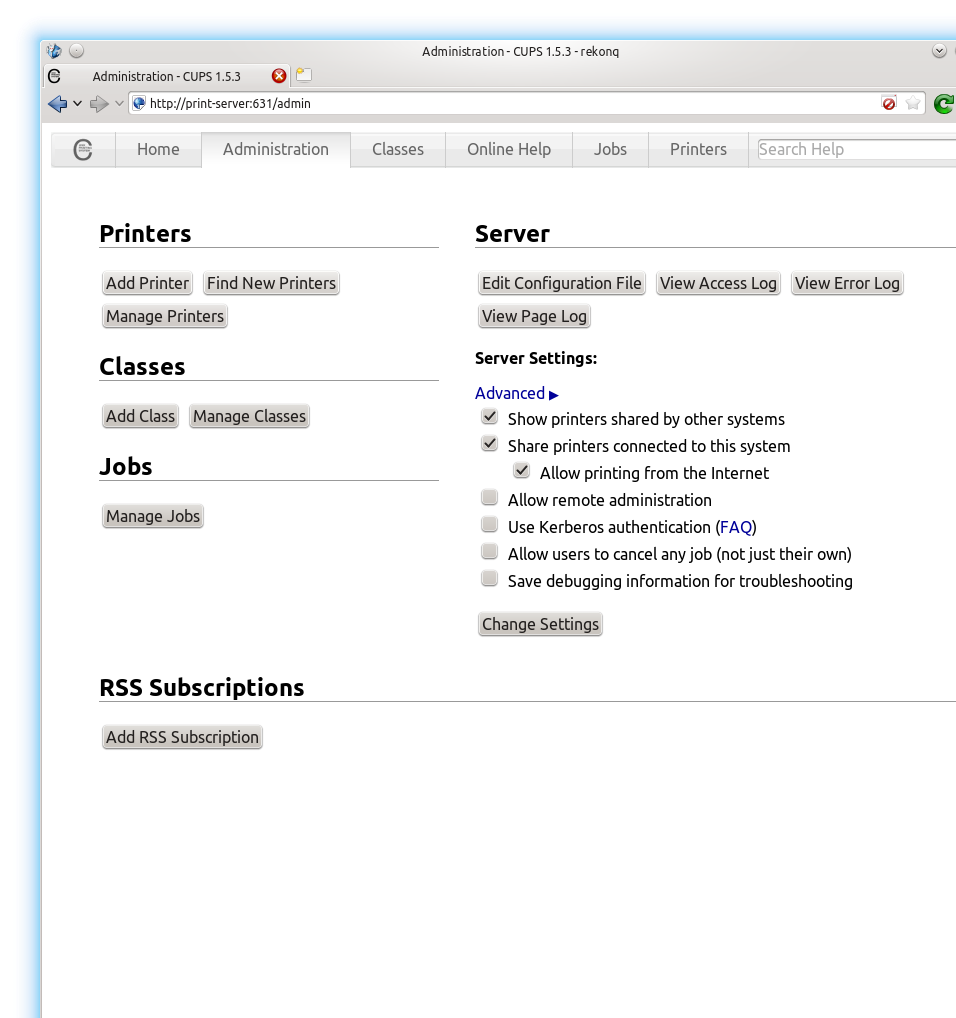 Click on "Add printer" in the top left. You need to be using a secure connection (https) here because CUPS will ask you to authenticate with a username and password. This is your system username and password, e.g. username "pi" and password "raspberry" by default.
 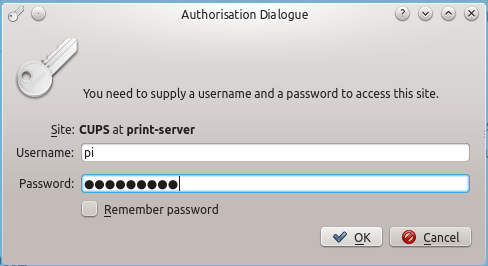 NOTE: if you get a Forbidden error here but the username/password popup doesn't reappear, this means that your credentials have been accepted (you are a user on the system) but you don't have permission to add a printer. Go back and read the part about adding your user to the
 lpadmin group, reboot the pi, and try again! If your printer is connected with a data cable, you should see it listed on the next page. Select it and press continue: 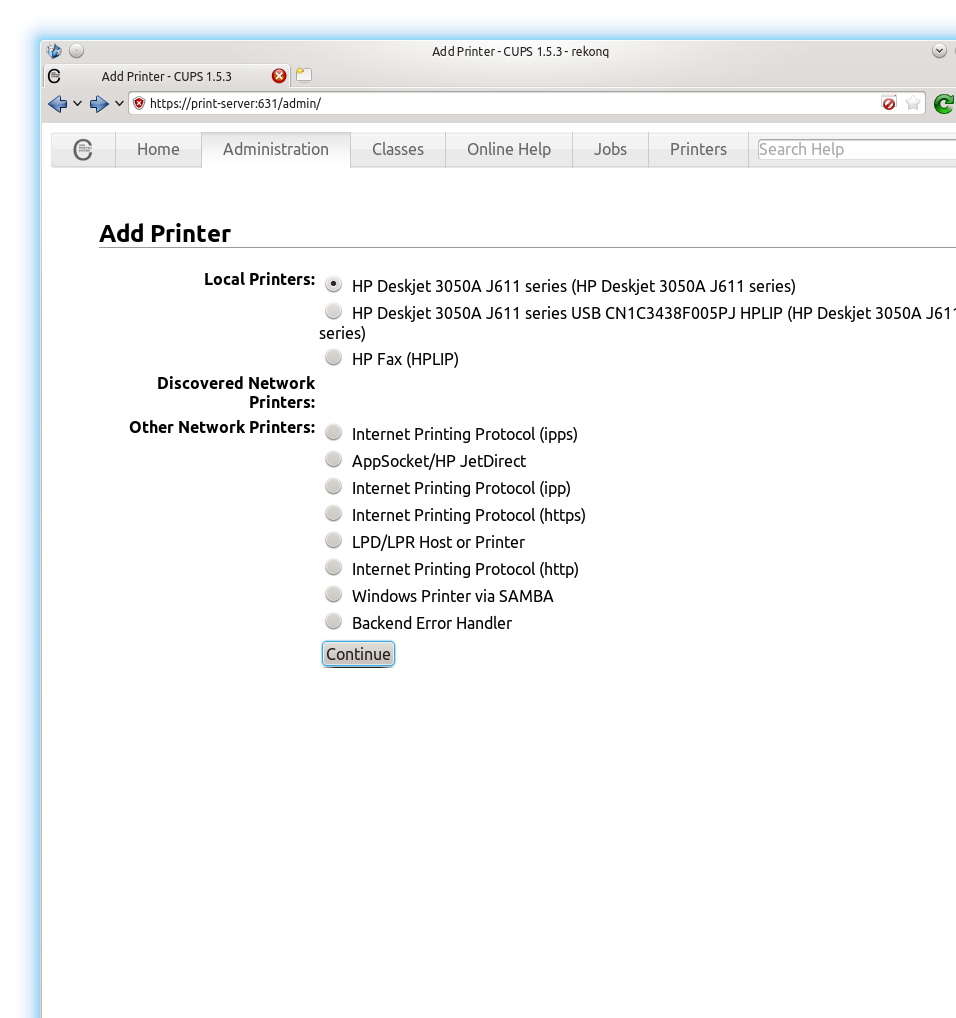 Fill in some key details and hit continue. Be sure to check "share this printer":
  Now select your model from the list of drivers available (these are provided by packages like HPLIP). If you have a choice, choose the cups version, then click add printer:
 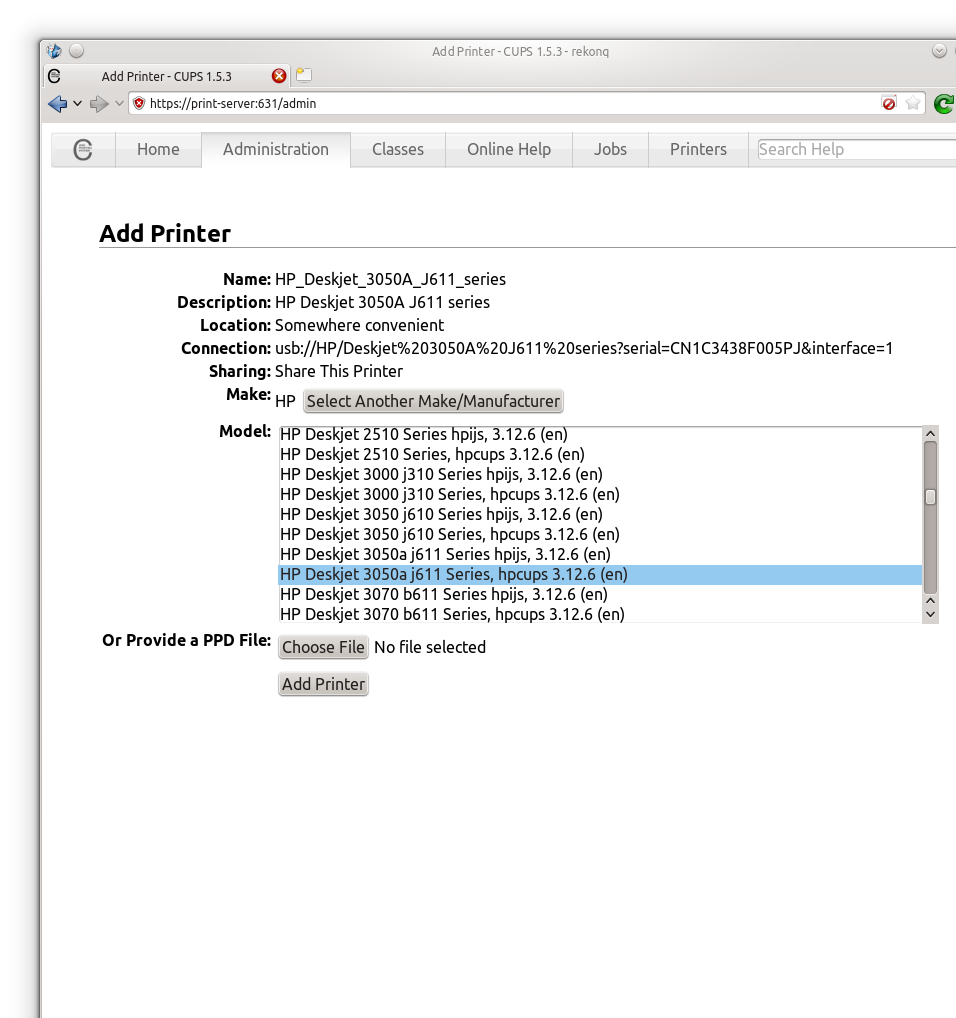 Finally, set your default printing options:
 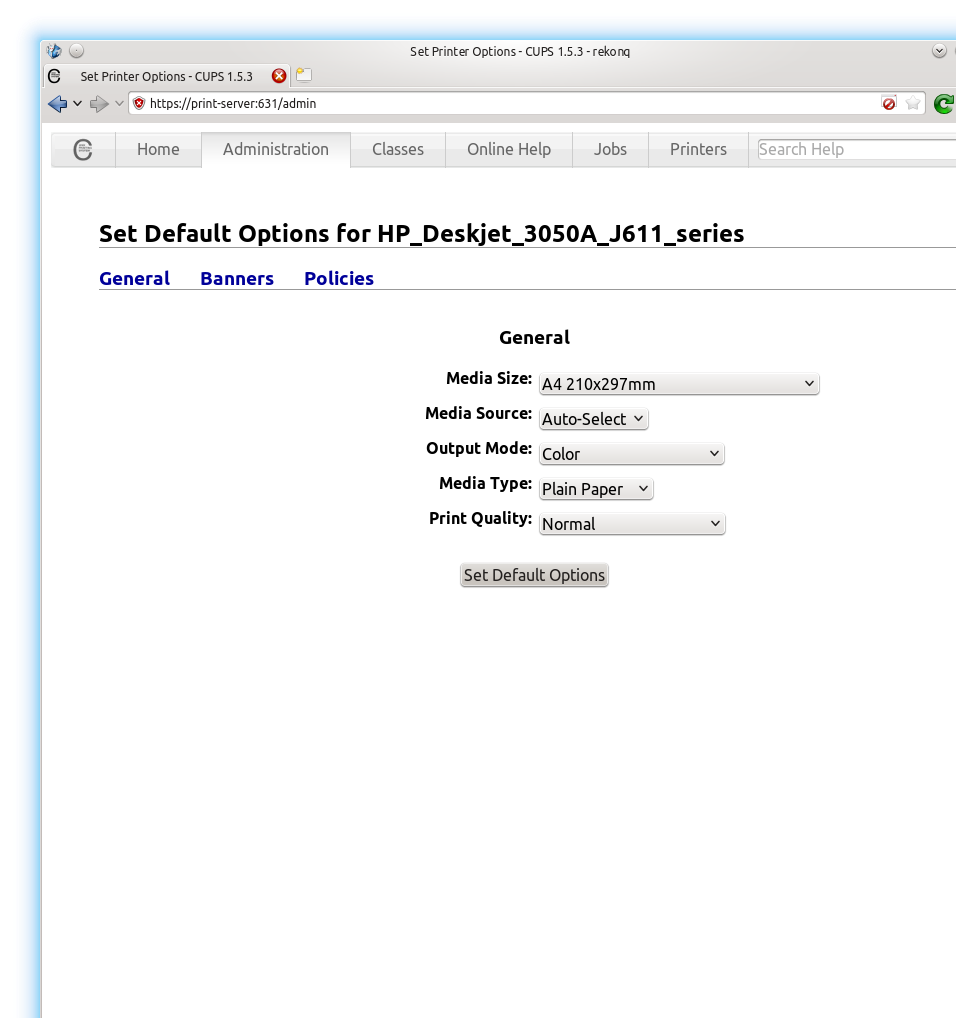 And your're done!
Setting up client machines
Here's an example of setting up the printer on KDE: Install the same driver files you used earlier. For HP printers:
sudo apt-get update
sudo apt-get install hplip
Then navigate to System settings --> Printers (or search for "printers"), and then select Add printer. 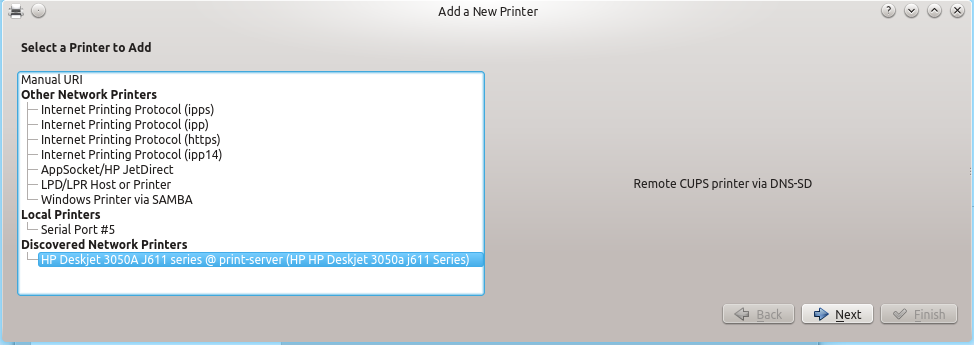 Your computer should automatically detect the printer shared by the print server over the network. Click next and follow the steps to add the printer - you will be asked to add the driver like you did in CUPS. When you are finished, click
 Maintenance --> Print Test Page to check everything works as expected. 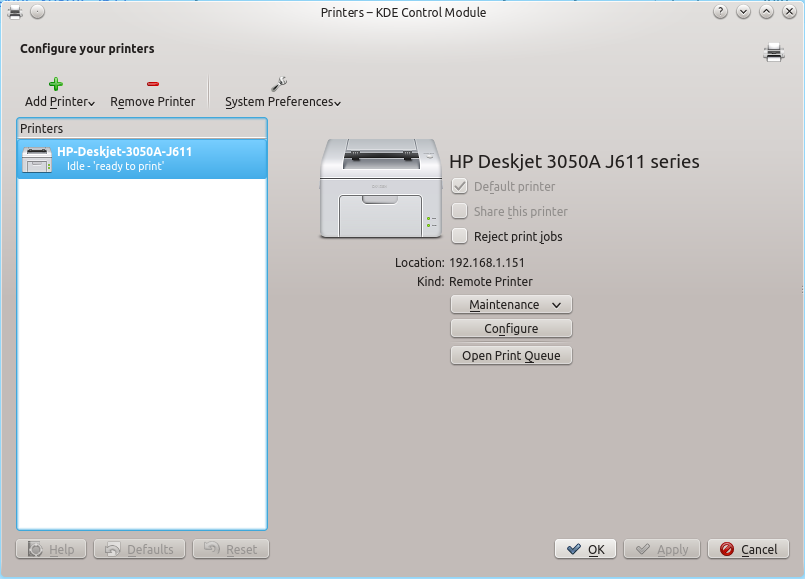
Windows machines
I don't have any Windows machines at home so I haven't tested this, but if you want to connect to the shared printer with Windows you should install Samba as described in the Ubuntu community documentation.
Scanning
Scanning also works remotely, but requires a bit more tinkering to get working.
Server Configuration
To get started, log back in to the Pi with SSH and install SANE:
sudo apt-get update
sudo apt-get install sane
SANE comes with a few useful tools for checking configuration. First, see if SANE can find your scanner:
sudo sane-find-scanner
You should get some output like this:
pi@print-server ~ $ sudo sane-find-scanner

  # sane-find-scanner will now attempt to detect your scanner. If the
  # result is different from what you expected, first make sure your
  # scanner is powered up and properly connected to your computer.

  # No SCSI scanners found. If you expected something different, make sure that
  # you have loaded a kernel SCSI driver for your SCSI adapter.
  # Also you need support for SCSI Generic (sg) in your operating system.
  # If using Linux, try "modprobe sg".

found USB scanner (vendor=0x03f0 [HP], product=0xa011 [Deskjet 3050A J611 series]) at libusb:001:005
found USB scanner (vendor=0x0bda [Manufacturer Realtek ], product=0x8172 [RTL8191S WLAN Adapter ]) at libusb:001:004
found USB scanner (vendor=0x0424, product=0xec00) at libusb:001:003
  # Your USB scanner was (probably) detected. It may or may not be supported by
  # SANE. Try scanimage -L and read the backend's manpage.

  # Not checking for parallel port scanners.

  # Most Scanners connected to the parallel port or other proprietary ports
  # can't be detected by this program.
If the program returns information about your make and model like above, you're good to go. Next, try the following:
sudo scanimage -L
You should get output like this:
device `hpaio:/usb/Deskjet_3050A_J611_series?serial=CN1C3438F005PJ' is a Hewlett-Packard Deskjet_3050A_J611_series all-in-one
Finally, try scanning something. Put something inside the scanner enter this command:
scanimage > ~/test-scan-file.pnm
You can see details about the file using this command:
file ~/test-scan-file.pnm
If you would like to fetch the file via SSH and inspect it on your laptop, you can use the secure copy command (run this from a terminal on your laptop):
scp pi@print-server:~/test-scan-file.pnm ~/test-scan-file.pnm
(...where print-server is the hostname of the print server, Alternatively, you can use the IP address of the Pi, e.g. 192.168.1.151). Once the transfer is complete, you can open the file from your home directory with a program like GIMP. Now we know that the scanner is working locally, we can set up the sane daemon. Open the configuration file /etc/default/saned and set this option to turn the sane daemon/server on:
RUN=yes
Next, open the file /etc/sane.d/saned.conf and add this line, which tells the server to accept connections from all IP addresses in the range 192.168.1.1 to 192.168.1.255:
192.168.1.0/24
The above assumes that your router's IP address is 192.168.1.1 - if it is 192.168.0.1 then change the line to 192.168.0.0/24. Also uncomment this line:
data_portrange = 10000 - 10100
We also need to fix the permissions so that the sane daemon can access the scanner without root. Part of the output from sane-find-scanner was the following line:
found USB scanner (vendor=0x03f0 [HP], product=0xa011 [Deskjet 3050A J611 series]) at libusb:001:005
The section "at libusb:001:005" at the end tells us that the scanner is located at /dev/bus/usb/001/005. Let's check who owns that file:
pi@print-server ~ $ ls -l /dev/bus/usb/001
total 0
crw-rw-r-T 1 root root 189, 0 Jul  6 19:44 001
crw-rw-r-T 1 root root 189, 1 Jan  1  1970 002
crw-rw-r-T 1 root root 189, 2 Jan  1  1970 003
crw-rw-r-T 1 root root 189, 3 Jul  6 19:44 004
crw-rw-r-T 1 root lp   189, 4 Jul  6 19:49 005
As you can see, it is owned by root with the group lp (linux printing). We need to add the sane daemon to the lp group to give it the necessary permissions:
sudo adduser saned lp
Now restart the SANE daemon to make all of the changes take effect. On Debian Wheezy and before, the command is:
sudo service saned restart
On Jessie and later (i.e. systems with systemd), use:
sudo systemctl start saned.socket
And tell the SANE service to start automatically when the Pi starts. On Wheezy:
sudo update-rc.d saned defaults
Or on Jessie:
sudo systemctl enable saned.socket
Now check SANE is running properly:
sudo service saned status
You can also check that the port is available externally by using nmap to port scan the Pi from your laptop:
nmap print-server
(again, assuming print-server is the hostname of your pi - alternatively, use the IP addresss). You shoudl get results like this:
Nmap scan report for print-server (192.168.1.151)
Host is up (0.019s latency).
rDNS record for 192.168.1.151: print-server.lan
Not shown: 997 closed ports
PORT     STATE SERVICE
22/tcp   open  ssh
631/tcp  open  ipp
6566/tcp open  sane-port
All good: the Pi has services bound to port 22 for SSH, 631 for printing/CUPS and 6566 for scanning/SANE.
Client configuration
I'm going to use KDE as an example again: install xsane and skanlite on the client machine:
sudo apt-get update
sudo apt-get install xsane skanlite
Now we need to edit a config file to tell your computer where to look for sane services. Edit /etc/sane.d/net.conf and uncomment this line:
connect_timeout = 60
And add the IP address of your print server to the file:
192.168.1.151
Now run this command. You should see a popup that says "scanning for devices" and then the following GUI will appear with a plethora of options:
xsane
 If you'd like something more simple, try Skanlite:
 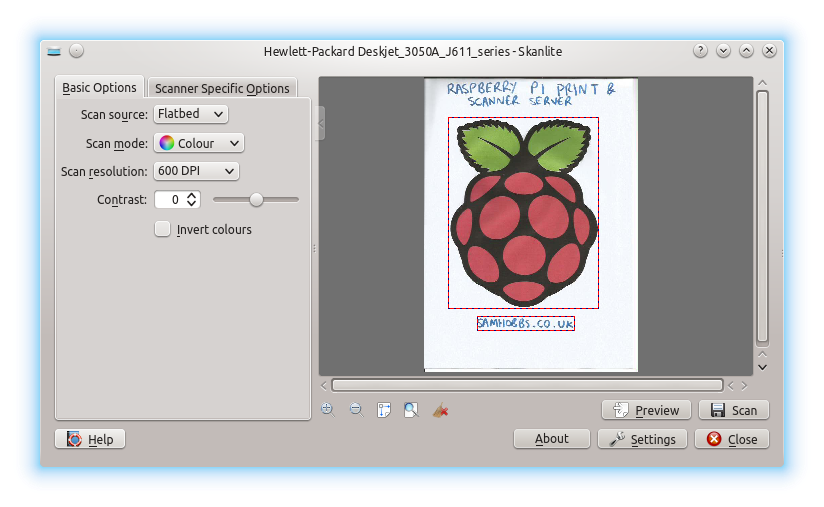 That's it! Hope you found it helpful, let me know how you get on :)
Comments
I found this very helpful.
I found this very helpful. Thanks.
One typo:
sudo service sane restart
should be "saned" instead of "sane".
Well spotted thanks for the correction!
Is there any software works
Is there any software works with Windows with sane?
There are an error:
sudo service sane restart,
does not exist but it is
sudo service saned restart
Thank for the guide :)
Thanks for your comment!
Hi Sam! I have tried to work
Hi Sam! I have tried to work the application but it seems an error and it not works. I try to use Ubuntu... is the solution...
Thank you Sam
You might prefer Kubuntu
windows version of xsane doesnt exist - there's another project
Hi Sam,
thank you for the great tutorial.
xsane for win doesnt exist, there is another project at sourceforge called SANEWinDS
url: https://sourceforge.net/projects/sanewinds/
the installation is next-next-finish and was able to use hp deskjet 1050 AIO as a scanner.
Ok Sam Thank you
Ok Sam
Thank you
error messages
Following your procedure made this install relatively painless. But upon starting either xsane or skanlite the first time, I got error messages regarding unable to create file due to file permissions even though both programs appeared to initialize normally. At the time, I had an ssh connection to my print server (Rapberry Pi B+ running raspian) but was not attempting to start the scan programs on it. I was using my laptop as a client as your procedure suggested. Upon restarting skanlite, however, no messages appeared. Retrying xsane brought up the error message. Any thoughts?
You might add a warning that these might show up the first time either program is started after installation, for it got me concerned!
That's strange! Which file
Would benefit from tmpfs
Thanks for a nice concise guide. When I tried it with my 256MB Pi I quickly found out that 256MB is waaaay too little for a cups server. It started swapping like crazy with a risk of damaging the SD card.
Even with a 512MB machine I think it would help both the server performance, and the health of the SD card to put some tmpfs on /run/ /var/log, and /var/spool/cups
In /etc/fstab add lines
tmpfs /var/run tmpfs defaults,noatime 0 0
tmpfs /var/log tmpfs defaults,noatime 0 0
tmpfs /tmp tmpfs defaults,noatime,mode=1777 0 0
tmpfs /var/spool/cups tmpfs defaults,noatime,mode=0755 0 0
Also just to be safe disable swap altogether with
sudo update-rc.d dphys-swapfile remove
The other thing I did was to use this project https://github.com/armooo/cloudprint to allow the cups server to act as a gateway to Google Cloudprint so Android and ChromeOS devices could print.
Interesting, thanks
tmpfs dynamically adjusts to
tmpfs dynamically adjusts to fit available memory and the size of the contents. If it runs out then it starts swapping. If no swap is available then the tmpfs partition will be full and the application will crash. Meanwhile if no memory is available when linux tries to allocate some, then the OOM algorithm will start killing processes.
Naturally this is not a good situation and so must be avoided. Use of a swap file will avoid crashes, but if too much use is made of swap then the performance will suck, and the SD card could wear out. The best solution is to have enough memory so swap is not needed. 256MB is clearly not enough. I have a 512MB Pi on order, and will report back on the performance advantages of tmpfs when it arrives.
Has it crashed on you?
Tried again with 512MB Pi B+
Now my new 512MB B+ has arrived I have conducted a few experiments with the print server.
With 512MB RAM the server never needs to use swap, so it does not matter if it is enabled or not.
As for tmpfs to my surprise it did not make any material difference in how long print jobs take. A one page test print took just over a minute regardless of whether /var/spool/cups was mounted on tmpfs or not.
htop confirmed that the CPU ran at 100% load while running a print job, while iotop shows that cups does not make frequent disc read/writes while processing, so the faster access time of tmpfs does not help much.
As for using tmpfs to reduce SD card wear. Modern SD cards have much better wear levelling than the old ones, but I have managed to destroy SD cards in the past, so for the sake of caution I feel more comfortable if tmpfs is used on directories holding temporary data.
Thank you for the useful info
Select the optimal driver
Some experimenting with printer drivers has got my print speed way down. For my HP OfficeJet the hpijs driver is way faster than the hpcups driver. A test page which was taking 70 secs, now completes in 26sec.
Looking at htop I can see it does not even max out the CPU.
Depending on which printer you have you may see a similar improvement. You could also try a Generic Postscript driver (check which version of Postscript your printer supports)
Nice! Is there any difference
I'm pretty surprised this
I'm pretty surprised this worked on the first try! Thanks for your tutorial
More than one scanner
hello,
thank you for your information.
have you tried to connect more than one scanner? if not, do you think it's possible? and how much time does it take a scanner to scan a page?
thanks in advance
Not something I've tried
I'm working on a project
I'm working on a project where I have to make more than one scanner work at the same time, don't you think that's too much for the pi to bear? I mean, is the pi fast enough for that?
- do you know how to make the images go directly to an SD card?
- and finally, what does the Wi-Fi have to do with the scanner? isn't it connected via USB ? I'm confused now !
I really appreciate your help :)
Should be fast enough
test-scan-file.pnmin your home directory on the Pi (/home/pi/test-scan-file.pnm). My Pi is connected to my router with wifi, so when I run skanlinte or xsane on my laptop, the pi has to scan the file to a temporary file on its SD card and then transfer the file to me over the LAN. If the connection from the pi to the router is poor then that transfer would be slow. Of course, you can run those graphical programs on the pi itself if you like - that's just not what I was expecting (I wouldn't really consider it to be a "server" if you use it like that). SamGrateful
OK, now it's clear to me.Again,thank you very much ,you have now idea how much this tutorial was helpful :)
Scanner won't work !
Hi Sam,
Everything works fine with me so far,but when I typed this command (( scanimage > ~/test-scan-file.pnm)) I got the following message :
((scanimage: no SANE devices found))
even though the pi manged to detect my scanner ( hp 5370c)
can you tell what is wrong?
List devices
scanimage -Lplease? SamThe output was exactly like
The output was exactly like yours , but the when I used this (( scanimage > ~/test-scan-file.pnm)) an error message showed.
But finally it worked just fine, I did two things actually to make it work and I don't know which of them was responsible for making it work :
1- I downloaded hplip even though my device is only a scanner not a printer
2- I typed sudo scanimage > ~/test-scan-file.pnm >>> notice sudo
Again, thank you very much :)
test sudo
lpto give it permission to use the scanner. Worth testing...LAN
Ok I will and I'll tell you what happens:)
Do you know how to make the pi send the images scanned through a local network? I've been trying but I couldn't figure out how ! I only was able to control it by any device connected to the LAN , but the problem is they have a complete access to the pi !!
SANE
Hi Sam ,
I tried to connect a new scanner ( HP 1510 all in one ) but it won't work even though it's supported by SANE !
when I type (sudo sane-find-scanner) the pi can find the scanner ,but when I type (sudo scanimage -L) it tells me that no scanners were identified !!
Add new comment