Got a spare RasPi knocking around? Why not hook it up to your all-in-one and use it as a handy print and scanner server? I have previously tried to get my multifunction printer/scanner working with OpenWrt, but ran into difficulty with the scanner. Having tried it with the RasPi, I'm pleased to report that it's as easy as Pi ;) Print server capability is provided by the Common Unix Printing System (CUPS), and scanner capability is provided by Scanner Access Now Easy (SANE). Here's my ninja RasPi chilling out discretely down the side of a bookcase: 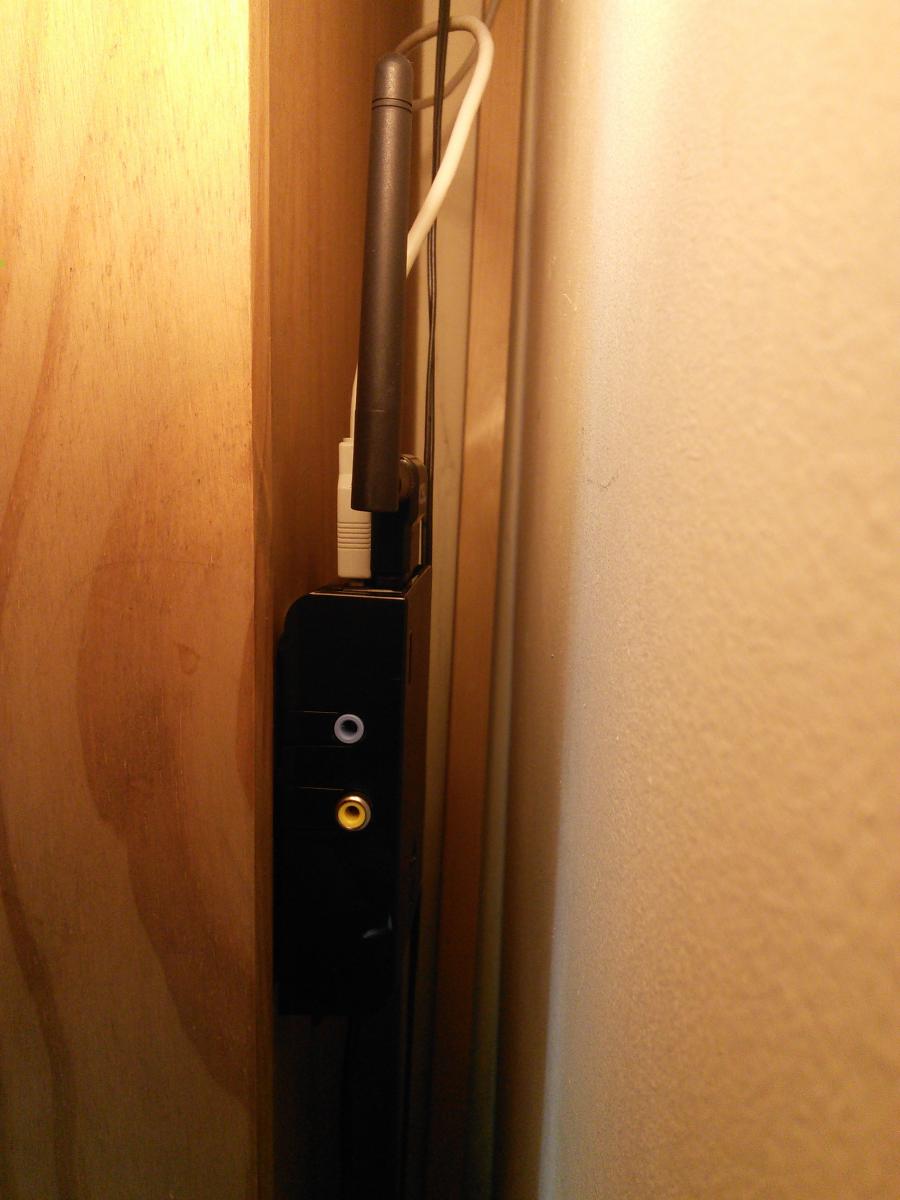 My all-in-one is a HP Deskjet 3050a. Before you start, it's a good idea to check that your device has supported drivers. HP devices are generally well supported by the Free and Open Source HP Linux Imaging and Printing (HPLIP) package, which is in the repos - you can check HP devices on this page to be sure. Other manufacturers also have supported devices, some of which will require proprietary drivers. A good place to check the Linux support of other devices is openprinting.org.
Printing
First we'll set up the Pi as a print server. I'm assuming you're doing this "headless", i.e. without a monitor using SSH. Some of the steps would be easier with a monitor, but this method will work regardless.
Server configuration
First, install the printer drivers. For HP printers, the package hplip is in the repos:
sudo apt-get update
sudo apt-get install hplip
And CUPS:
sudo apt-get install cups
To add a printer your user needs to be a member of the linux printing administration group lpadmin. On my previous Raspbian installations, I found this to be the case by default but I set up the print server again recently and I had to add myself to the group. I think this may be one of the differenced between a NOOBS installation and a standard Raspbian image. You can check which groups your username is a member of using the groups command:
pi@print-server ~ $ groups
pi adm dialout cdrom sudo audio video plugdev games users netdev input spi gpio
As you can see, lpadmin is not in the list, so we need to add pi to the lpadmin group with this command:
sudo usermod -a -G lpadmin pi
Now reboot the pi:
sudo reboot
and check again:
pi@print-server ~ $ groups
pi adm dialout cdrom sudo audio video plugdev games users netdev lpadmin input spi gpio
Good! Now connect your printer's data cable into one of the RasPi's USB ports. CUPS administration can be done via a web interface, but remote access (i.e. not localhost) is turned off by default. To enable remote administration, we first need to edit the cups config file via SSH. The CUPS configuration file is at /etc/cups/cupsd.conf. The first change we need to make is to allow connections from other machines on the network. Look for this line:
Listen localhost:631
Change it to this:
Port 631
Add these two lines:
BrowseRemoteProtocols CUPS dnssd
BrowseAddress @LOCAL
Find the server root Location statement, and edit it to match this one to enable shared printing:
<Location  />
  Order allow,deny
  Allow all
</Location>
Now find the /admin Location statement, and edit it to match this one (i.e. comment or delete the Order allow,denyline inside). This will allow access to the admin pages:
<Location /admin>
</Location>
Find the /admin/conf locaiton block and delete the Order allow,deny, which will enable access to the configuration files. Now reload the CUPS daemon to make the changes:
sudo service cups reload
Now go to a web browser and type the IP address or hostname of your Pi, followed by :631 (port 631), for example https://192.168.1.151:631 or https://print-server:631 You should see a page that looks like this: 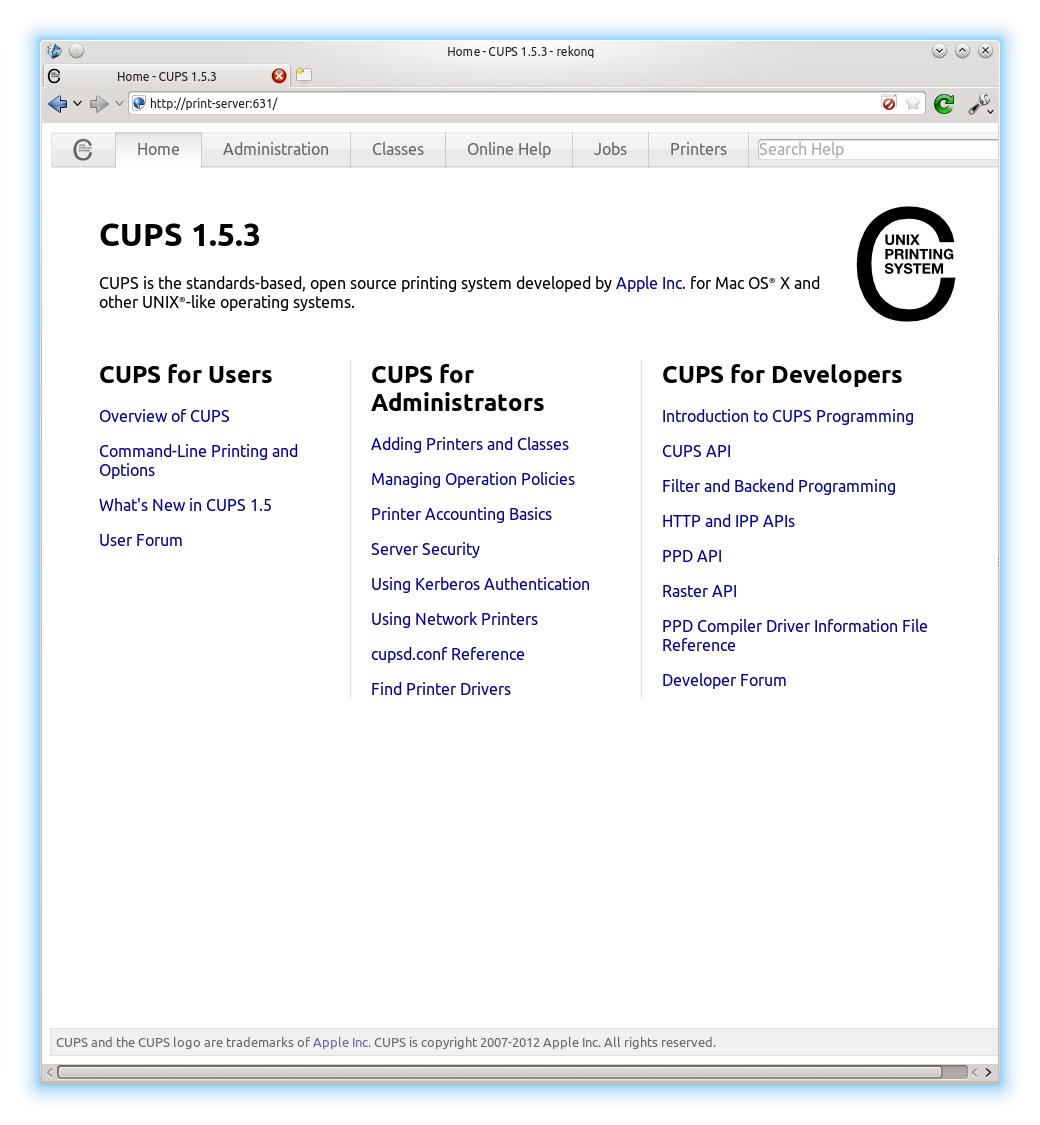 Click on the administration tab and you will see a page like this:
 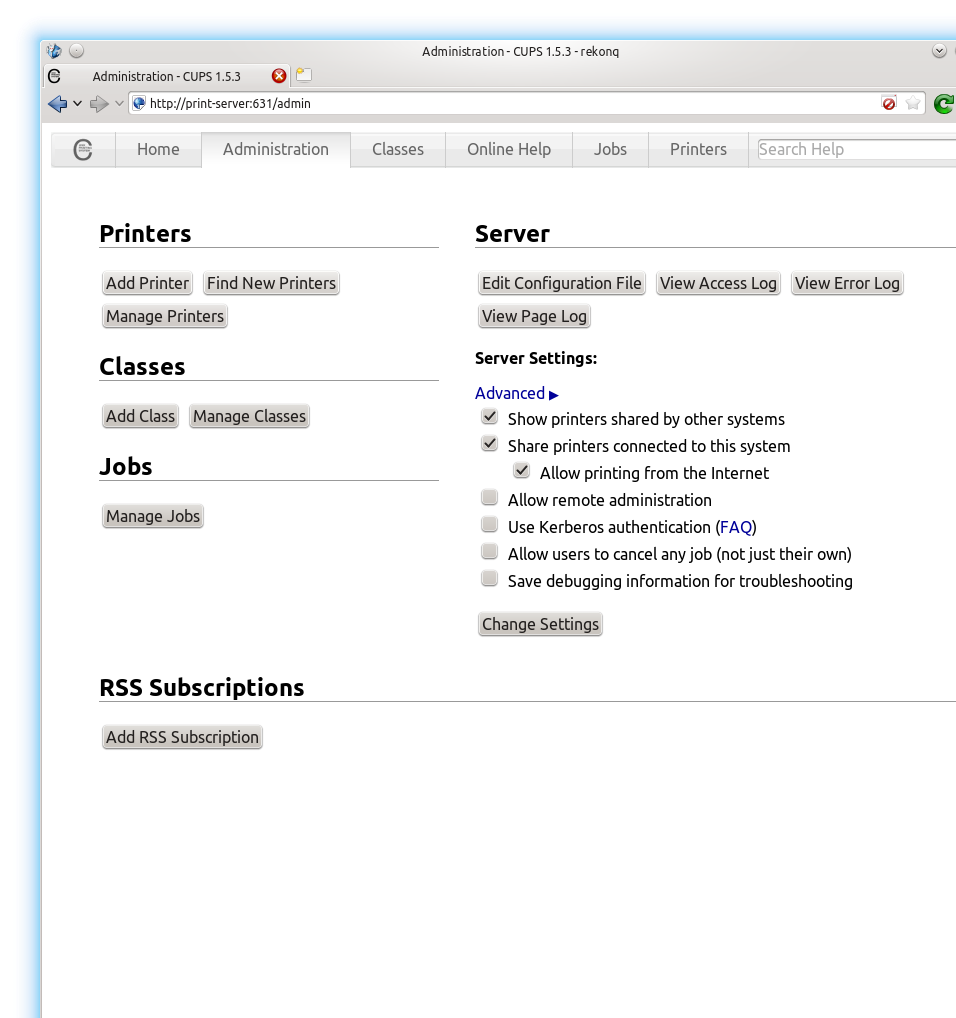 Click on "Add printer" in the top left. You need to be using a secure connection (https) here because CUPS will ask you to authenticate with a username and password. This is your system username and password, e.g. username "pi" and password "raspberry" by default.
 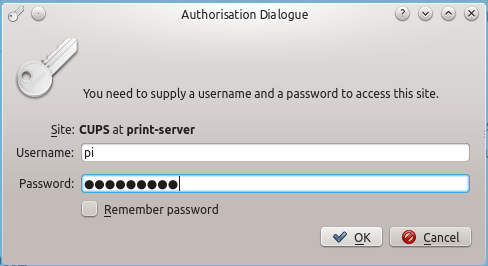 NOTE: if you get a Forbidden error here but the username/password popup doesn't reappear, this means that your credentials have been accepted (you are a user on the system) but you don't have permission to add a printer. Go back and read the part about adding your user to the
 lpadmin group, reboot the pi, and try again! If your printer is connected with a data cable, you should see it listed on the next page. Select it and press continue: 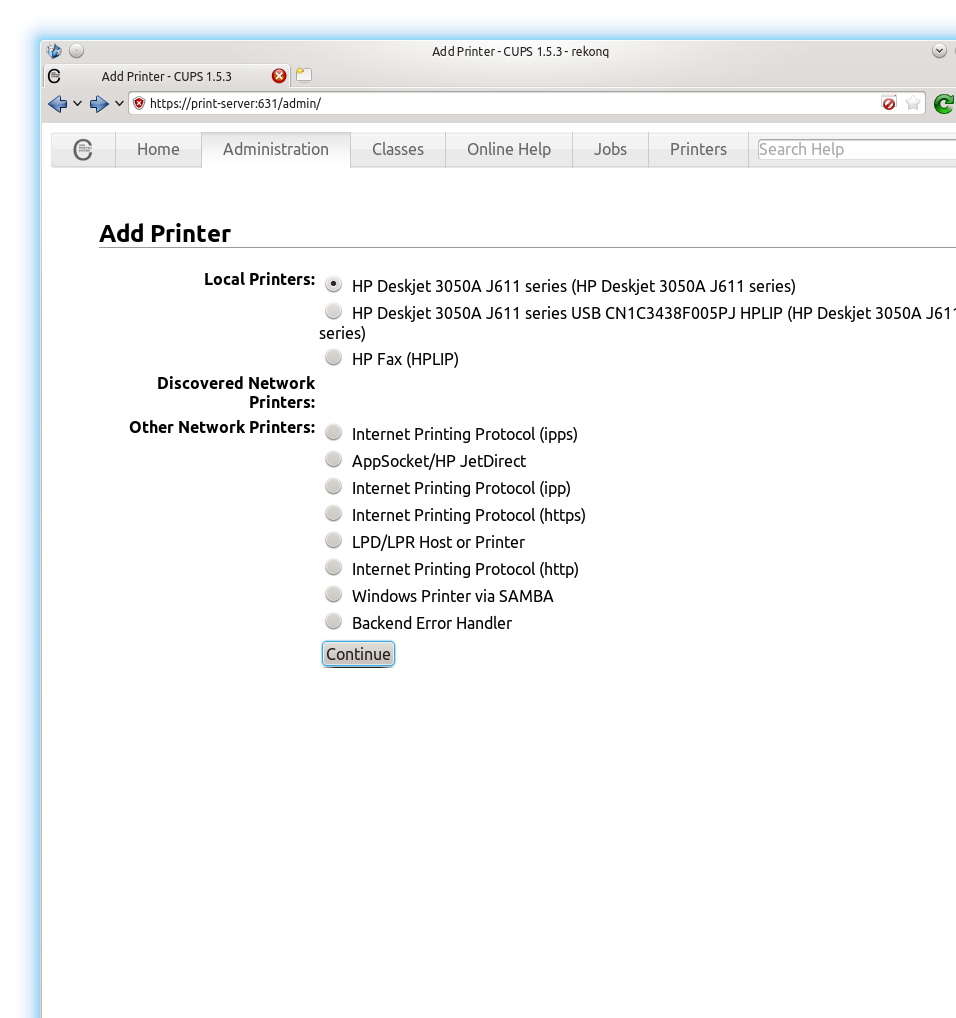 Fill in some key details and hit continue. Be sure to check "share this printer":
  Now select your model from the list of drivers available (these are provided by packages like HPLIP). If you have a choice, choose the cups version, then click add printer:
 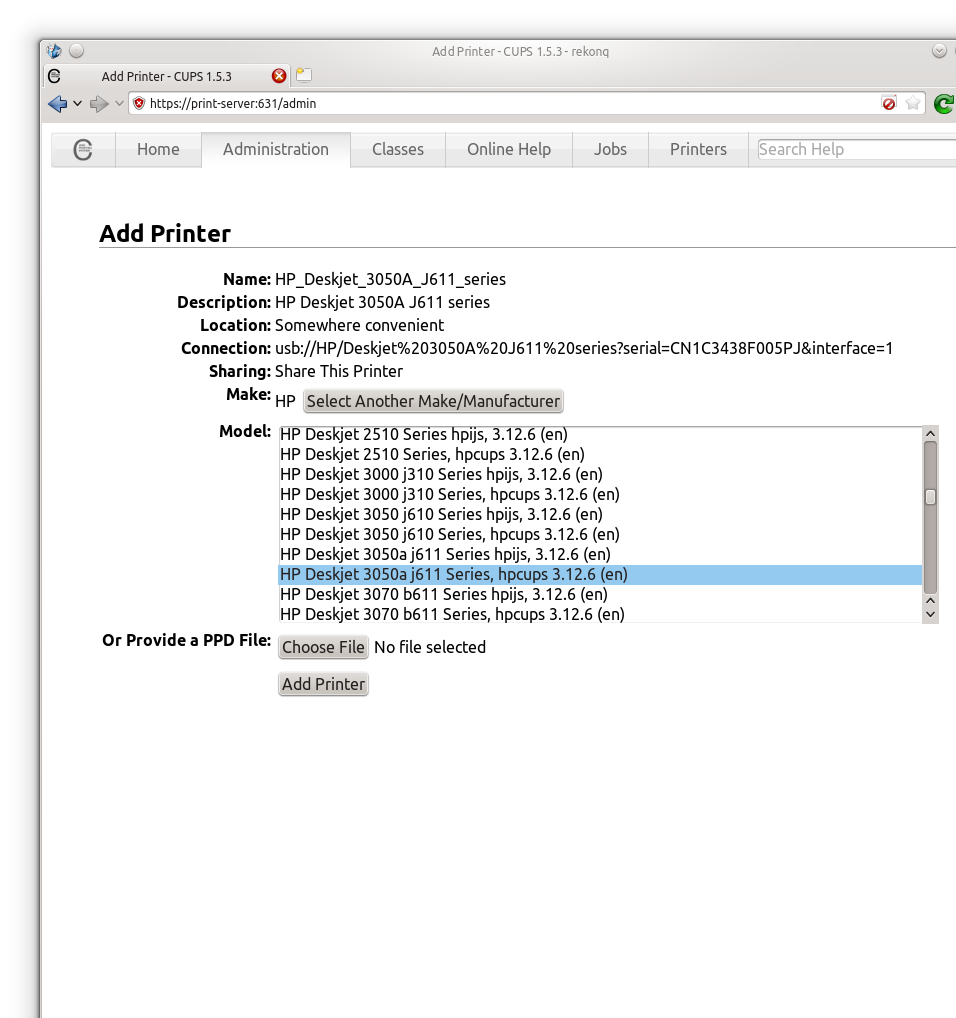 Finally, set your default printing options:
 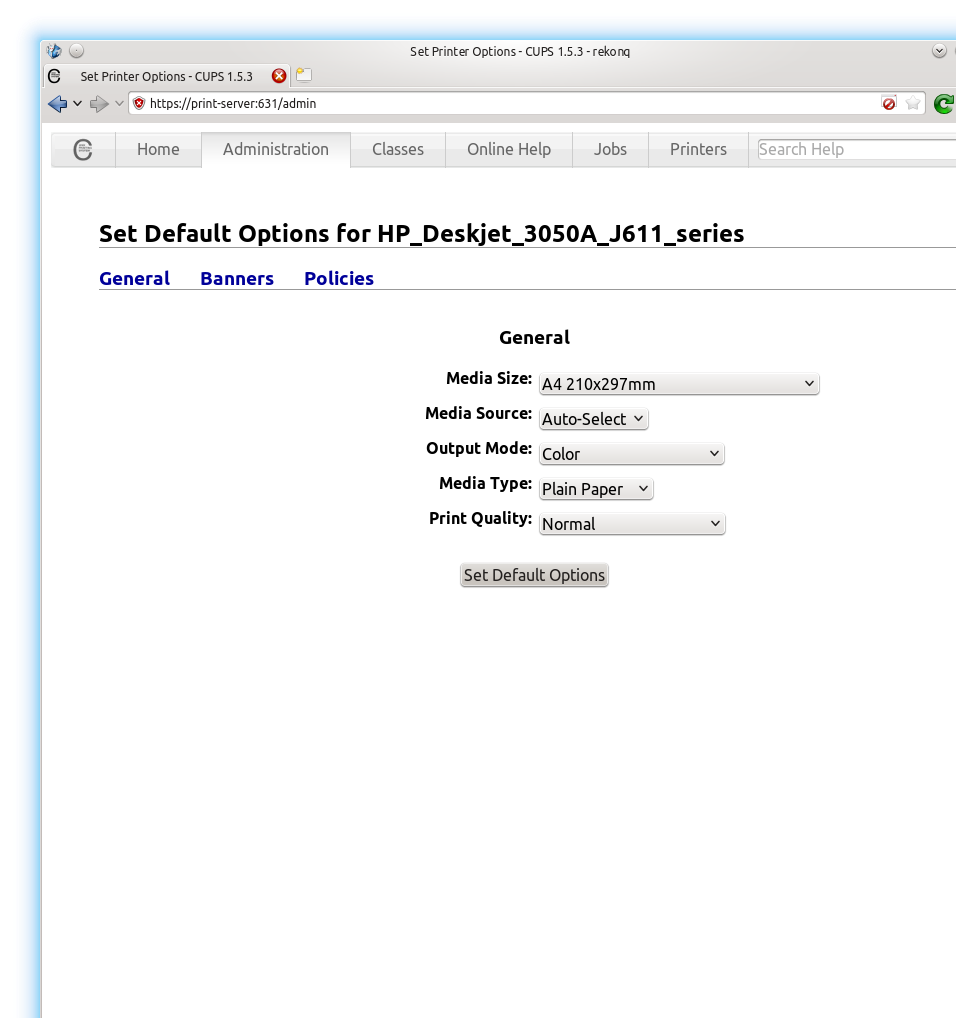 And your're done!
Setting up client machines
Here's an example of setting up the printer on KDE: Install the same driver files you used earlier. For HP printers:
sudo apt-get update
sudo apt-get install hplip
Then navigate to System settings --> Printers (or search for "printers"), and then select Add printer. 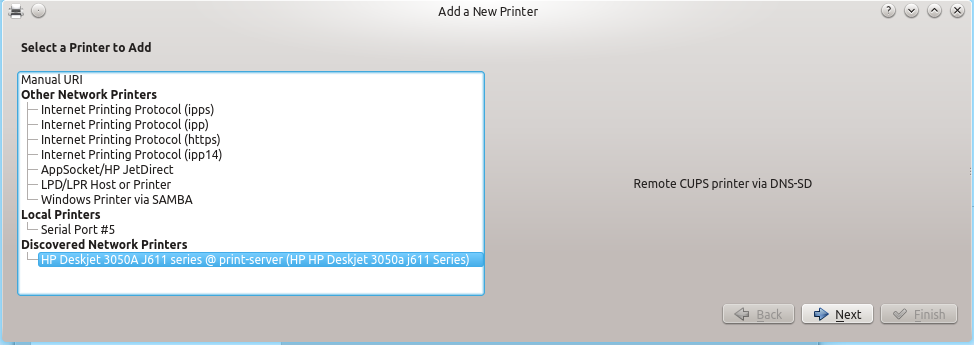 Your computer should automatically detect the printer shared by the print server over the network. Click next and follow the steps to add the printer - you will be asked to add the driver like you did in CUPS. When you are finished, click
 Maintenance --> Print Test Page to check everything works as expected. 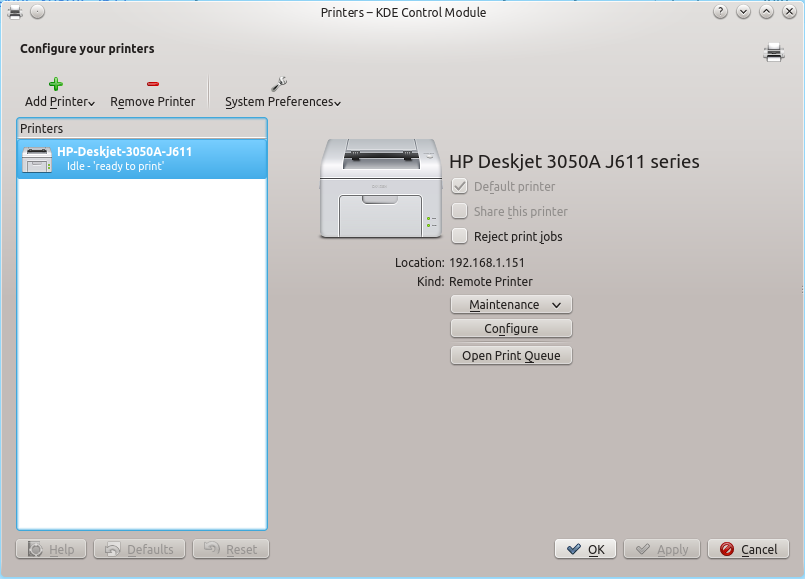
Windows machines
I don't have any Windows machines at home so I haven't tested this, but if you want to connect to the shared printer with Windows you should install Samba as described in the Ubuntu community documentation.
Scanning
Scanning also works remotely, but requires a bit more tinkering to get working.
Server Configuration
To get started, log back in to the Pi with SSH and install SANE:
sudo apt-get update
sudo apt-get install sane
SANE comes with a few useful tools for checking configuration. First, see if SANE can find your scanner:
sudo sane-find-scanner
You should get some output like this:
pi@print-server ~ $ sudo sane-find-scanner

  # sane-find-scanner will now attempt to detect your scanner. If the
  # result is different from what you expected, first make sure your
  # scanner is powered up and properly connected to your computer.

  # No SCSI scanners found. If you expected something different, make sure that
  # you have loaded a kernel SCSI driver for your SCSI adapter.
  # Also you need support for SCSI Generic (sg) in your operating system.
  # If using Linux, try "modprobe sg".

found USB scanner (vendor=0x03f0 [HP], product=0xa011 [Deskjet 3050A J611 series]) at libusb:001:005
found USB scanner (vendor=0x0bda [Manufacturer Realtek ], product=0x8172 [RTL8191S WLAN Adapter ]) at libusb:001:004
found USB scanner (vendor=0x0424, product=0xec00) at libusb:001:003
  # Your USB scanner was (probably) detected. It may or may not be supported by
  # SANE. Try scanimage -L and read the backend's manpage.

  # Not checking for parallel port scanners.

  # Most Scanners connected to the parallel port or other proprietary ports
  # can't be detected by this program.
If the program returns information about your make and model like above, you're good to go. Next, try the following:
sudo scanimage -L
You should get output like this:
device `hpaio:/usb/Deskjet_3050A_J611_series?serial=CN1C3438F005PJ' is a Hewlett-Packard Deskjet_3050A_J611_series all-in-one
Finally, try scanning something. Put something inside the scanner enter this command:
scanimage > ~/test-scan-file.pnm
You can see details about the file using this command:
file ~/test-scan-file.pnm
If you would like to fetch the file via SSH and inspect it on your laptop, you can use the secure copy command (run this from a terminal on your laptop):
scp pi@print-server:~/test-scan-file.pnm ~/test-scan-file.pnm
(...where print-server is the hostname of the print server, Alternatively, you can use the IP address of the Pi, e.g. 192.168.1.151). Once the transfer is complete, you can open the file from your home directory with a program like GIMP. Now we know that the scanner is working locally, we can set up the sane daemon. Open the configuration file /etc/default/saned and set this option to turn the sane daemon/server on:
RUN=yes
Next, open the file /etc/sane.d/saned.conf and add this line, which tells the server to accept connections from all IP addresses in the range 192.168.1.1 to 192.168.1.255:
192.168.1.0/24
The above assumes that your router's IP address is 192.168.1.1 - if it is 192.168.0.1 then change the line to 192.168.0.0/24. Also uncomment this line:
data_portrange = 10000 - 10100
We also need to fix the permissions so that the sane daemon can access the scanner without root. Part of the output from sane-find-scanner was the following line:
found USB scanner (vendor=0x03f0 [HP], product=0xa011 [Deskjet 3050A J611 series]) at libusb:001:005
The section "at libusb:001:005" at the end tells us that the scanner is located at /dev/bus/usb/001/005. Let's check who owns that file:
pi@print-server ~ $ ls -l /dev/bus/usb/001
total 0
crw-rw-r-T 1 root root 189, 0 Jul  6 19:44 001
crw-rw-r-T 1 root root 189, 1 Jan  1  1970 002
crw-rw-r-T 1 root root 189, 2 Jan  1  1970 003
crw-rw-r-T 1 root root 189, 3 Jul  6 19:44 004
crw-rw-r-T 1 root lp   189, 4 Jul  6 19:49 005
As you can see, it is owned by root with the group lp (linux printing). We need to add the sane daemon to the lp group to give it the necessary permissions:
sudo adduser saned lp
Now restart the SANE daemon to make all of the changes take effect. On Debian Wheezy and before, the command is:
sudo service saned restart
On Jessie and later (i.e. systems with systemd), use:
sudo systemctl start saned.socket
And tell the SANE service to start automatically when the Pi starts. On Wheezy:
sudo update-rc.d saned defaults
Or on Jessie:
sudo systemctl enable saned.socket
Now check SANE is running properly:
sudo service saned status
You can also check that the port is available externally by using nmap to port scan the Pi from your laptop:
nmap print-server
(again, assuming print-server is the hostname of your pi - alternatively, use the IP addresss). You shoudl get results like this:
Nmap scan report for print-server (192.168.1.151)
Host is up (0.019s latency).
rDNS record for 192.168.1.151: print-server.lan
Not shown: 997 closed ports
PORT     STATE SERVICE
22/tcp   open  ssh
631/tcp  open  ipp
6566/tcp open  sane-port
All good: the Pi has services bound to port 22 for SSH, 631 for printing/CUPS and 6566 for scanning/SANE.
Client configuration
I'm going to use KDE as an example again: install xsane and skanlite on the client machine:
sudo apt-get update
sudo apt-get install xsane skanlite
Now we need to edit a config file to tell your computer where to look for sane services. Edit /etc/sane.d/net.conf and uncomment this line:
connect_timeout = 60
And add the IP address of your print server to the file:
192.168.1.151
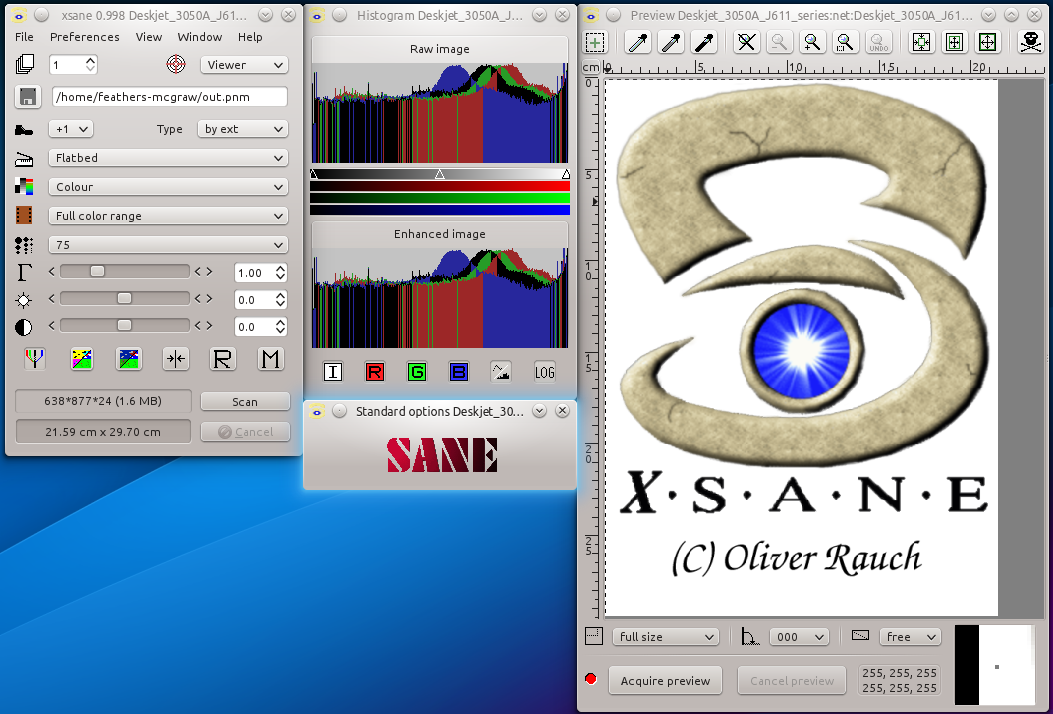
Now run this command. You should see a popup that says "scanning for devices" and then the following GUI will appear with a plethora of options:
xsane
 If you'd like something more simple, try Skanlite:
 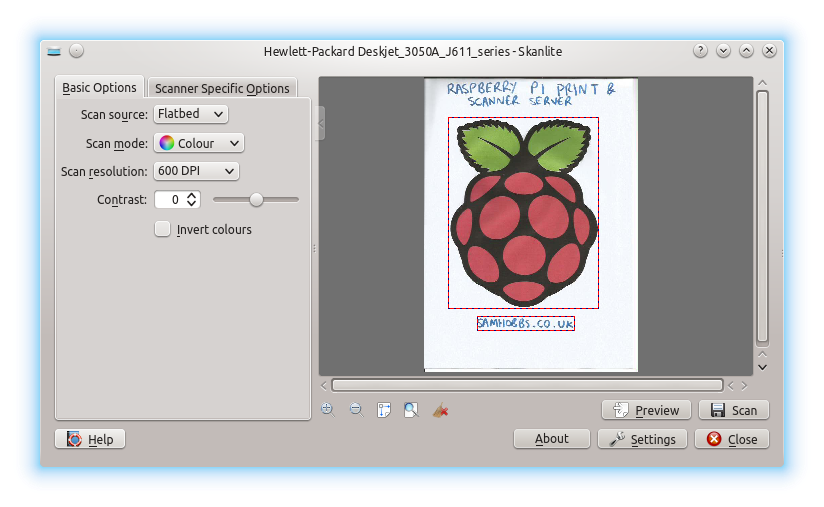 That's it! Hope you found it helpful, let me know how you get on :)
Comments
Thank you
Hi, just wanted to say thank you. Your tutorial worked like a charm, on my Raspberry Pi WH. Just a small tip on the client computer... after you edit the /etc/sane.d/net.conf reboot your system in order for it to work. Thank you very much!
WOW! Now we have almost the
WOW! Now we have almost the end of 2020 and this tutorial is still simple and useful. Things used: laptop (ubuntu Budgie 20.04), Raspi 2B (Raspian Buster), HP Deskjet F4180. Thank you very much.
Share the tutorial
Hi there.
The tutorial is useful, can I translate into my language and post on my blog?
Thanks
Great tutorial, problem with resolution
Hi,
thanks for the tutorial. Although some years old it worked like a charm for my brand new Raspberry Pi Model B based print+scan server named "inky". I also installed phpSane for web scanning and my smartphone uses SANEdroid app. Perfect! The shitty old 3050 with non-WPA2 support and stupid HP drivers/print/scan apps now perfectly wrapped in a great CUPS/SANE interface and connected by USB :-)
However the resolution is always 75 dpi and whatever I do it does not change.
phpSane uses the "scanimage" command and also when I manually execute this command, I always get 75 dpi:
> scanimage -v -v -d "hpaio:/usb/Deskjet_3050_J610_series?serial=CN12E3B12V05HX" -l 1mm -t 0mm -x 210mm -y 296.926mm --mode Color --resolution 200 --brightness 1000 --contrast 1000 --source Flatbed   | /usr/bin/pnmtojpeg --quality=100 > /tmp/testscan.jpg

scanimage: scanning image of size 620x876 pixels at 24 bits/pixel

scanimage: acquiring RGB frame

scanimage: min/max graylevel value = 0/254

scanimage: read 1629360 bytes in total

Closing device

Calling sane_exit

scanimage: finished

> ls -lh /tmp/testscan.jpg

-rw-r--r-- 1 root root 471K May 25 09:38 /tmp/testscan.jpg
I tried --resolution 300, --resolution 300dpi, different color modes, different output formats pnm/jpeg/tiff, nothing worked :-/
Help appreciated.
Scan over a webpage
I have followed your tutorial and i got my Raspberry acting as a print and scan server in my LAN. I am using an app in windows that connects to the RPI and gets the scan.
i would like to take it a step further and scan over a web page. I have tried phpsane, but it fails to recognise the scanner, while the app in windows find the scanner and it works fine. Is there a way to make phpsane or any other software work to scan over the web page, please?
Hi Sam. When printing pdf
Hi Sam. When printing pdf files it takes ages to get printed(>5minutes for 10 pages) from Raspberry PI print server. On the other hand if i attach the printer by USB to the Laptop (WIN 10) the same pdf file gets printed in less that 30 secs.
Any idea how to speed up the printing on the print server, please?
Add new comment