 This tutorial will show you how to take a vanilla Raspbian image and turn it into a HTTP server hosting one or more WordPress website. I’ve previously written a few bits and pieces about WordPress, but I’ve never actually covered how to install it on a Raspberry Pi until now. This was one of the first things I did with my Pi, so I’m going to assume you know very little and try to be as detailed as possible. The actual WordPress bit is very quick and easy once the ground work is done: wordpress.org has a 5 minute installation guide, but it doesn’t tell you how to do the difficult bits! This tutorial will cover everything you need, from the ground up.
A Quick Overview
Here’s a basic summary of what we’re going to do. There’s a lot here, but it should all be reasonably quick and painless if you follow it in sequence: Server Preparation Some suggested improvements to the default RasPi configuration. Temporary changes for testing A quick change to your hosts file on your computer that will allow you to test your domain without opening up the Pi to the world. Apache and PHP
- Install & configure Apache, the web server
- Install PHP, the server side scripting language
Database Installation & Configuration
- Install some Database software & create a root username and password
- Install phpMyAdmin for GUI database management
WordPress
- Download the latest version of WordPress as a .tar.gz file from wordpress.org and decompress it.
- Create a username and database for WordPress
- Create the WordPress configuration file (wp-config.php) and fill it in with details of the WordPress database.
- Move the WordPress files to the correct location in Apache’s data directory
- Run the WordPress installation script.
WAN access
- Set up DNS records to point your domain name at your WAN IP address
- Set up port forwarding on your router to allow users to access the site from outside your LAN
Preparation
I’ve previously written a post explaining some good first steps for setting up a server. The post covers:
- Burning Raspbian to an SD card
- SSH configuration & some security recommendations
- Speed improvements
Temporary changes for testing
While we’re setting up your website, ideally we want to be able to test it by typing in your domain name (instead of an IP address), without having to allow access from outside your local area network (LAN). Whenever you type a domain name in your browser, your computer looks up the web server’s IP address in its host file, and if no IP address is defined it uses a DNS provider on the internet to look it up. So, if we change the hosts file on your computer temporarily, we can redirect traffic to your server for whichever domain you’d like. On Linux, that hosts file is /etc/hosts; on Windows it is C:\Windows\System32\drivers\etc\HOSTS, and on MacOS it’s /private/etc/hosts. Regardless of whether you’re a Linux, Windows or MacOS user, what we want to add to the HOSTS file is exactly the same. Windows users, click here to see how to edit your hosts file. MacOS users, try here. Linux users can open it with a text editor with this command:
sudo nano /etc/hosts
You should see something like this inside:
127.0.0.1       localhost
127.0.1.1       62-West-Wallaby-Street
62-West-Wallaby-Street is the hostname of my computer, in case you were wondering what the hell that was! Add another two lines to the bottom of the file that contain the IP address of the Pi followed by your domain name, e.g.:
127.0.0.1       localhost
127.0.1.1       62-West-Wallaby-Street
192.168.1.103       yourdomain.com
192.168.1.103       www.yourdomain.com
Now save and exit. If you don’t know the Pi’s IP address, you can either check your router’s admin page (usually http://192.168.1.1) or type this command (from within a secure shell to the Pi – not on your laptop/desktop!!):
admin@samhobbs ~ $ /sbin/ifconfig
eth0      Link encap:Ethernet  HWaddr b8:27:eb:46:a9:7c
          inet addr:192.168.1.103  Bcast:192.168.1.255  Mask:255.255.255.0
          UP BROADCAST RUNNING MULTICAST  MTU:1500  Metric:1
          RX packets:2311644 errors:0 dropped:0 overruns:0 frame:0
          TX packets:3026728 errors:0 dropped:0 overruns:0 carrier:0
          collisions:0 txqueuelen:1000
          RX bytes:423049135 (403.4 MiB)  TX bytes:3404216571 (3.1 GiB)

lo        Link encap:Local Loopback
          inet addr:127.0.0.1  Mask:255.0.0.0
          UP LOOPBACK RUNNING  MTU:65536  Metric:1
          RX packets:94272 errors:0 dropped:0 overruns:0 frame:0
          TX packets:94272 errors:0 dropped:0 overruns:0 carrier:0
          collisions:0 txqueuelen:0
          RX bytes:7323348 (6.9 MiB)  TX bytes:7323348 (6.9 MiB)
The Local Area Network (LAN) IP address is shown under eth0 after “inet addr:”, in this case it is 192.168.1.103 . Now when you type in yourdomain.com your browser will make a connection to your Pi. Cool. You’ll see this in action later when we’ve installed Apache.
Apache2
To start, update your list of installable software, then install Apache2 (the web server).
sudo apt-get update
sudo apt-get install apache2
This will also install a few dependencies. Apache’s configuration files are in /etc/apache2/; the data folder (which contains the content you’re serving) is /var/www/. Have a look in /etc/apache2/sites-available/ and /etc/apache2/sites-enabled/, and you will see some configuration files:
sudo ls -l /etc/apache2/sites-available/
sudo ls -l /etc/apache2/sites-enabled/
These are your VirtualHost configuration files, which are used to let you run more than one website on the same server. The “default” configuration file allows http:// traffic, and the “default-ssl” file is for https://. You may have noticed that the default file is enabled, but the default-ssl site is not (sites that are enabled are symlinked from /etc/apache2/sites-available/ to /etc/apache2/sites-enabled/). Enable the Apache SSL module, and then the SSL VirtualHost with these commands:
sudo a2enmod ssl
sudo a2ensite default-ssl
Now Apache will serve content on http and https. There’s one more thing we need to change in those VirtualHost files. We want WordPress to be able to make configuration changes to the folder it’s in (overriding the global defaults for Apache). Do this by editing those files (e.g. sudo nano /etc/apache2/sites-enabled/000-default). Find the section for the /var/www/ directory:
<Directory /var/www/>
     Options Indexes FollowSymLinks MultiViews
     AllowOverride None
     Order allow,deny
     allow from all
</Directory>
Change AllowOverride None to AllowOverride All, i.e.
<Directory /var/www/>
     Options Indexes FollowSymLinks MultiViews
     AllowOverride all
     Order allow,deny
     allow from all
</Directory>
Remember to do this for the default-ssl VirtualHost too! The changes we just made mean that when Apache serves a page in /var/www/, it will read the .htaccess file in that folder and override the global defaults with any parameters inside. Note that files beginning with a period on Linux are hidden files. If you want to see them in a list, use the -a option. For example, this command will list all files and folders in the current directory, including hidden files/folders:
sudo ls -al
If you’d like to understand more about the parameters inside the VirtualHost file and how you can put them to good use, take a look at my tutorial on VirtualHosts. There’s no requirement to do this unless you’re already running a site or service on the Pi (like OwnCloud, for example). If you don't have a SSL certificate you can generate one yourself and get it signed for free by CAcert. Now reload Apache’s configuration files:
sudo service apache2 reload
At this stage Apache2 is up and running, and should respond to your requests if you type your domain name into a web browser: 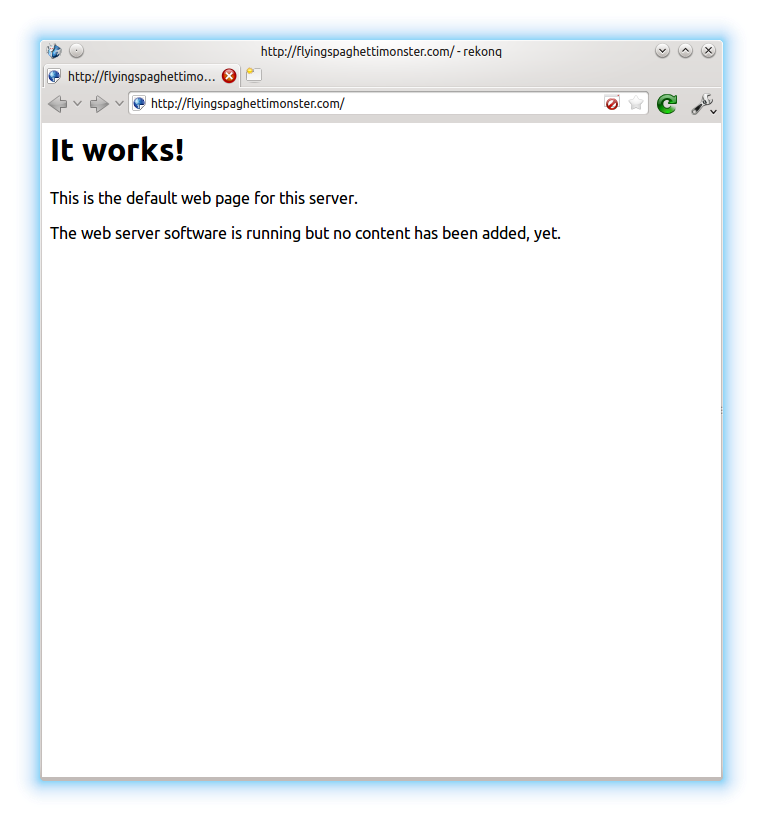
Server side scripting: PHP
PHP is a server side scripting language that is used by many applications, including WordPress. It does all of the interactive parts of your site: comment boxes, logins, etc. Here’s how to install it:
sudo apt-get install libapache2-mod-php5 php5
Now you can install a package that will allow PHP scripts to connect to databases:
sudo apt-get install php5-mysql
PHP Cache for faster page loading times
When you request a PHP page on the server, the server has to compile the page from the PHP source before it sends the data you requested. Because your Pi is such a low powered machine, this can be really slow. Luckily, there’s a PHP cache you can use that will store a pre-compiled copy of pages in your RAM after they have been visited already. This makes a significant improvement to page loading times. Install it by using this command:
sudo apt-get install php-apc
Database Software: MySQL
WordPress uses a database to store your site’s content, as well as other information like usernames and passwords. We need to install some database software to allow this to work. Install mysql server and client:
sudo apt-get install mysql-server mysql-client
The package installation will bring up a configuration wizard, which will ask you to set a root username and password. Enter the username you’d like to use, and a password. Write these down!
GUI database management with phpMyAdmin
Now that we have some database software installed, let’s install a program called phpMyAdmin, which allows you to manage databases from within a web browser instead of the commandline.
sudo apt-get install phpmyadmin
You’ll be asked to confirm which web server you have installed… choose Apache2. 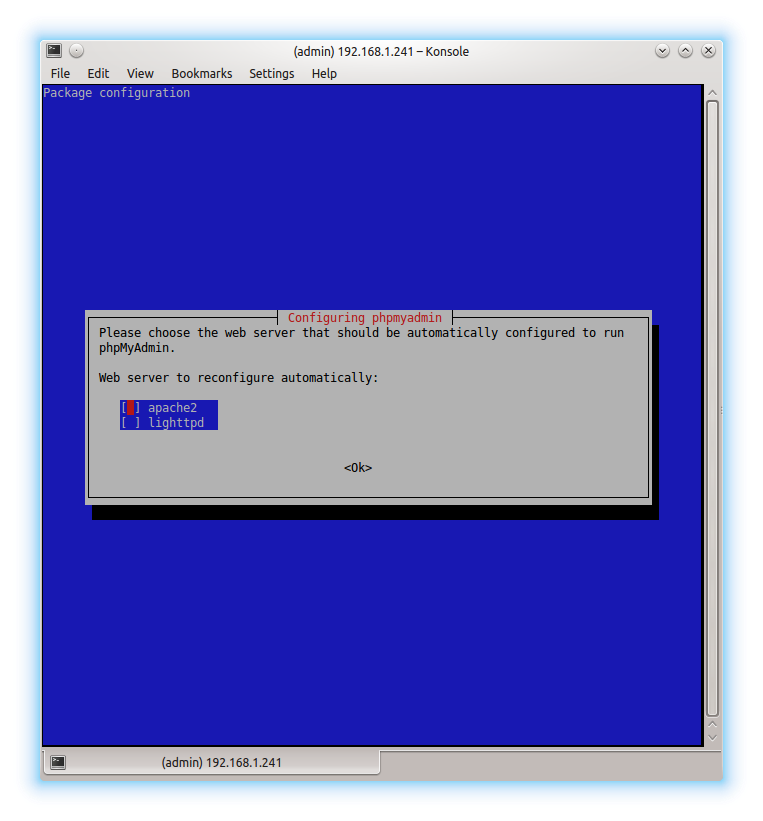 Next, you’ll be asked whether you’d like phpMyAdmin to set up a database for you… choose yes! The setup script will ask for an administrative password, which is the root password that you set when you installed the mysql server and client.
 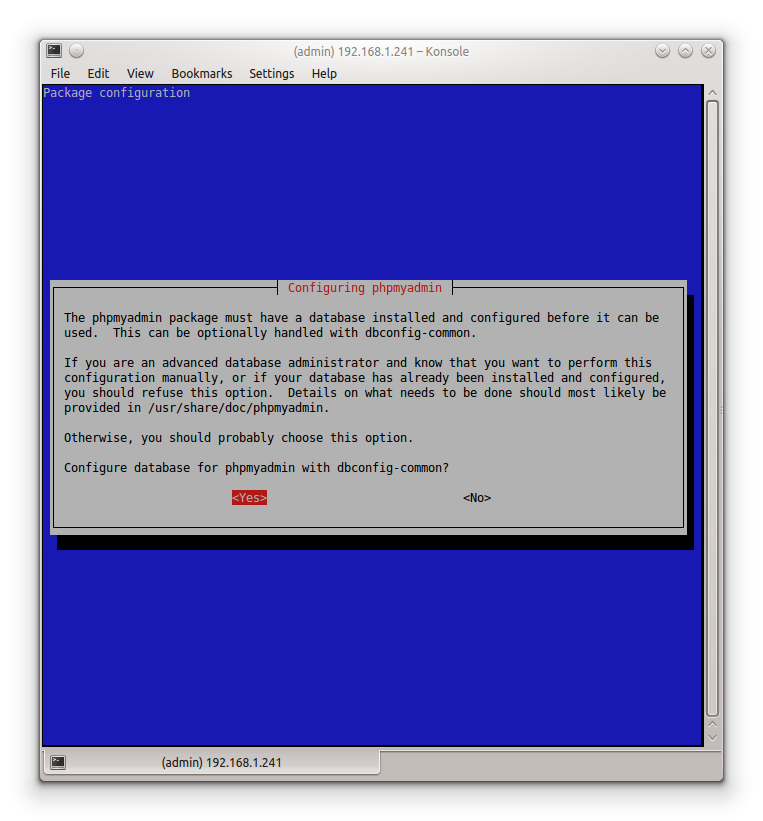 Next, the script will ask you to choose a password that phpMyAdmin will use to register itself with the database server. I chose to leave mine blank: you won’t ever actually need to use this password yourself so a random one will do:
 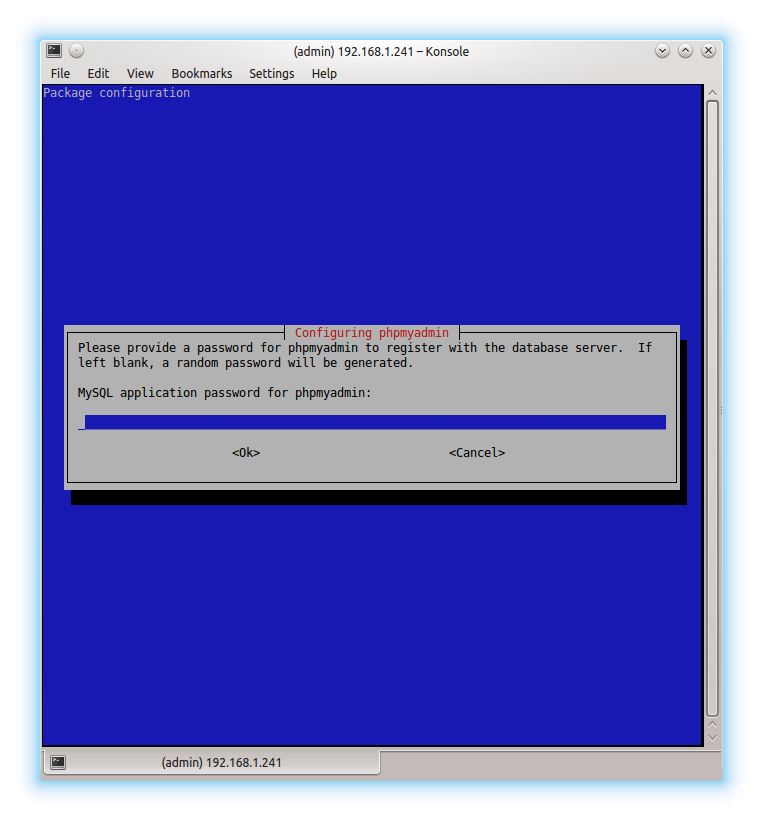 Finally, you need to tell Apache that you’d like it to load phpMyAdmin’s configuration files, so that yourdomain.com/phpmyadmin will bring up the GUI. Apache reads all configuration files in
 /etc/apache2/conf.d/ when it loads, so we can symlink phpMyAdmin’s Apache configuration file (/etc/phpmyadmin/apache.conf) into this directory to achieve this:
sudo ln -s /etc/phpmyadmin/apache.conf /etc/apache2/conf.d/phpmyadmin.conf
Note: the command above is correct for Raspbian Wheezy, but on Raspbian Jessie apache configuration is now stored in /etc/apache2/conf.available and symlinked to /etc/apache2/conf.enabled when it is enabled (similar to sites-availalbe and sites-enabled for virtual host files). On Jessie, you should symlink the configuration directly into the conf-enabled directory using this command:
sudo ln -s /etc/phpmyadmin/apache.conf /etc/apache2/conf-enabled/phpmyadmin.conf
Now restart Apache:
sudo service apache2 restart
If you go to yourdomain.com/phpmyadmin in a web browser, you should now see the phpMyAdmin page. 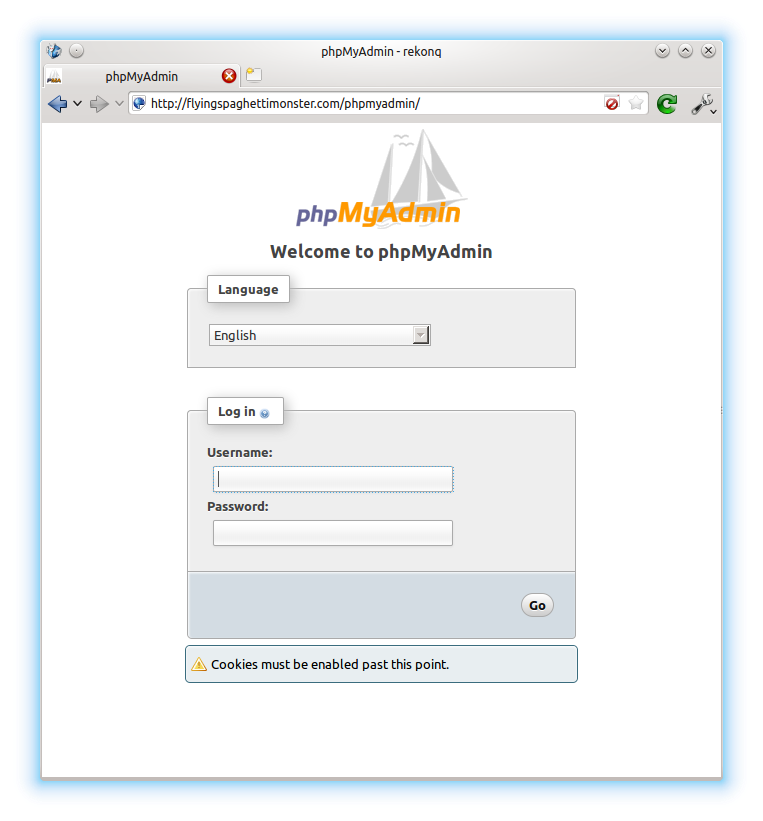 I’d recommend restricting access to phpMyAdmin from WAN unless you think you’ll really need to be able to edit databases from outside your local network, as it’s just another way for attackers to attempt to compromise your server.
WordPress
SSH into your Pi, and then make sure you’re in your home folder:
cd ~
Download & Extract
Now download the latest version of WordPress from wordpress.org:
wget http://wordpress.org/latest.tar.gz
The file you just downloaded is a compressed archive. Unpack it with this command:
tar -xzvf latest.tar.gz
This should result in the creation of a folder in your home directory called wordpress. Change directory into it and list the files to get a feel for what’s inside:
cd wordpress
ls -l
Now from within the wordpress folder use this command to copy the entire contents to Apache’s data directory (/var/www/):
sudo cp -r * /var/www/
Alternatively, if you think you might like to run another website on the Pi in the future, you could use this command to put everything in /var/www/wordpress and then edit the DocumentRoot parameter in the site’s VirtualHost file. This would keep the data for each website separate:
sudo cp -r ~/wordpress/ /var/www/wordpress/
If you go this route I’d recommend reading my tutorial on VirtualHosts to get your head around VirtualHost configuration.
Create a WP Database and User
Now we need to log in to phpMyAdmin and create a new database for WordPress, and a user to access the database. We’ll grant this user full rights to read & modify the wordpress database, but not any of the other databases you might have. Log in to phpMyAdmin as root using the password you chose earlier: 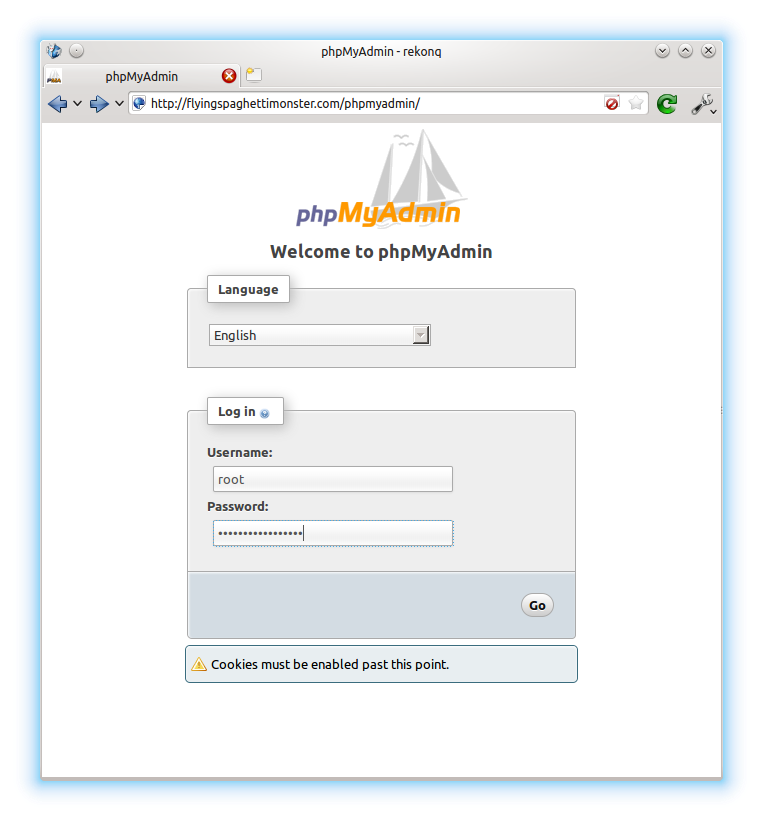 Navigate to the privileges section of phpMyAdmin:
 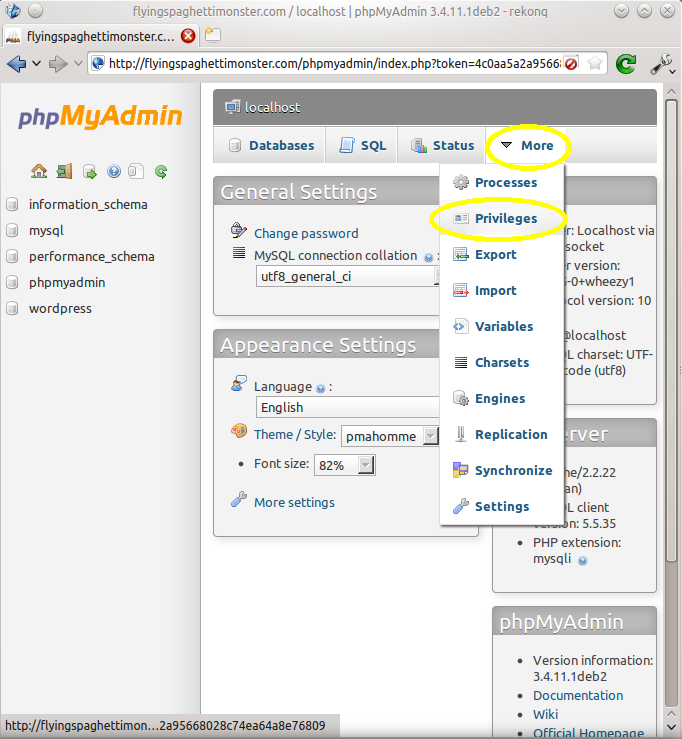 Select “Add a new user”:
 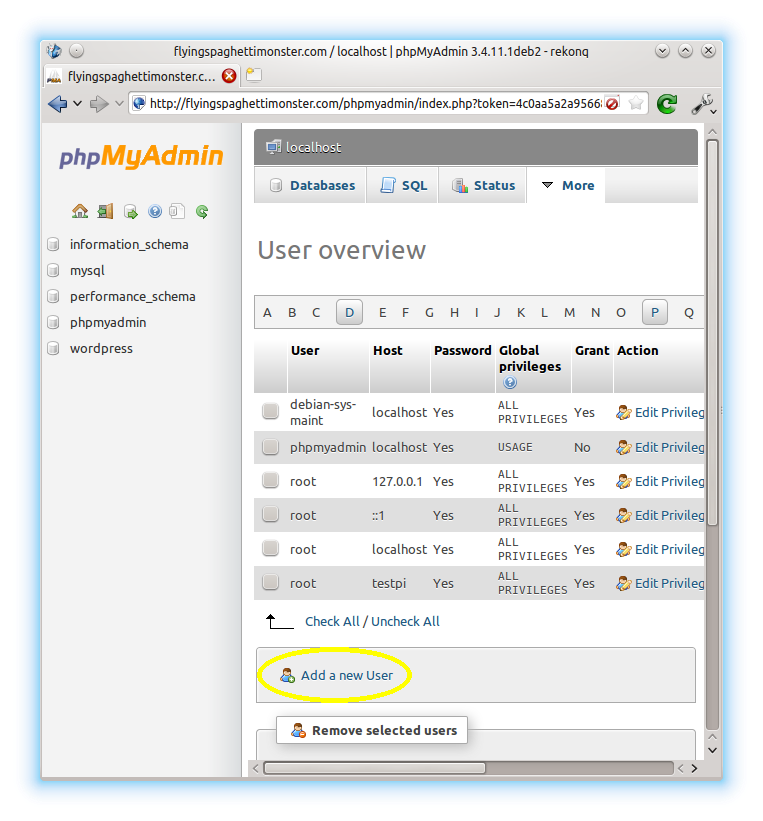 Fill in the required information. Choose a name like “wordpress” for the user, select local host, and auto generate a password. Important: write this password down, you’ll need to tell it to WordPress in a minute:
 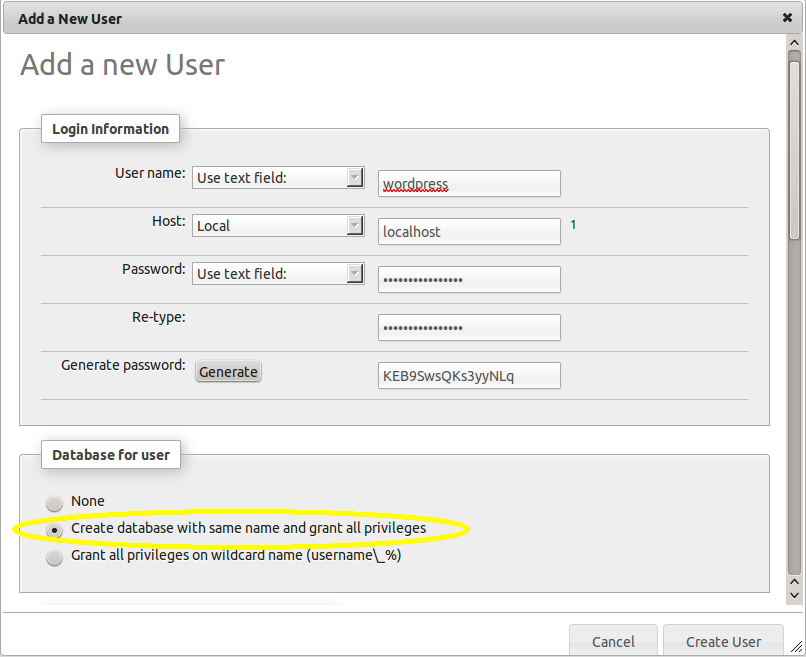 Make sure you check the box to create a database with the same name, and grant the user all rights to that database. In previous versions of phpMyAdmin this option didn’t exist – databases had to be created separately… creating the user and database in one is a really useful option that saves a lot of time.
wp-config.php
Now that wordpress has a database and user, we need to tell WordPress what it’s called, and what the password is. Assuming your wordpress files are in /var/www/: Copy the example configuration file:
sudo cp /var/www/wp-config-sample.php /var/www/wp-config.php
Now we can edit it and fill in the required information:
sudo nano /var/www/wp-config.php
Scroll down to the section headed // ** MySQL settings – You can get this info from your web host ** // Fill in:
- DB_NAME = *name of database you created for WordPress in phpMyAdmin*, e.g. “wordpress”
- DB_USER = *name of wordpress user with full privileges for that database*, e.g. “wordpress”
- DB_PASSWORD = *the password you chose for the wordpress user*
- DB_HOST = localhost
Testing
Now that wordpress has all the details it needs to open and use the database software, we can test the website in a web browser. Before we start, however, we need to remove the index.html file that Apache auto generated (the one that shows the “It works!” message), since it’s being used instead of the WordPress index.php file that we want to load when people visit the domain.
sudo rm /var/www/index.html
At this stage you have a decision to make about how you want WordPress to do updates. The quick and dirty method of getting WordPress up and running is to make all of WordPress’ files owned by the Apache user www-data to allow WordPress to update itself, install new plugins and upload files:
sudo chown -R www-data:www-data /var/www/
However, this isn't very secure, as a flaw in WordPress could allow an attacker to modify the WordPress PHP scripts for malicious purposes. A more secure configuration is to require authentication when installing plugins and making updates (i.e. WordPress will prompt you for your system username and password), and make the changes via an internal FTP connection. This tutorial of mine explains how to do this. Now go to yourdomain.com in a web browser and you should see something like this: 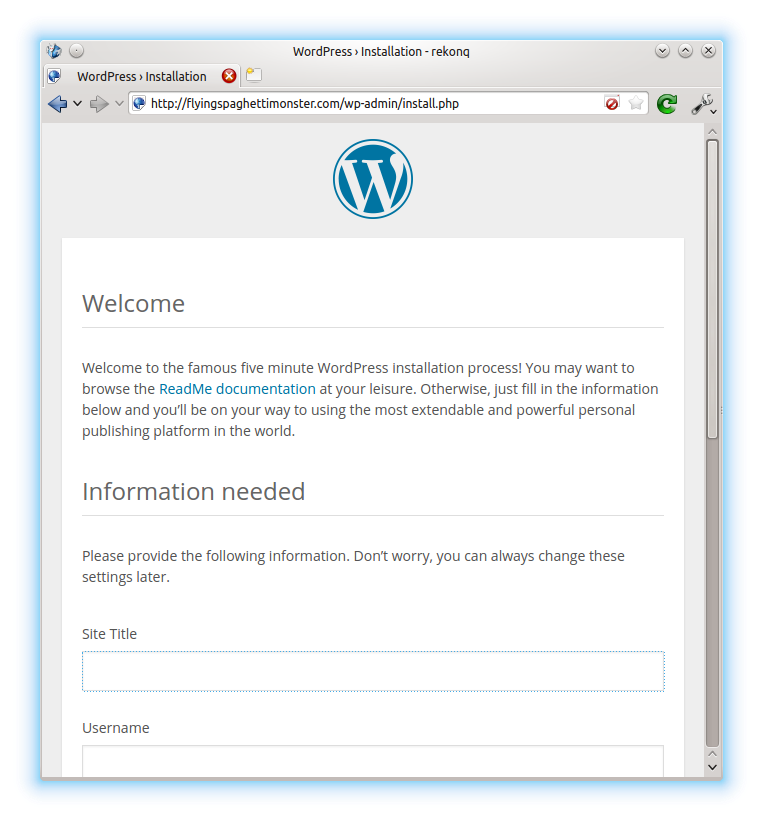 Now fill in your details:
 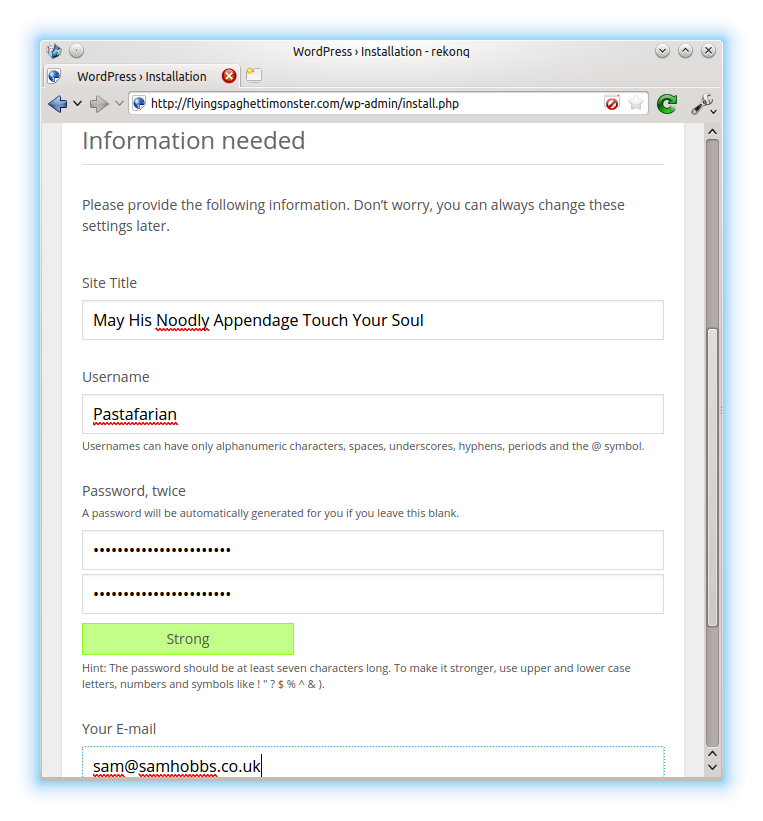 …and hit go, and that’s it! You may have to wait a few minutes while WordPress initialises, but be patient. Eventually you’ll see a greeting page, and you can begin customising your site!
Allow WAN Access
If your website is working properly, you can undo the changes you made to your hosts file at the start of the tutorial. Once you’ve done that, you can allow people on the internet to view your site. Here’s what you need to do: DNS A Record Log in to your Domain Name Service (DNS) provider’s website and create a DNS A record that points to your global ip address. If you don’t know what your IP address is, click here: What is my IP?. Static IP address Ideally, you should have a static IP address so that the DNS A record doesn’t need to be updated all the time. Mine cost £5 to set up with my ISP (PlusNet). However, it’s possible to configure dynamic DNS by installing a program on the server/your router that will phone home to your DNS provider and get them to update the record periodically. Explaining how is beyond this article, but there’s plenty of info out there. I used Namecheap’s service for a while, which worked fine. Port Forwarding Log in to your router’s admin page and forward ports 80 and 443 (for http and https) to your Pi. you’ll be able to create content through your browser over HTTPS, so these are the only ones you need to open. However, if you want to be able to log with SSH to the Pi from anywhere, you may also want to forward a port for SSH. The standard is port 22, but you can configure your router so that connections to another port (like 1234) from WAN are forwarded to port 22 on your Pi. The Pi will take less of a beating this way with scripts trying to log in – even if you’re using publickey authentication it’s still a waste of resources. To connect on a non-standard port, the command becomes:
ssh admin@yourdomain.com -p 1234
Some Credits, plus: where to go from here?
I learned how to do some of this from wordpress.org‘s installation guides, and dingleberrypi.com (another website that was also hosted on a Raspberry Pi) was the site that made me believe I could do it myself. Thanks to the authors of both! Related things worth looking into: Akismet for spam blocking Better WP Security plugin for sensible configuration changes
Comments
Thanks
Thank you so much for this great tutorial. I had Wordpress up & running in no time thanks to this. I also plan to check out your articles about running a Raspberry Pi as a mail server. Thanks again!
You're very welcome
FINALLY, a PROPER guide
Thanks so much for this! I've installed wordpress on my Raspberry 4 times from other people's guides and none of them would allow me to save anything to my server. I could not upload pics or themes but your method worked perfectly!!! Kudos and many thanks
Thanks for the great tutorial….
I am moving my web site from Google Apps to a Raspberry PI and your guide has been very helpful, thanks for putting it together.
Hey Sam!
Hey Sam!
Is it me or my ISP that is blocking port 80 and every other damn port.
I have opened port 80 and alot of others in both Port Forwards and Traffic Rules to my RPi with a static ip.
Any other tricks up your sleeve or is it time to change ISP? :D
/Andreas
Eugh, really?
I am trying to get answers
I am trying to get answers from them but that seems harder than just go to another ISP haha.
Neither static or dynamic... I got a mixup called private ip... And upgrading to a static doesn't exists...
But I wait and see what they have to say, otherwise it's bye bye! :D
No it wasn't ISP that's
No it wasn't ISP that's blocking port 80 but port 25 is. So I have to figure out
how to open 80 and 443 for the webserver even though I tried everything I think..
And for the mailserver I probably start looking for another ISP :)
Now I have the ethernet cable
Now I have the ethernet cable straight in the laptop, so it shouldn't be
anything in the way... And yes I have tried a few different port checking sites...
176.10.249.56 port 21 is closed
176.10.249.56 port 22 is closed
176.10.249.56 port 25 is closed
176.10.249.56 port 80 is closed
176.10.249.56 port 110 is closed
176.10.249.56 port 143 is closed
176.10.249.56 port 993 is closed
176.10.249.56 port 995 is closed
176.10.249.56 port 3389 is closed
I've gave myself the answer
I've gave myself the answer earlier..Private IP... But they could change that to Public IP...
Still no static but I have already setup a ddns so it should be working soon :)
E-commerce
Do you think that it would be possible to run a wordpress based shop from the pi? just interested...
Possible but not advisable
- The USB driver is a bit flaky, and the Ethernet port is connected via USB so that means that's flaky too. Not a problem during normal use, but if you get loads of traffic it seems to drop packets. Not ideal if you need your Pi to be reliable!
- The drives are unreliable - even if you boot to a USB drive as described this tutorial the drive could fail... keeping backups gives you an escape route should this happen but it doesn't mean it wouldn't be a pain if it did.
Keep in mind that you don't know how much traffic your pi will receive - if it's running close to the limit then it doesn't take much to tip it over. Having a bit of reserve isn't a terrible idea! SamWorth a try then
Fair do's
I'm not exspecting much traffic, see my post Here for an explanation.
If I started having any problems, I'd move onto a more reliable server, probably something like what you've got now :)
Rewrite mod
I strongly recommend adding the rewite mod, so pretty permalinks can work.
simply add this to your .htaccess file:
RewriteEngine On
RewriteBase /
RewriteRule ^index\.php$ - [L]
RewriteCond %{REQUEST_FILENAME} !-f
RewriteCond %{REQUEST_FILENAME} !-d
RewriteRule . /index.php [L]
and run:
sudo a2enmod rewrite
Took me ages to work out...
Ironic, I used to have a tutorial for that!
Glad to help
Well, Happy I could help lol.
You wouldn't believe how many times I re-flashed my SD card back to a known good point, because I thought I'd corrupted my database when the pages stopped working...
Ah well, when I get my own site back up and running properly, I intend to write up a collection of scripts that'll do things like that.
I'll share when I get it up :) (expect to see scripts of all youre tutorials and more lol) ;)
Sorry! I went through the
More character building, more
More character building, more fun, better learning experience, and most importantly, more control
not decided yet, BASH would be my first option, but the interactive bits are harder in bash. So I might go with Pearl or Python. Probably Pearl, but i havent learned any Pearl yet lol
Lesson #1
...
Yes, I realised after posting... Spell check has a lot to answer for lol
Messed up database :)
Hey!
The website was running fine, but 2 days ago I got an database error when I go to the wordpress site.
So I go to phpmyadmin but... Yeah... Can't remember the password..
Screw it.. Didn't have anything on the site anyway. So I removed everything with the mysql.
And when I try to install mysql again it gives me an error when Im setting the root password for the mysql saying that it already been set?
So how do I remove the mysql? All of it so I can start fresh :)
I would use dpkg-reconfigure
Didn't work...
Ah you are right, it should be behind but it did work in front to :)
I have also used autoremove, autoclean and even remove --purge mysql* to be sure that it's all gone.
Then I try to install it all again and type a root password in the configure and after that it's all error,error,error,error and so on.
Saying that the raspberry is malfunction or that a password is already set earlier?
Do I also have to remove apache?
What are the specific errors?
2 packages missing
I can't get mysql-server to install properly and I can't run reconfigure..
Eugh, I hate dependency problems
Hi, thanks for the tutorial.
Hi, thanks for the tutorial.
I successfully followed all your steps, very good and simple commands.
I have some problems when viewing it from the internet, the theme is now working, but when i view it from local lan, it shows the right thing.
Do you know what's wrong?
Clarification
upon checking with the w3
upon checking with the w3 validator, it says that "Unable to contact target server 10.0.1.8:80 after 3 tries."
So i guess network issues with my ISP. Thanks.
Great tutorial, I'll put your installation link in my blog as soon as i can up my blog.
i found the problem.
i found the problem.
the local ip and my wordpress ip.
whenever i put the live ip in my wordpress url/site it shows correctly from outside but i cannot view it correctly locally and i cannot log in because of the IP changes.
Rpi is inside my network.
Add new comment