![]() This is the third part of a five part tutorial that will show you how to install a full featured email server on your Raspberry Pi. This tutorial covers how to set up Webmail with Squirrelmail.
This is the third part of a five part tutorial that will show you how to install a full featured email server on your Raspberry Pi. This tutorial covers how to set up Webmail with Squirrelmail.
The parts are:
The Introduction & Contents Page (read first)
Raspberry Pi Email Server Part 1: Postfix
Raspberry Pi Email Server Part 2: Dovecot
Raspberry Pi Email Server Part 3: Squirrelmail
Raspberry Pi Email Server Part 4: Spam Detection with Spamassassin
Raspberry Pi Email Server Part 5: Spam Sorting with LMTP & Sieve
Installing Apache
If you don't already have apache installed (you might if you've followed my wordpress tutorial), then install it now.
sudo apt-get update
sudo apt-get install apache2
Enable the SSL apache module so that you can use HTTPS:
sudo a2enmod ssl
There are some "pre-made" virtualhost configurations that come with apache. This command will enable the "default-ssl" virtualhost, by creating a symbolic link from /etc/apache2/sites-available/default-ssl to /etc/apache2/sites-enabled/default-ssl:
sudo a2ensite default-ssl
Now reload apache to make the changes take effect:
sudo service apache2 reload
If you type the IP address or hostname of the pi into a web browser now, you should see the default Apache test page: 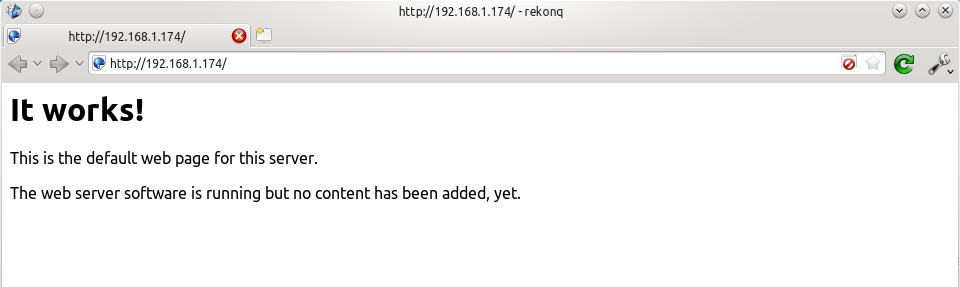 If you try the https version, you'll get a certificate error because you are using a self-signed SSL certificate. If you like, you can follow my CAcert tutorial to get a free SSL certificate for your domain, or you can just store an exception for the certificate and generate a proper one later.
  That's it for Apache. If you want to know more about setting up Apache for multiple websites, subdomains, and SSL configurations, I suggest you read my tutorial explaining Apache's VirtualHost files.
Installing Squirrelmail
Now we need to install squirrelmail:
sudo apt-get update
sudo apt-get install squirrelmail
The basic configuration for squirrelmail is really easy, and can be done with the setup script. To run the script, use this command:
sudo squirrelmail-configure
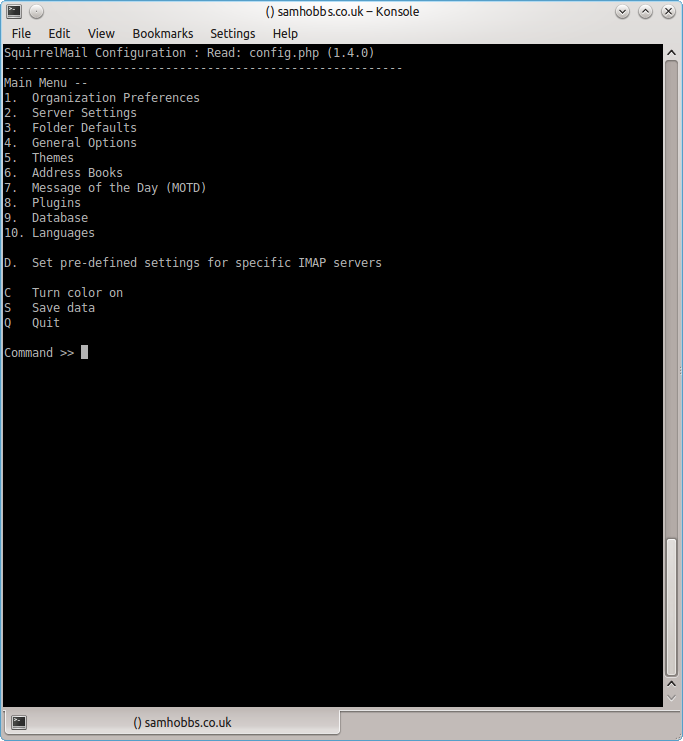 Choose “D” for pre-defined settings
 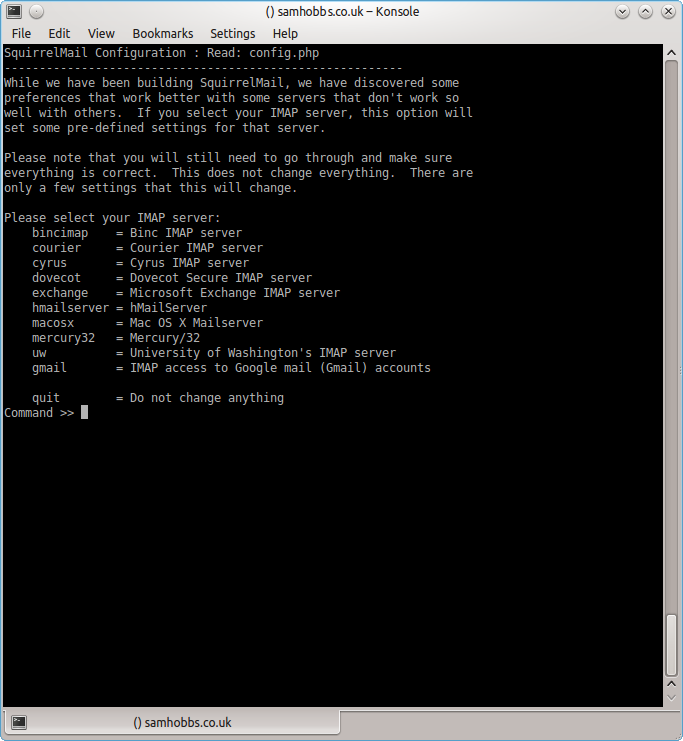 Now type “dovecot” and hit enter
 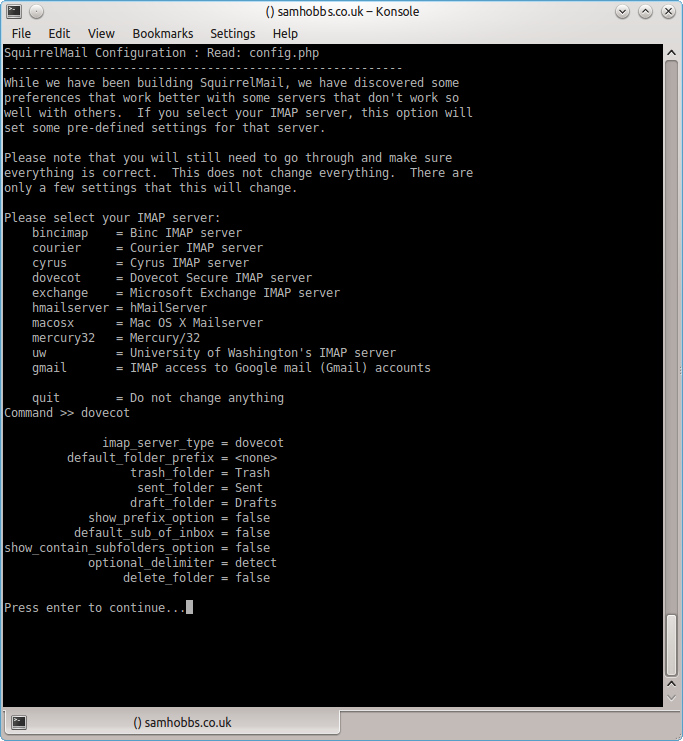 Press enter to continue, then save and quit (press Q and save when prompted, or press S then Q). The configuration script creates a configuration file for apache in
 /etc/squirrelmail/apache.conf. You need to create a symbolic link so that Apache2 will load your Squirrelmail apache configuration file when it starts up. On Raspbian Wheezy, the command is:
sudo ln -s /etc/squirrelmail/apache.conf /etc/apache2/conf.d/squirrelmail.conf
On Raspbian Jessie, the apache configuration directory structure is more like ubuntu, with separate folders for configuration files that are available and files that are enabled. This command will create a symlink from the directory where enabled configuration is stored, to squirrelmail's apache configuration file:
sudo ln -s /etc/squirrelmail/apache.conf /etc/apache2/conf-enabled/squirrelmail.conf
On a related note, there's a convenience command a2enconf that works similarly to a2ensite: it creates a symlink from the conf-available directory to the conf-enabled directory. You should use this in situations where config already exists in conf-available, e.g. sudo a2enconf squirrelmail would create a symlink for a file called squirrelmail.conf. Now reload Apache one more time so that it reads the config file we just symlinked:
sudo service apache2 reload
Now visit the IP address or hostname of your Pi again, but add /squirrelmail to the path, e.g. 192.168.1.174/squirrelmail, you should see the login page: 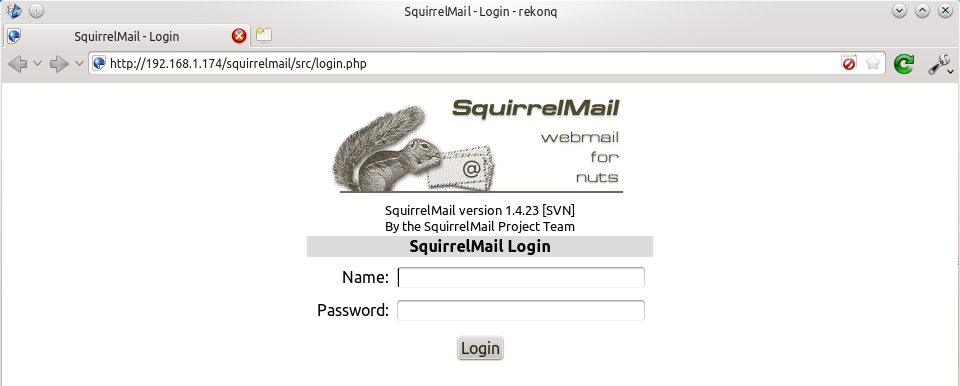 The squirrelmail configuration file just adds an alias that should affect every virtualhost, so if you install a wordpress site or something like that on your pi, you will be able to get to the squirrelmail login page by visiting yourdomain.com/squirrelmail.
Redirect http to https for secure login
Since you don't want to send your login details and confidential information over the internet without SSL, it's best to redirect all http URLs to https. The default squirrelmail apache configuration file at /etc/squirrelmail/apache.conf contains some rewrite rules we can use, we just need to uncomment them. Open the file and uncomment the lines by removing the # at the start of each so that it looks like this:
<IfModule mod_rewrite.c>
  <IfModule mod_ssl.c>
    <Location /squirrelmail>
      RewriteEngine on
      RewriteCond %{HTTPS} !^on$ [NC]
      RewriteRule . https://%{HTTP_HOST}%{REQUEST_URI}  [L]
    </Location>
  </IfModule>
</IfModule>
This configuration makes sure that the rewrite and ssl modules are enabled, and does nothing if they aren't. We already enabled the ssl module earlier, so all we need to do now is enable the rewrite module:
sudo a2enmod rewrite
And reload Apache:
sudo service apache2 reload
Now if you visit the HTTP page, you should be redirected to HTTPS.
Optional: Configuring Apache to serve Squirrelmail on a subdomain
If you would like to move the login page to the root of your domain (i.e. so that yourdomain.com would serve the login page for squirrelmail), or if you would like to serve it on a subdomain like mail.yourdomain.com, you can edit the configuration file. If not, you can skip this section. By default, this line in /etc/squirrelmail/apache.conf means that http://www.yourdomain.com/squirrelmail will load squirrelmail:
Alias /squirrelmail /usr/share/squirrelmail
If you would rather have webmail on a subdomain like mail.yourdomain.com then you could edit the /etc/squirrelmail/apache.conf file to look like this (comment out the rest):
<VirtualHost *:80>
  DocumentRoot /usr/share/squirrelmail
  ServerName mail.yourdomain.com


<Directory /usr/share/squirrelmail>
  Options FollowSymLinks
  <IfModule mod_php5.c>
    php_flag register_globals off
  </IfModule>
  <IfModule mod_dir.c>
    DirectoryIndex index.php
  </IfModule>

  # access to configtest is limited by default to prevent information leak
  <Files configtest.php>
    order deny,allow
    deny from all
    allow from 127.0.0.1
  </Files>
</Directory>
</VirtualHost>
Note that if you want to serve mail on a subdomain, then that subdomain needs a DNS record, so edit your records with your DNS provider accordingly. However, the virtualhost code above only does HTTP. You also want an HTTPS virtualhost for the subdomain on port 443:
<IfModule mod_ssl.c>
<VirtualHost *:443>
  DocumentRoot /usr/share/squirrelmail
  ServerName mail.yourdomain.com

<Directory /usr/share/squirrelmail>
  Options FollowSymLinks
  <IfModule mod_php5.c>
    php_flag register_globals off
  </IfModule>
  <IfModule mod_dir.c>
    DirectoryIndex index.php
  </IfModule>

  # access to configtest is limited by default to prevent information leak
  <Files configtest.php>
    order deny,allow
    deny from all
    allow from 127.0.0.1
  </Files>
</Directory>

ErrorLog ${APACHE_LOG_DIR}/error.log
LogLevel warn
CustomLog ${APACHE_LOG_DIR}/ssl_access.log combined

SSLEngine on
SSLCertificateFile    /etc/ssl/certs/your-ssl-certificate.crt
SSLCertificateKeyFile /etc/ssl/private/your-ssl-certificate-keyfile.key


</VirtualHost>
</IfModule>
If you use this configuration, the rewrite rules from the "rewrite to HTTPS" section (the ones from the default config file) won't work. If you want an HTTPS-only solution, you can replace the virtualhost for port 80 with this:
<VirtualHost *:80>
ServerName mail.yourdomain.com
<IfModule mod_rewrite.c>
  <IfModule mod_ssl.c>
    <Location />
      RewriteEngine on
      RewriteCond %{HTTPS} !^on$ [NC]
      RewriteRule . https://%{HTTP_HOST}%{REQUEST_URI}  [L]
    </Location>
  </IfModule>
</IfModule>
</VirtualHost>
As before, make sure you have the rewrite module enabled:
sudo a2enmod rewrite
Now reload apache:
sudo service apache2 restart
If you get an error like this:
[....] Restarting web server: apache2[Fri Dec 06 15:54:04 2013] [warn] _default_ VirtualHost overlap on port 443, the first has precedence
Then add NameVirtualHost *:443 to the start of the SSL VirtualHost block, i.e.:
NameVirtualHost *:443
<IfModule mod_ssl.c>
<VirtualHost *:443>
  DocumentRoot /usr/share/squirrelmail
  ServerName mail.yourdomain.com
...
For more info on HTTP and HTTPS VirtualHost configuration on Apache2, see this tutorial of mine. If all went to plan then you can navigate to mail.yourdomain.com and you should see the squirrelmail login page (you might need to forward some ports on your router if you haven't already - see the next section): 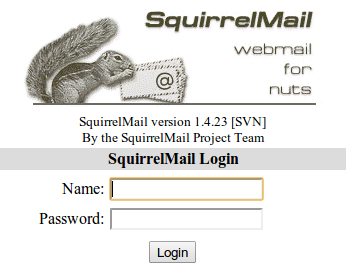
Port Forwarding
Squirrelmail will log in to your IMAP server on port 143 to display your emails. It doesn’t need to authenticate because it’s in your network (remember the permit_mynetworks parameter from the previous tutorials?). You don’t need to worry about it being an unencrypted connection, because the data isn't actually travelling over any insecure networks (the connection is internal). Similarly, you don’t need to open port 143 (“plain” imap without SSL/TLS) on your router because the connection happens within the Pi, and the content is actually served to you, the user, on port 443 (https). So you do need to open ports 80 and 443 for http and https like below: 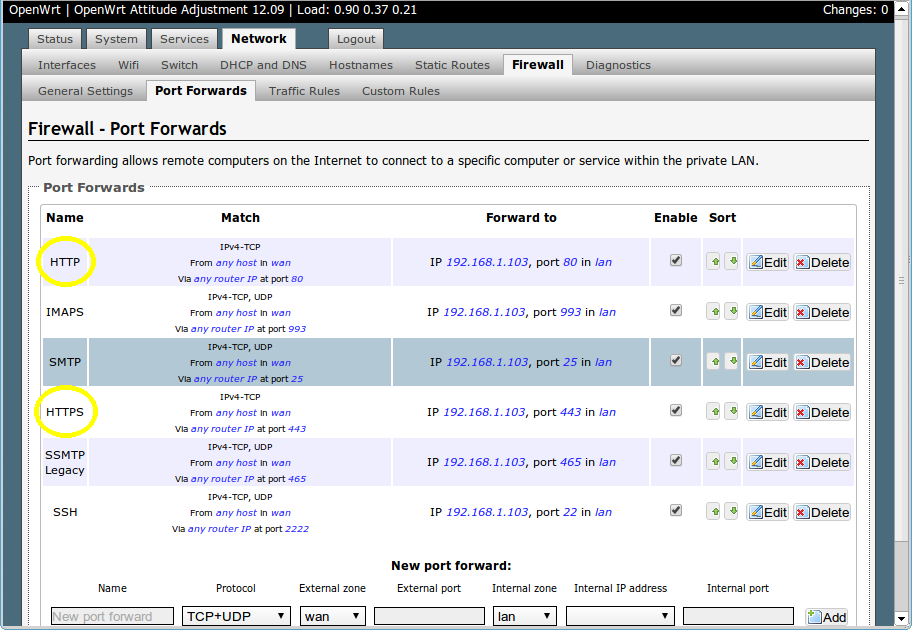
Testing
Before you start testing your webmail, make sure that the permit_mynetworks parameters are uncommented in your postfix confuguration file /etc/postfix/main.cf (in both your smtpd_recipient_restrictions and smtpd_helo_restrictions). Now reload your postfix configuration:
sudo service postfix reload
Try sending and receiving emails from within Squirrelmail. You should have no problems, but if you do please post a comment and I’ll try to help you out.
Customising the Squirrelmail Login
To customise the login page, run the configuration wizard:
sudo squirrelmail-configure
- Select “1″ (organisation preferences)
- Select “7″ and change to your domain (e.g. http://www.samhobbs.co.uk)
- Select “8″ and change to you/your organisation’s name
Squirrelmail Plugins
There are loads of plugins available for Squirrelmail, for all kinds of things. On most systems, these plugins are installed by downloading a .zip file to your server, unzipping the plugin to the right location and then tinkering with the settings manually. Thankfully, some of the most commonly used plugins are available from the Raspbian repositories, so installation is much simpler. Here is a list of the plugins in the repo:
- squirrelmail-compatibility
- squirrelmail-decode
- squirrelmail-locales
- squirrelmail-lockout
- squirrelmail-logger
- squirrelmail-quicksave
- squirrelmail-secure-login
- squirrelmail-sent-confirmation
- squirrelmail-spam-buttons
- squirrelmail-viewashtml
The one I think is most useful and the one I’m going to use as an example is lockout. To use the lockout package, we need to install the compatibility package, which basically makes sure that plugins built for different versions of squirrelmail can still work with the version you are running.
sudo apt-get update
sudo apt-get install squirrelmail-compatibility
Now we need to enable the plugin:
sudo squirrelmail-configure
- select “8″
- select “compatibility”
- select “S” (to save)
- select “Q” (to quit)
That’s all you need to do for the compatibility plugin. Now we can install the lockout plugin:
sudo apt-get install squirrelmail-lockout
Now for the configuration:
sudo squirrelmail-configure
Make sure that lockout is enabled Now we can manually edit some settings. Before starting, I like to back up the default config files for reference:
cd /etc/squirrelmail
sudo cp lockout-table.php lockout-table.php.BAK
sudo cp lockout-config.php lockout-config.php.BAK
Now edit the lockout-table.php file. Read the comments in the file for an explanation of how the table works. I wanted to disable logins for the user “admin”, so I commented out the examples at the end of the file and replaced them with this:
user: admin locked_out.php
Now edit lockout-config.php and set $use_lockout_rules = 1; to turn on lockouts. Now try and log in as the user you locked out, and you should get this message: “Access Denied / Please contact your system administrator”. We can also lock out IP addresses of users who enter incorrect username/password combinations repeatedly. To do this, open lockout-config.php and set $max_login_attempts_per_IP = '3:5:0'. The first number in this parameter is the number of incorrect attempts that are allowed before a ban. The second number is the time frame for these incorrect attempts, and the last number is the amount of time the ban lasts for when activated (0 is forever). So, the setting I gave you above means that anyone who makes 3 incorrect attempts to authenticate in 5 minutes is permanently banned. When a successful login is made, the count is reset to 0. Data on current bad login attempts and bans is stored here: /var/lib/squirrelmail/data/lockout_plugin_login_failure_information The plugin will add entries like this to keep track of bad logins:
999.999.99.99_login_failure_times=1386774015:1386774034:1386774053
999.999.99.99_TOO_MANY_FAILED_LOGIN_ATTEMPTS=PERMANENT
…where 999.999.99.99 is the offending IP address If you accidentally ban yourself, you’ll have to log in via SSH and edit this file to remove those lines. That’s it, you’re done! Have fun exploring the other plugins! The next two tutorials, Part 4 and Part 5 deal with spam detection and filtering.
Comments
Different Problem
Ok, I have managed to bypass that but now I'm having another problem. When I try to do the same thing, it won't allow relaying. I want it to send to gmail, yahoo, etc.
The Error is
554 5.7.1 : Relay access denied
My full mail.log can be found at
http://pastebin.com/jadyYbxU
Wrong domain in email address?
pi@JustinHPLubuntu. If the domain from that email address (JustinHPLubuntu) isn't in your destinations, then the pi thinks you're trying to relay mail, not send from a user on the server. It's not a FQDN - I'd expect you to be sending frompi@yourdomain.com. SamI used pi@jc5599mc.me
The server and web server are in different machines, so i wouldn't expect that to happen. I will try your solution.
Didn't work
I added JustinHPLubuntu to my destinations but it's still saying the same error.
important information omitted
Cant access mail
i am new to raspberry .Squirrel mail is running and i can access it but problem is i dont have login credentials.PLEASE HELP
how can i send mail... pls help
Default user and password
piandraspberry, so try justpias the username, and if that doesn't work usepi@yourdomain.comwhereyourdomain.comis your own domain name. SamRouter using port 80 and 443
My router is configured to use port 80 and 443 to access it form the web for checking calls, turning off wifi etc. But the problem is that the pi also uses port 80 and 443 so the router ignores it and goes straight to the login page of the router. I thought you can maybe use different ports like 8080 but then you have to do example.com:8080/squirrelmail that's not very convenient. Is there a possibility to tell the router if the initial domain was example.cf (for mail) or example.spdns.eu (dynDNS of the router) and then forward it to the pi or stay at router?
P. S. I use CNAME example.spdns.eu because freenom (where you can get free .cf domains) doesn't offer a dynDNS service. So even though my IP only changes every 3 to 6 months or at every router restart, I don't really want to change it manually every time.
I'm also open for completely different solutions
Mine uses 80 and 443 for web
AVM Fritz!Box
My router is the AVM Fritz!Box 7270v2 I can change basically everything because it's linux based. Although I only know how to connect through telnet to it. And obviously I know how to change the configuration in the admin panel. Additionally there is an alternative Firmware called "Freetz" where you actually can unlock the full Linux potential of the router.
When I'm connected to the router directly there's nor problem It 's just form outside. When I access the root (example.com) I connect to the pi when I connect to example.com/squirrelmail I get an Error of the router that the site is unknown (404) and it redirects me to the login page of the router. After that I can't access the pi anymore.
Hang on, I think I misread
App for the FritzBox
I use it also to make cheap calls through my homephone when I'm outside of Germany, so it wouldn't be convenient to turn WAN access off. But I can check if I can change the ports of the router, because then I would only have to change the configuration of the apps which shouldn't be the problem.
I'll write another answer if I find a solution (or not).
Option 3 is possible but not very convenient, because when the pi turns off I can't access the router form WAN.
Mail undelivered woes
Firstly, massive thank you for your guides - managed to get everything up and running fine with only one problem. Currently, the vast majority of e-mails I try to send return undelivered. For example:
: host palin.cent.gla.ac.uk[130.209.34.34]
said: 550-host 86.30.224.239 is listed in zen.dnsbl.ja.net (127.0.0.11)
550 Please contact mailsec1505@gla.ac.uk for help. Sorry (1430587570). (in
reply to RCPT TO command)
or
: host
gmail-smtp-in.l.google.com[173.194.67.26] said: 550-5.7.1 [86.30.224.239
12] Our system has detected that this message is 550-5.7.1 likely
unsolicited mail. To reduce the amount of spam sent to Gmail, 550-5.7.1
this message has been blocked. Please visit 550-5.7.1
http://support.google.com/mail/bin/answer.py?hl=en&answer=188131 for 550
5.7.1 more information. el1si3330590wib.120 - gsmtp (in reply to end of
DATA command)
Is there anything I could do to fix this?
Thanks,
Abe.
spam blocklist, PTR and SPF
cheers
Thanks for the quick reply. Annoyingly I do have a dynamic IP address and use a DDNS service that came with my router so my domain has a CNAME record rather than A record. Obviously due to that I wasn't able to setup a MX record etc - though I can add TXT records. Would that work or do I need to try and sort out a static IP with my ISP?
Anyone know if Virgin Media (UK) are decent when it comes to requesting a static IP?
Cheers,
Abe
replace CNAME?
Sorry for my ignorance.
Sorry for my ignorance. Relatively IT competent but completely new to the webhosting side of things. My domain registrar recommended using a CNAME as the DDNS my router uses creates an address in the format of [custom-name].asuscomm.com rather than providing me with an IP address that I could use for an A record.
Did a bit of searching and sadly Virgin only offer static IPs for business accounts rather than residential.
Thanks again.
sounds like you need a different ddns client
Thanks. More annoyingly
Thanks. More annoyingly looks like my domain provider doesn't have a DDNS option - and was why I used the service that came with my router instead. I have one of the relatively new .scot domains so there wasn't a large choice in terms of domain registrars that offered them. Given my IP only changes whenever I reset the router its probably actually pretty safe to set the A record to whatever my current IP is myself as I'll know if I ever have to reset the router that I'll need to update the records.
hang on...
I am hosting a website as
I am hosting a website as well. Managed to get that all up and running fine, except need to get round to setting up apache so the https and http go to the same site (at moment https still goes to the 'it works' page). Thought, however, since I am paying for a domain name I might as well setup email as well for it.
I setup the A, MX, and TXT records for my current WAN and after giving plenty time for it to propogate I am still getting rejections. Strangely, the test e-mail I sent via telnet following your instructions got through gmail's spam filters with no issues. Unsure whether that was a fluke, I still have some setting wrong, or if my current WAN IP is actually blocked by the spam filters if someone who it was previously assigned it used it for spam.
However, I am willing to believe I have messed up the settings somewhere. Tried setting up the ssl certificates with cacert but chrome still flags my mail page as potentially malicious. Issue is now trying to figure out where I went wrong.
Cheers,
Al.
cacert root and virtualhosts
Send Mail over Squirrelmail Error
Message not sent. Server replied:
Connection refused
111 Can't open SMTP stream.
I get this message when I try to send an email with squirrelmail. I changed the myhostname in /etc/postfix/main.cf and also mydestination to a new name. But this time the name looks like: pi.domainname.at. Could that be the problem?
hostname
/etc/hostnamewithout changing it in/etc/hosts? If squirrelmail is trying to connect to the domain name you put in/etc/hostnamebut it doesn't resolve to 127.0.1.1 in/etc/hosts, then you could have a problem, and it might look like this. SamYes I can.sudo service
Yes I can.
sudo service postfix status[ ok ] postfix is running.
I tried changing the hostname in both
/etc/hostnameand/etc/hostsfile but the problem is that a postfix configuration I guess.I just changed this line in /etc/postfix/main.cf
myhostname = pi.petritzdesigns.atand
mydestination = petritzdesigns, pi.petritzdesigns.at, pi.petritzdesigns, localhost.localdomain, localhostI didn't mean you should change it
sudo squirrelmail-configure. SamSending of the message failed
Hi,
I was installing CACert and Apache at the same time but when I got to the end of it and tried to send an e-mail, it said:
"Sending of message failed.
The message could not be sent because the connection to SMTP server mtsstudios.eu timed out. Try again or contact your network administrator."
Can you please help me?
Thanks,
Mike
A list of things to check
- Your DNS record points to the right IP address (currently 85.244.233.149)
- Postfix is running (check
- Ports on your router are forwarded correctly to the right LAN IP address
- See if you can telnet to localhost on the pi, port 25, to make sure it's listening
If all of the above turn up no errors, then maybe your ISP is blocking port 25 (have you been sending bulk email? check your/var/log/mail.errand see if you get errors when you restart it)/var/log/mail.logto make sure only people who area supposed to be sending email have been doing so.) SamRe: A list of things to check
Hi Sam,
Thanks a lot for your answer,
I made all what you asked me to do and it only failed on the telnet localhost 25, it gives an 503 error when I enter the AUTH PLAIN key.
What should I do to fix it?
Miguel
It probably said 503
Add new comment