 This tutorial will show you how to take a vanilla Raspbian image and turn it into a HTTP server hosting one or more WordPress website. I’ve previously written a few bits and pieces about WordPress, but I’ve never actually covered how to install it on a Raspberry Pi until now. This was one of the first things I did with my Pi, so I’m going to assume you know very little and try to be as detailed as possible. The actual WordPress bit is very quick and easy once the ground work is done: wordpress.org has a 5 minute installation guide, but it doesn’t tell you how to do the difficult bits! This tutorial will cover everything you need, from the ground up.
A Quick Overview
Here’s a basic summary of what we’re going to do. There’s a lot here, but it should all be reasonably quick and painless if you follow it in sequence: Server Preparation Some suggested improvements to the default RasPi configuration. Temporary changes for testing A quick change to your hosts file on your computer that will allow you to test your domain without opening up the Pi to the world. Apache and PHP
- Install & configure Apache, the web server
- Install PHP, the server side scripting language
Database Installation & Configuration
- Install some Database software & create a root username and password
- Install phpMyAdmin for GUI database management
WordPress
- Download the latest version of WordPress as a .tar.gz file from wordpress.org and decompress it.
- Create a username and database for WordPress
- Create the WordPress configuration file (wp-config.php) and fill it in with details of the WordPress database.
- Move the WordPress files to the correct location in Apache’s data directory
- Run the WordPress installation script.
WAN access
- Set up DNS records to point your domain name at your WAN IP address
- Set up port forwarding on your router to allow users to access the site from outside your LAN
Preparation
I’ve previously written a post explaining some good first steps for setting up a server. The post covers:
- Burning Raspbian to an SD card
- SSH configuration & some security recommendations
- Speed improvements
Temporary changes for testing
While we’re setting up your website, ideally we want to be able to test it by typing in your domain name (instead of an IP address), without having to allow access from outside your local area network (LAN). Whenever you type a domain name in your browser, your computer looks up the web server’s IP address in its host file, and if no IP address is defined it uses a DNS provider on the internet to look it up. So, if we change the hosts file on your computer temporarily, we can redirect traffic to your server for whichever domain you’d like. On Linux, that hosts file is /etc/hosts; on Windows it is C:\Windows\System32\drivers\etc\HOSTS, and on MacOS it’s /private/etc/hosts. Regardless of whether you’re a Linux, Windows or MacOS user, what we want to add to the HOSTS file is exactly the same. Windows users, click here to see how to edit your hosts file. MacOS users, try here. Linux users can open it with a text editor with this command:
sudo nano /etc/hosts
You should see something like this inside:
127.0.0.1       localhost
127.0.1.1       62-West-Wallaby-Street
62-West-Wallaby-Street is the hostname of my computer, in case you were wondering what the hell that was! Add another two lines to the bottom of the file that contain the IP address of the Pi followed by your domain name, e.g.:
127.0.0.1       localhost
127.0.1.1       62-West-Wallaby-Street
192.168.1.103       yourdomain.com
192.168.1.103       www.yourdomain.com
Now save and exit. If you don’t know the Pi’s IP address, you can either check your router’s admin page (usually http://192.168.1.1) or type this command (from within a secure shell to the Pi – not on your laptop/desktop!!):
admin@samhobbs ~ $ /sbin/ifconfig
eth0      Link encap:Ethernet  HWaddr b8:27:eb:46:a9:7c
          inet addr:192.168.1.103  Bcast:192.168.1.255  Mask:255.255.255.0
          UP BROADCAST RUNNING MULTICAST  MTU:1500  Metric:1
          RX packets:2311644 errors:0 dropped:0 overruns:0 frame:0
          TX packets:3026728 errors:0 dropped:0 overruns:0 carrier:0
          collisions:0 txqueuelen:1000
          RX bytes:423049135 (403.4 MiB)  TX bytes:3404216571 (3.1 GiB)

lo        Link encap:Local Loopback
          inet addr:127.0.0.1  Mask:255.0.0.0
          UP LOOPBACK RUNNING  MTU:65536  Metric:1
          RX packets:94272 errors:0 dropped:0 overruns:0 frame:0
          TX packets:94272 errors:0 dropped:0 overruns:0 carrier:0
          collisions:0 txqueuelen:0
          RX bytes:7323348 (6.9 MiB)  TX bytes:7323348 (6.9 MiB)
The Local Area Network (LAN) IP address is shown under eth0 after “inet addr:”, in this case it is 192.168.1.103 . Now when you type in yourdomain.com your browser will make a connection to your Pi. Cool. You’ll see this in action later when we’ve installed Apache.
Apache2
To start, update your list of installable software, then install Apache2 (the web server).
sudo apt-get update
sudo apt-get install apache2
This will also install a few dependencies. Apache’s configuration files are in /etc/apache2/; the data folder (which contains the content you’re serving) is /var/www/. Have a look in /etc/apache2/sites-available/ and /etc/apache2/sites-enabled/, and you will see some configuration files:
sudo ls -l /etc/apache2/sites-available/
sudo ls -l /etc/apache2/sites-enabled/
These are your VirtualHost configuration files, which are used to let you run more than one website on the same server. The “default” configuration file allows http:// traffic, and the “default-ssl” file is for https://. You may have noticed that the default file is enabled, but the default-ssl site is not (sites that are enabled are symlinked from /etc/apache2/sites-available/ to /etc/apache2/sites-enabled/). Enable the Apache SSL module, and then the SSL VirtualHost with these commands:
sudo a2enmod ssl
sudo a2ensite default-ssl
Now Apache will serve content on http and https. There’s one more thing we need to change in those VirtualHost files. We want WordPress to be able to make configuration changes to the folder it’s in (overriding the global defaults for Apache). Do this by editing those files (e.g. sudo nano /etc/apache2/sites-enabled/000-default). Find the section for the /var/www/ directory:
<Directory /var/www/>
     Options Indexes FollowSymLinks MultiViews
     AllowOverride None
     Order allow,deny
     allow from all
</Directory>
Change AllowOverride None to AllowOverride All, i.e.
<Directory /var/www/>
     Options Indexes FollowSymLinks MultiViews
     AllowOverride all
     Order allow,deny
     allow from all
</Directory>
Remember to do this for the default-ssl VirtualHost too! The changes we just made mean that when Apache serves a page in /var/www/, it will read the .htaccess file in that folder and override the global defaults with any parameters inside. Note that files beginning with a period on Linux are hidden files. If you want to see them in a list, use the -a option. For example, this command will list all files and folders in the current directory, including hidden files/folders:
sudo ls -al
If you’d like to understand more about the parameters inside the VirtualHost file and how you can put them to good use, take a look at my tutorial on VirtualHosts. There’s no requirement to do this unless you’re already running a site or service on the Pi (like OwnCloud, for example). If you don't have a SSL certificate you can generate one yourself and get it signed for free by CAcert. Now reload Apache’s configuration files:
sudo service apache2 reload
At this stage Apache2 is up and running, and should respond to your requests if you type your domain name into a web browser: 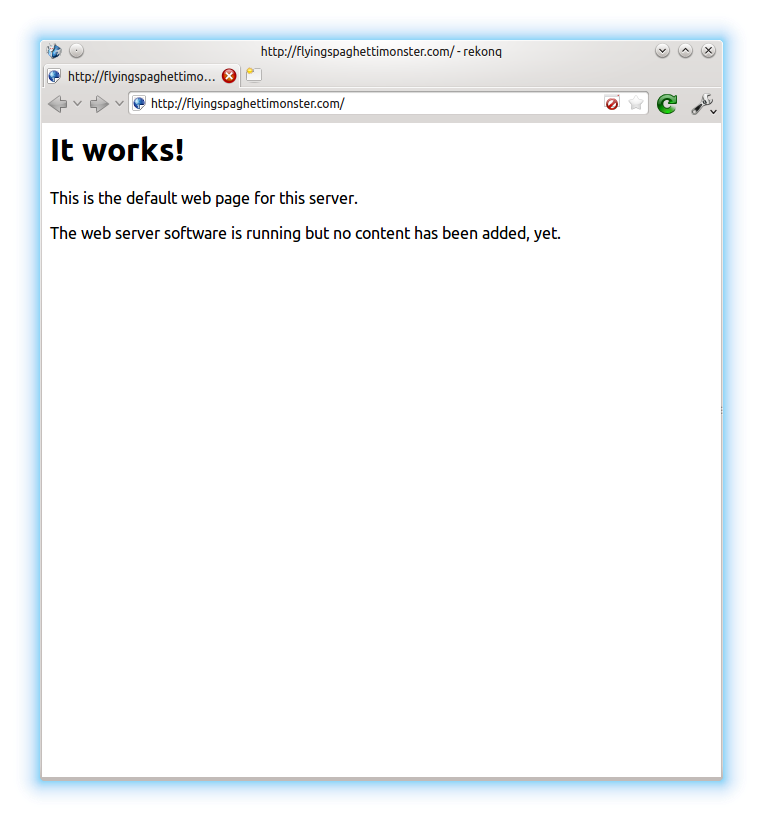
Server side scripting: PHP
PHP is a server side scripting language that is used by many applications, including WordPress. It does all of the interactive parts of your site: comment boxes, logins, etc. Here’s how to install it:
sudo apt-get install libapache2-mod-php5 php5
Now you can install a package that will allow PHP scripts to connect to databases:
sudo apt-get install php5-mysql
PHP Cache for faster page loading times
When you request a PHP page on the server, the server has to compile the page from the PHP source before it sends the data you requested. Because your Pi is such a low powered machine, this can be really slow. Luckily, there’s a PHP cache you can use that will store a pre-compiled copy of pages in your RAM after they have been visited already. This makes a significant improvement to page loading times. Install it by using this command:
sudo apt-get install php-apc
Database Software: MySQL
WordPress uses a database to store your site’s content, as well as other information like usernames and passwords. We need to install some database software to allow this to work. Install mysql server and client:
sudo apt-get install mysql-server mysql-client
The package installation will bring up a configuration wizard, which will ask you to set a root username and password. Enter the username you’d like to use, and a password. Write these down!
GUI database management with phpMyAdmin
Now that we have some database software installed, let’s install a program called phpMyAdmin, which allows you to manage databases from within a web browser instead of the commandline.
sudo apt-get install phpmyadmin
You’ll be asked to confirm which web server you have installed… choose Apache2. 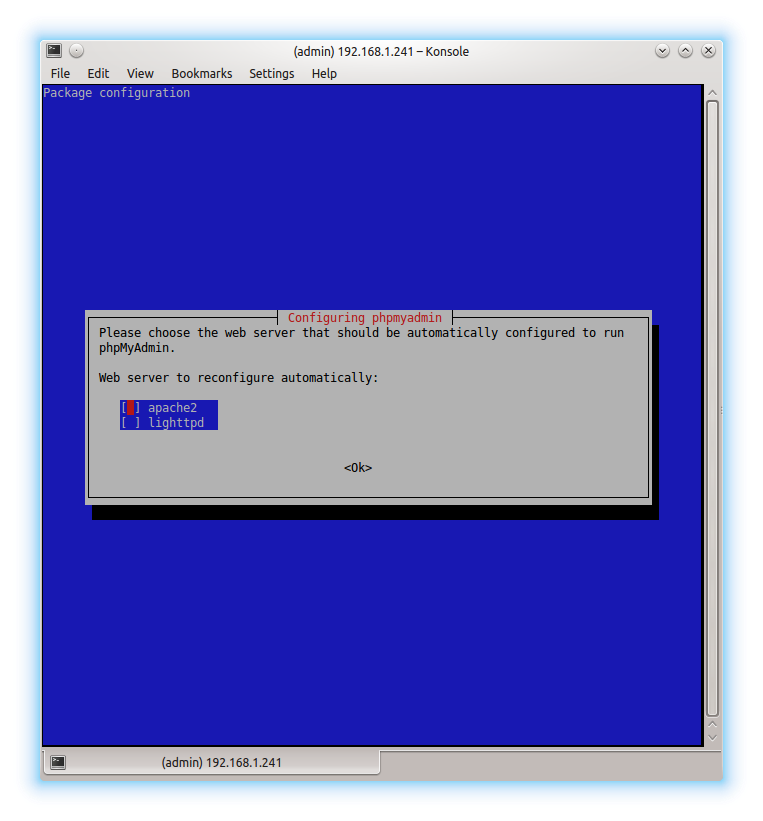 Next, you’ll be asked whether you’d like phpMyAdmin to set up a database for you… choose yes! The setup script will ask for an administrative password, which is the root password that you set when you installed the mysql server and client.
 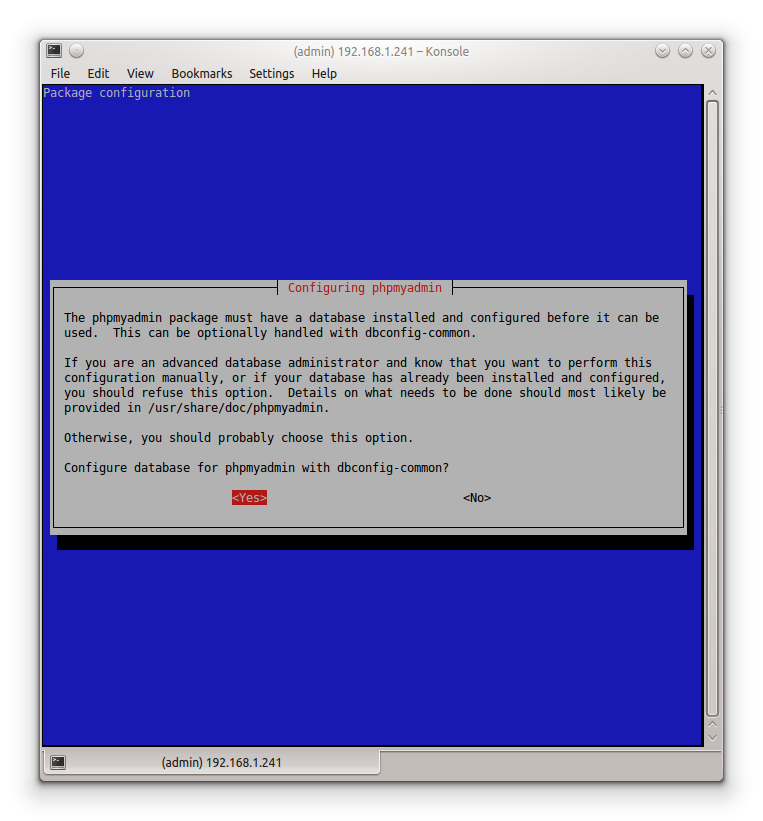 Next, the script will ask you to choose a password that phpMyAdmin will use to register itself with the database server. I chose to leave mine blank: you won’t ever actually need to use this password yourself so a random one will do:
 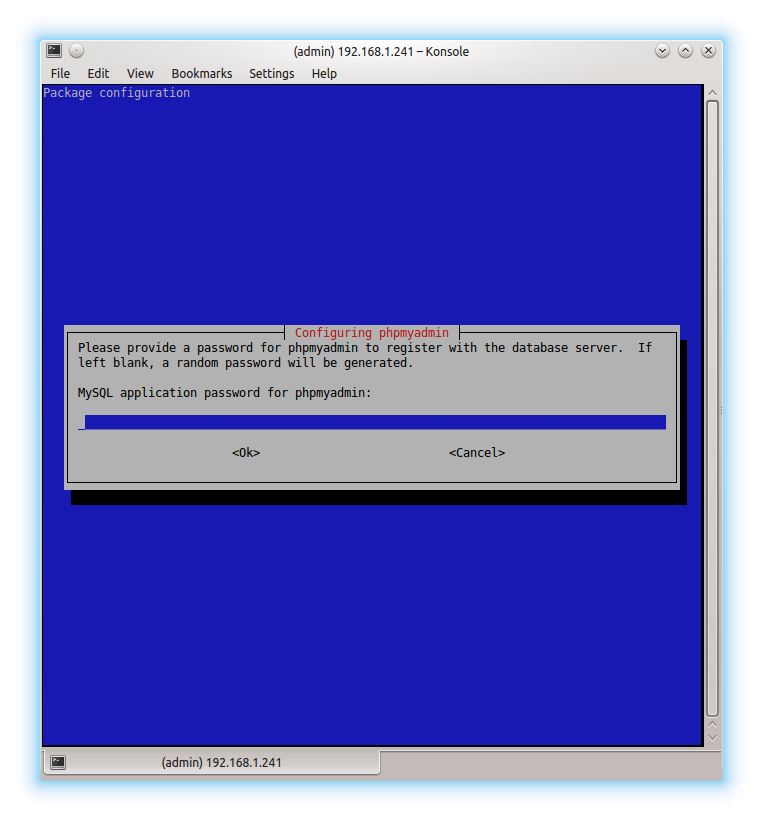 Finally, you need to tell Apache that you’d like it to load phpMyAdmin’s configuration files, so that yourdomain.com/phpmyadmin will bring up the GUI. Apache reads all configuration files in
 /etc/apache2/conf.d/ when it loads, so we can symlink phpMyAdmin’s Apache configuration file (/etc/phpmyadmin/apache.conf) into this directory to achieve this:
sudo ln -s /etc/phpmyadmin/apache.conf /etc/apache2/conf.d/phpmyadmin.conf
Note: the command above is correct for Raspbian Wheezy, but on Raspbian Jessie apache configuration is now stored in /etc/apache2/conf.available and symlinked to /etc/apache2/conf.enabled when it is enabled (similar to sites-availalbe and sites-enabled for virtual host files). On Jessie, you should symlink the configuration directly into the conf-enabled directory using this command:
sudo ln -s /etc/phpmyadmin/apache.conf /etc/apache2/conf-enabled/phpmyadmin.conf
Now restart Apache:
sudo service apache2 restart
If you go to yourdomain.com/phpmyadmin in a web browser, you should now see the phpMyAdmin page. 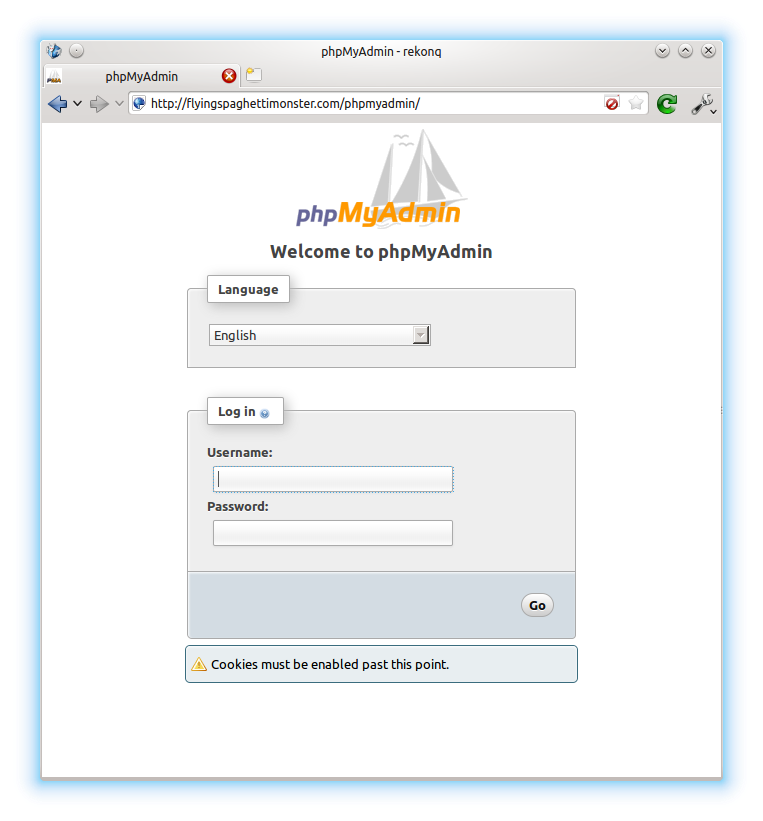 I’d recommend restricting access to phpMyAdmin from WAN unless you think you’ll really need to be able to edit databases from outside your local network, as it’s just another way for attackers to attempt to compromise your server.
WordPress
SSH into your Pi, and then make sure you’re in your home folder:
cd ~
Download & Extract
Now download the latest version of WordPress from wordpress.org:
wget http://wordpress.org/latest.tar.gz
The file you just downloaded is a compressed archive. Unpack it with this command:
tar -xzvf latest.tar.gz
This should result in the creation of a folder in your home directory called wordpress. Change directory into it and list the files to get a feel for what’s inside:
cd wordpress
ls -l
Now from within the wordpress folder use this command to copy the entire contents to Apache’s data directory (/var/www/):
sudo cp -r * /var/www/
Alternatively, if you think you might like to run another website on the Pi in the future, you could use this command to put everything in /var/www/wordpress and then edit the DocumentRoot parameter in the site’s VirtualHost file. This would keep the data for each website separate:
sudo cp -r ~/wordpress/ /var/www/wordpress/
If you go this route I’d recommend reading my tutorial on VirtualHosts to get your head around VirtualHost configuration.
Create a WP Database and User
Now we need to log in to phpMyAdmin and create a new database for WordPress, and a user to access the database. We’ll grant this user full rights to read & modify the wordpress database, but not any of the other databases you might have. Log in to phpMyAdmin as root using the password you chose earlier: 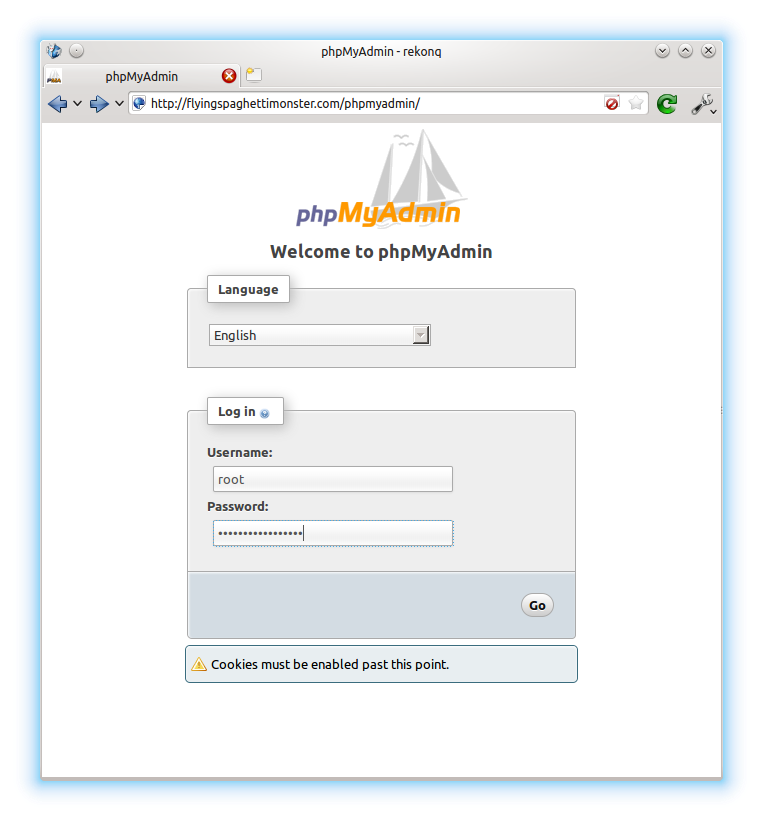 Navigate to the privileges section of phpMyAdmin:
 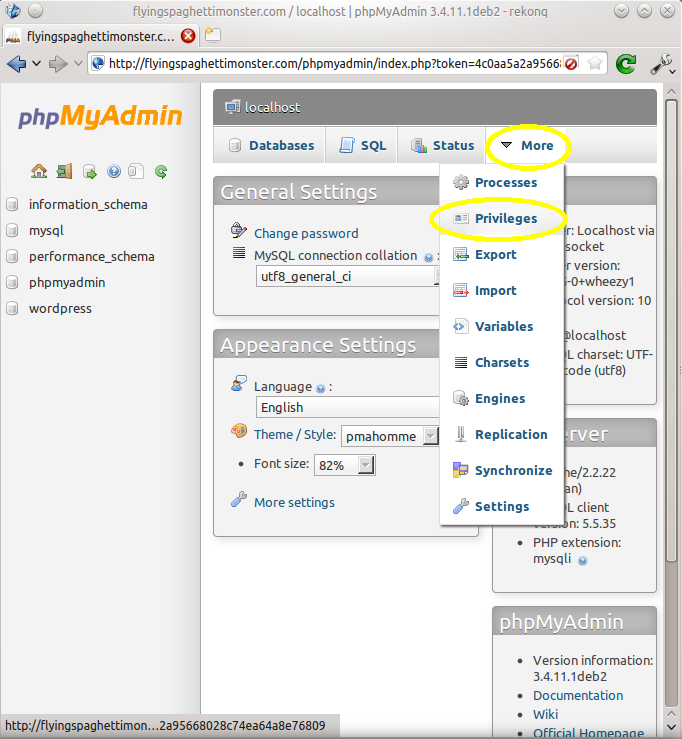 Select “Add a new user”:
 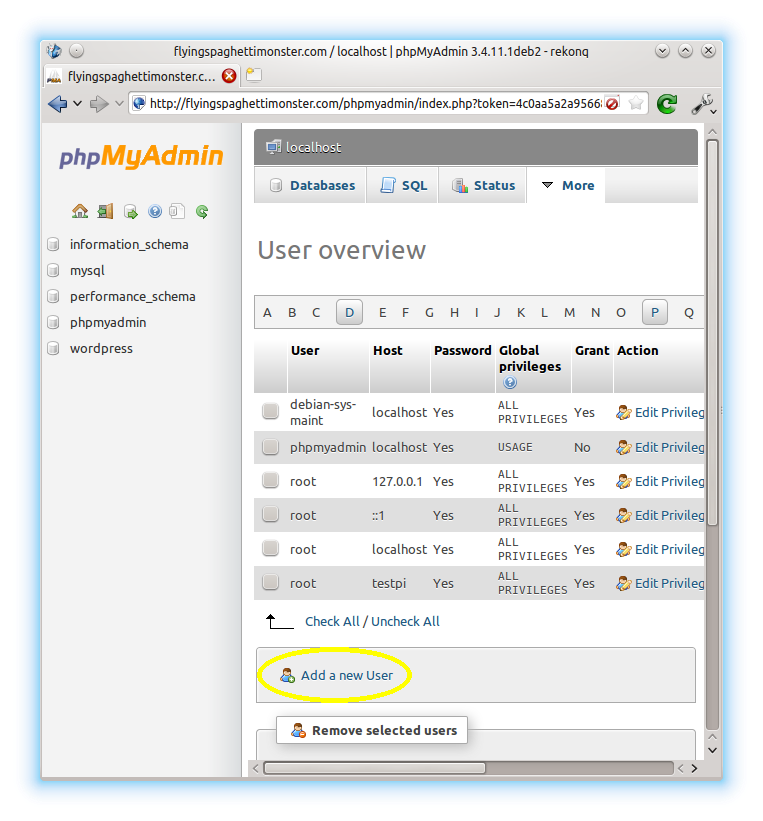 Fill in the required information. Choose a name like “wordpress” for the user, select local host, and auto generate a password. Important: write this password down, you’ll need to tell it to WordPress in a minute:
 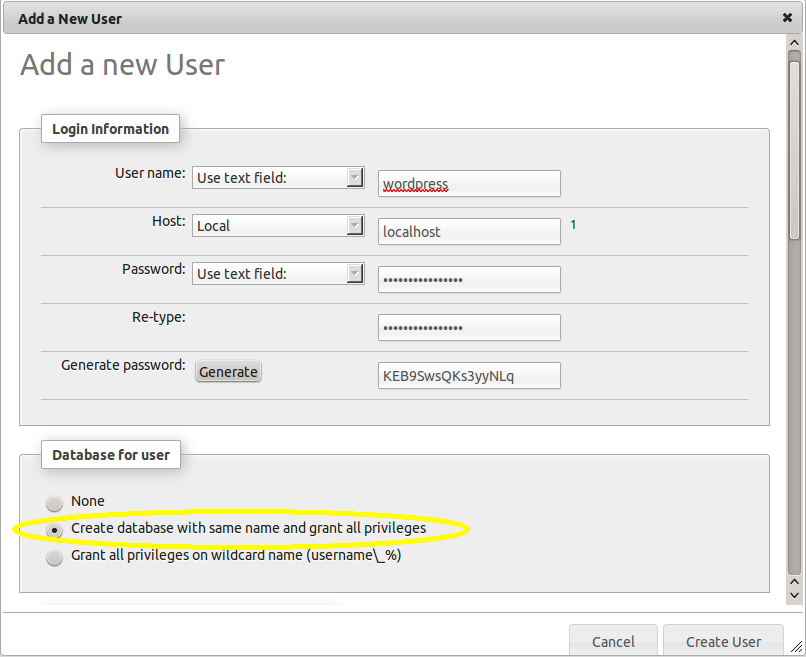 Make sure you check the box to create a database with the same name, and grant the user all rights to that database. In previous versions of phpMyAdmin this option didn’t exist – databases had to be created separately… creating the user and database in one is a really useful option that saves a lot of time.
wp-config.php
Now that wordpress has a database and user, we need to tell WordPress what it’s called, and what the password is. Assuming your wordpress files are in /var/www/: Copy the example configuration file:
sudo cp /var/www/wp-config-sample.php /var/www/wp-config.php
Now we can edit it and fill in the required information:
sudo nano /var/www/wp-config.php
Scroll down to the section headed // ** MySQL settings – You can get this info from your web host ** // Fill in:
- DB_NAME = *name of database you created for WordPress in phpMyAdmin*, e.g. “wordpress”
- DB_USER = *name of wordpress user with full privileges for that database*, e.g. “wordpress”
- DB_PASSWORD = *the password you chose for the wordpress user*
- DB_HOST = localhost
Testing
Now that wordpress has all the details it needs to open and use the database software, we can test the website in a web browser. Before we start, however, we need to remove the index.html file that Apache auto generated (the one that shows the “It works!” message), since it’s being used instead of the WordPress index.php file that we want to load when people visit the domain.
sudo rm /var/www/index.html
At this stage you have a decision to make about how you want WordPress to do updates. The quick and dirty method of getting WordPress up and running is to make all of WordPress’ files owned by the Apache user www-data to allow WordPress to update itself, install new plugins and upload files:
sudo chown -R www-data:www-data /var/www/
However, this isn't very secure, as a flaw in WordPress could allow an attacker to modify the WordPress PHP scripts for malicious purposes. A more secure configuration is to require authentication when installing plugins and making updates (i.e. WordPress will prompt you for your system username and password), and make the changes via an internal FTP connection. This tutorial of mine explains how to do this. Now go to yourdomain.com in a web browser and you should see something like this: 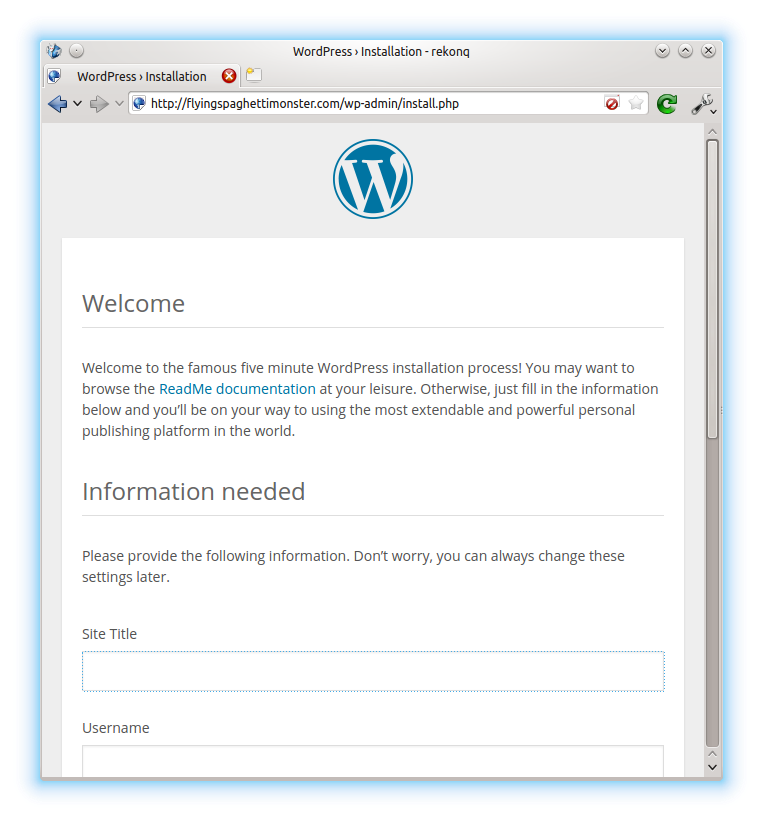 Now fill in your details:
 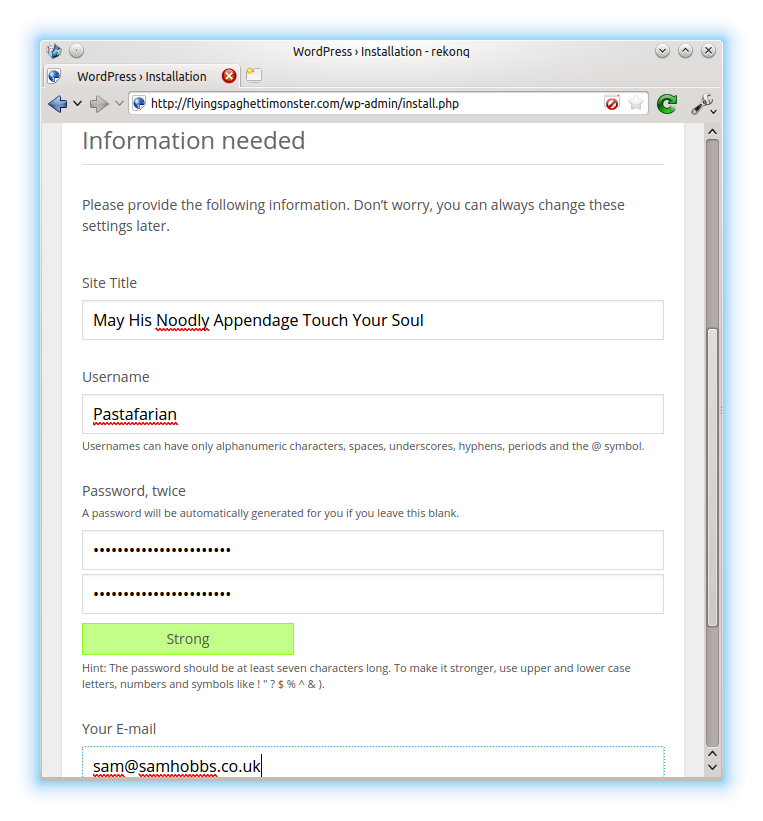 …and hit go, and that’s it! You may have to wait a few minutes while WordPress initialises, but be patient. Eventually you’ll see a greeting page, and you can begin customising your site!
Allow WAN Access
If your website is working properly, you can undo the changes you made to your hosts file at the start of the tutorial. Once you’ve done that, you can allow people on the internet to view your site. Here’s what you need to do: DNS A Record Log in to your Domain Name Service (DNS) provider’s website and create a DNS A record that points to your global ip address. If you don’t know what your IP address is, click here: What is my IP?. Static IP address Ideally, you should have a static IP address so that the DNS A record doesn’t need to be updated all the time. Mine cost £5 to set up with my ISP (PlusNet). However, it’s possible to configure dynamic DNS by installing a program on the server/your router that will phone home to your DNS provider and get them to update the record periodically. Explaining how is beyond this article, but there’s plenty of info out there. I used Namecheap’s service for a while, which worked fine. Port Forwarding Log in to your router’s admin page and forward ports 80 and 443 (for http and https) to your Pi. you’ll be able to create content through your browser over HTTPS, so these are the only ones you need to open. However, if you want to be able to log with SSH to the Pi from anywhere, you may also want to forward a port for SSH. The standard is port 22, but you can configure your router so that connections to another port (like 1234) from WAN are forwarded to port 22 on your Pi. The Pi will take less of a beating this way with scripts trying to log in – even if you’re using publickey authentication it’s still a waste of resources. To connect on a non-standard port, the command becomes:
ssh admin@yourdomain.com -p 1234
Some Credits, plus: where to go from here?
I learned how to do some of this from wordpress.org‘s installation guides, and dingleberrypi.com (another website that was also hosted on a Raspberry Pi) was the site that made me believe I could do it myself. Thanks to the authors of both! Related things worth looking into: Akismet for spam blocking Better WP Security plugin for sensible configuration changes
Comments
More than enough
Great. :) Thanks !!!
Great. :)
Thanks !!!
Given up...
Morning Sam,
I have a good look at the forums for how to remove iframe and most of the posts i found were trying to add it, so i'm still no closer to figuring out what i have done different to your guide. The only that I did do that was slightly different was I added the:
     Options Indexes FollowSymLinks MultiViews

     AllowOverride all

     Order allow,deny

     allow from all
into the 2 files that are in the /etc/apache2/sites-enabled/ folder.
probably part of your theme
Nearly there
Evening Sam,
Right I gave it one more go and by a process of elimination i have found out the way that domain company forwards the domain to my external IP address is what is affecting the display of the site. If I put my external ip address in the 2 url's for the wordpress site and then type that same ip address in my web browser it all works as it should do. So it has to be the re-direct.
I have the domain with 1&1 and that is where the re-direct is but not sure i'm using the right one. HTTP re-direct still shows the ip address where as the frame re-direct is what i was using to mask the ip address but that is where the problems are. Do you have ideas on why it wouldn't be working correctly ?
Cheers for your time
Andy Middleton
Forbidden access from lan
Hi Sam, I'm writing here because your old page "/diy-raspberry-pi-webserver" doesn't exist anymore. I have a problem with the apache config but I can't find where's the error could you help me to investigate? The problem is that I can't access to my site from LAN, if I type 192.198.1.102 (ip of my raspberry) into my browser I get the "Forbidden Access" page but if I type the external url www.mysite.com all works fine. Do you have any suggestion? The is my config file with virtual host:
#============================== ANTI PROXY SPAM =========================
VirtualHost *:80>
ServerName default.only
Location />
Order allow,deny
Deny from all
/Location>
ErrorLog ${APACHE_LOG_DIR}/spam/error.log
LogLevel warn
CustomLog ${APACHE_LOG_DIR}/spam/access.log combined
/VirtualHost>
#============================ MYSITE SERVER ===================
VirtualHost *:80>
ServerAdmin admin@mysite.com
ServerName www.mysite.com:80
ServerAlias mysite.com
# Indexes + Directory Root.
DirectoryIndex index.html index.htm index.php
DocumentRoot /var/www/mysite.com/www/
Alias /phpmyadmin /usr/share/phpmyadmin
# CGI Directory
ScriptAlias /cgi-bin/ /var/www/mysite.com/cgi-bin/
Location /cgi-bin>
Options +ExecCGI
/Location>
# Logfiles
ErrorLog /var/log/mysite.com/error.log
CustomLog /var/log/mysite.com/access.log combined
/VirtualHost>
Wow that was ages ago! The
Sorry but I don't understand
Sorry but I don't understand where is the problem. Why I can't access the website simply calling the ip address of the rasp on the browser?
I've also tried with your config file here (modded with my settings) without success. Everytime I call the ip address 192.168.1.x the server sees me as spam so I get redirected to the "anti proxy spam" folder.
#============================== ANTI PROXY SPAM =============================ServerName default.only
Order allow,deny
Deny from all
ErrorLog ${APACHE_LOG_DIR}/spam/error.log
LogLevel warn
CustomLog ${APACHE_LOG_DIR}/spam/access.log combined
#================================= WEBSITE ===================================
ServerAdmin webmaster@samhobbs.co.uk
ServerName www.samhobbs.co.uk:80
ServerAlias samhobbs.co.uk
DocumentRoot /var/www/samhobbs/
Options Indexes FollowSymLinks MultiViews
AllowOverride all
Order allow,deny
allow from all
ErrorLog ${APACHE_LOG_DIR}/samhobbs/error.log
LogLevel warn
CustomLog ${APACHE_LOG_DIR}/samhobbs/access.log combined
There isn't a problem, apache
Thank you Sam now i've
Thank you Sam now i've understood the process.
Final step...
Hi from Spain, Sam!
Thank you for this fantastic tutorial. I have a little problem, and I think you can solve it!
When you said that we need to remove the index.html that Apache generate with:
sudo rm /var/www/index.html
In Raspbian Jessie I finally do with:
sudo rm /var/www/html/index.html
Ok. Little problem solved. But there is another: when I put this:
sudo chown -R www-data:www-data /var/www/
Seems to not doing nothing and my domain only shows something like that:
Index of /
[ICO] Name Last modified Size Description
Apache/2.4.10 (Raspbian) Server at santiroberto.com Port 80
Doesn't appear the Welcome page of Wordpress. Can you help me, please??
Thank you in advance, you're a phenomemon!
document root has changed
Hi,
Hi,
just wanted to ask you if you'd kindly update this tutorial. Although it is really detailed and extensive, a lot of things have changed since you created this tutorial like php7 instead of 5, mariadb instead of mysql etc.
Thanks
Updated page but no publish available
Hi Sam
I have installed wordpress and back on the 28th of June I was able to create/update some pages (at stent.nz) and then publish. Since this first publish I am no longer able to publish. The Update button within the 'Publish' panel at the top right of the edit screen always stays saying 'Update' and not Publish. I have tried to track down other users with this problem and it seems to be unique for me.
Please help.
Richard.
WP configuration changes virtual host
Dear Sam,
You mention to make changes in the virtual host files and to 'Find the section for the /var/www/ directory:'
I am not seeing these sections in the enabled-sites config files but only in my apache2.conf file. Does this mean that i need to make the change you recommend in this apache2.conf file instead?
Hans,
Priveleges in the phpmyadmin
Hi Sam, hope your still here, your tutorials are among the best on the internet, so I still use them.
I am actually trying to migrate my RPI wordpress site to an Ubuntu machine temporarily, and I've been using your tutorial as a guide. I may have done something wrong in setting up the wordpress database. I am running apache2 and have a few websites on the computer. I am going to run a single wordpress site out of one of those websites. I have the wordpress files in the folder for the worpress site, and I have installed phpmyadmin. When I run phpadmin I can't see a priveleges tab. Hence I can't follow the steps you have in your tutorial. Just wondering why that might be and if there's an easy fix.
Add new comment