![]() If you run your own website, email server or other services like OwnCloud at home then you may find yourself in need of a SSL certificate. When you install Apache, it generates a self-signed "snakeoil" certificate that can be used to encrypt your session. However, while this certificate is useful for testing purposes, it falls short in a couple of important ways:
If you run your own website, email server or other services like OwnCloud at home then you may find yourself in need of a SSL certificate. When you install Apache, it generates a self-signed "snakeoil" certificate that can be used to encrypt your session. However, while this certificate is useful for testing purposes, it falls short in a couple of important ways:
- The snakeoil certificate has not been signed by an authority that your browser trusts, so your browser will throw an error when you connect.
- The common name on the certificate probably doesn't match your domain name. Another browser error.
- Short of manually inspecting the certificate's checksum, you have no guarantee that you are communicating with your own server - it could easily be an imposter using another self-signed certificate.
This tutorial will show you how to generate your own SSL certificate, and get it signed by the community driven SSL certificate signing authority CAcert. Once you have imported the certificate into your browser or into your operating system's root filesystem, your computer will automatically verify the identity of the server and you will enjoy error-free secure communications. Oh, and CAcert is free of charge!
Before we start: a quick note about filename extensions
As far as I can tell, Linux is not at all bothered about what you name your certificate and certificate key files. You could use the .magic extension for your cert if you liked and it would probably still work. From what I've read, file name extensions seem to only matter on Windows, whereas on Linux they're just descriptive. However, it's probably worth noting that there are lots of different types of certificate encoding styles, which have been summarised neatly here. Some extensions such as .pem and .der imply that the file is encoded in a certain way. Since we are able to choose whatever extension we like, I've chosen the following:
- .csr for the certificate signing request (CSR)
- .crt for the signed certificate file
- .key for the key file
These have the benefit of not implying any particular encoding. The first time I did this on my Pi, I used .pem for everything and got in a muddle, forgetting which file was which. This should make things much easier!
Generate your certificate
We are going to use a two step process to generate your certificate. First, run this command, which will generate a private key:
openssl genrsa -out <filename for your private key>.key 4096
Now we will generate a new certificate signing request (CSR) from your private key:
openssl req -new -key <filename for your private key>.key -out <filename for the CSR>.csr
This stage requires user input, a series of questions about what information you would like to be on the certificate. Since CAcert is an automated service, it discards most of the information on the certificate (so that it doesn't certify the information it is unable to verify), leaving only the essentials: the email address and the common name. Here is the information you will be asked for:
- Country Name (use a two letter code e.g. GB)
- State or Province Name (e.g. Surrey)
- Locality Name (e.g. Guildford)
- Organisational Name (e.g. Sam Hobbs' Personal Website)
- Organisational Unit Name (e.g. Website)
- Common Name (your domain name - see note below - e.g. samhobbs.co.uk)
- Email Address (the contact address for your administrator e.g. webmaster@samhobbs.co.uk)
Don't set a password - leave it blank when asked. We will keep the key file private by setting appropriate permissions. The common name is important here: most websites rewrite https:// to https://www. or vice versa. If your website is available at https://yourdomain.com then you should use yourdomain.com as the common name; if your website is at https://www.yourdomain.com then your common name should be www.yourdomain.com or *.yourdomain.com (the wildcard will match any subdomain, meaning you can use the same cert for https://mail.yourdomain.com and https://www.yourdomain.com, which is handy). Personally, I use a wildcard certificate. If you were paying for a normal certificate authority to sign your certificate then a wildcard cert would be more expensive, but CAcert is of course free so you might as well take advantage of it!
Install the CAcert root certificate
Every operating system comes pre-loaded with a set of certificates that are seen as trusted by the OS. This includes certificates from verisign and other big name certificate signing authorities. Very few OSes trust CAcert by default, although a couple of Linux distributions do. The CAcert website provides https using a certificate that was signed by the CAcert root. Since you are going to be sending sensitive information to the website during registration, it makes sense to install the CAcert root certificate now so that you can use the site without browser errors. To install the CAcert root certificate from the commandline, you can use these commands:
cd ~
wget http://www.cacert.org/certs/root.txt
sudo cp root.txt /etc/ssl/certs/cacert-root.crt
Those commands will download the CAcert root certificate into your home directory, and then copy it to your certificates folder. If you look in your certs directory (ls -l /etc/ssl/certs) you will see that all of the certs have sensible certificate names like GeoTrust_Global_CA.pem, but there are also a load of symbolic links with names like 2c543cd1.0 that point to the certificate files with the human readable names. Those symlink names like 2c543cd1.0 are hashes of the certificate files, and are there to enable programs on your computer to quickly check whether the root certificate is in your computer's certificate directory or not. Some programs manage to recognise that the certificate is installed just fine without the symlinks, but some of them do not. Openssl is one of the ones that doesn't. So, we need to make use of one more command to create a symlink for the newly installed cacert-root.crt (this will also refresh the symlinks for the rest of the certs in the folder):
sudo c_rehash /etc/ssl/certs
Now that the CAcert root cert is installed, almost all software on your system will recognise it (chromium, rekonq etc.). The exception to this is Mozilla software such as the Firefox web browser and Thunderbird email client. Mozilla software has its own certificate database, which has both advantages and disadvantages. For example, if you're using a system where you don't have admin rights, you can still easily import the CAcert root to Firefox. The disadvantage is that if you are an administrator, you can't do a one-stop installation: you have to import it separately to Firefox. To install the certs, open Firefox and navigate to the root certificate downloads page and click on the links for the class 1 and class 3 .pem encoded root certificates. You will be prompted to decide whether to import them or not. To install to Android, follow this tutorial of mine.
Required Email Address
CAcert verifies that you own the domain it is signing a certificate for by sending a verification link to one of the following email addresses:
- root@yourdomain.com
- webmaster@yourdomain.com
- postmaster@yourdomain.com
You therefore need to be able to receive email to one of these addresses. You can set up your own email server, or failing that some domain name registrars provide email forwarding capabilities. If you used my tutorials to set up your email server then you may want to add some aliases to your server so that emails to those addresses above are delivered to your username. Here's how: Edit /etc/aliases and add:
postmaster: yourusername
webmaster: yourusername
root: yourusername
Now run this command to load the new aliases:
sudo newaliases
And reload Postfix:
sudo service postfix reload
Submitting the CSR to CAcert
First things first, you will need to go to the CAcert website and create an account: Please note that CAcert has signed its own SSL certificate, so your browser may throw an error if you haven't imported the root cert yet. 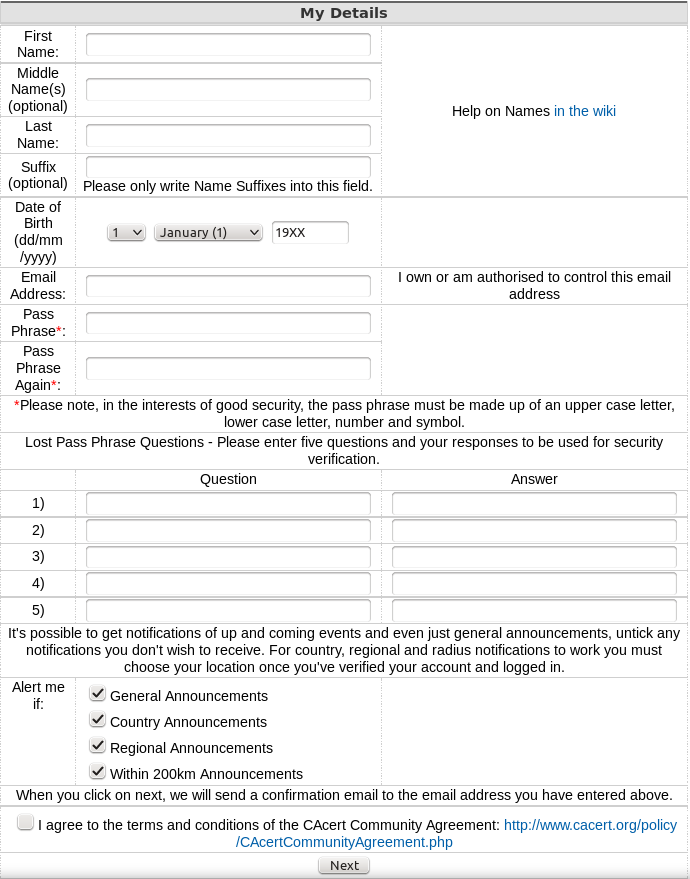 After you have created your account and logged in, navigate to server certificates --> new. On your server, use
 cat to print the the Certificate Signing Request (CSR) you created earlier and then copy & paste it into the box:
cat <filename for the CSR>.csr
...and click submit. The result will be displayed on screen, and you will also be emailed the certificate. Copy and paste it into a file with the .crt extension, e.g. using nano:
sudo nano <path to your cert>.crt
...then CTRL+SHIFT+V to paste, CTRL+X, save when prompted. Note: the BEGIN CERTIFICATE and END CERTIFICATE lines are part of the cert, so copy those too!
Certificate File Locations
Assuming your certificates and key file are in your home directory, it's a good idea to move them to the proper locations
- Your key file should be stored at
/etc/ssl/private/samhobbs.key. - Your certificate file should be stored at
/etc/ssl/certs/samhobbs.crt. - You can get rid of your CSR, or keep it for reference if you like.
Permissions & Ownership
Your key file is secret. It should be owned by root, and your permissions should be set so that only the root user can read and write to it. This command will set it to be owned by root:
sudo chown root:root /etc/ssl/private/samhobbs.key
And this command will set it so that only the root user can read and modify it:
sudo chmod 600 /etc/ssl/private/samhobbs.key
Most services like Apache, Postfix etc. require root privileges to start up. They read the certs when they start and store them in RAM, so that they can still use them when they drop to their normal users ( e.g. www-datafor Apache). Unlike your key file, your signed certificate file is not a secret (it is sent to users when establishing a secure session). You want all users to be able to read the cert, but only the root user to have write access to it. As before, this command will set it to be owned by root:
sudo chown root:root /etc/ssl/certs/samhobbs.crt
And this command will set it to be readable by everyone, but only modified by root:
sudo chmod 644 /etc/ssl/certs/samhobbs.crt
Some common SSL cert configuration parameters: Apache, Postfix, Dovecot
This section is a quick reference for where to find SSL parameters for Apache, Postfix and Dovecot.
Apache
You can tell Apache to use a specific certificate file in your SSL virtualhost configuration (e.g /etc/apache2/sites-available/default-ssl) with these parameters:
SSLEngine on
SSLCertificateFile /etc/ssl/certs/samhobbs.crt
SSLCertificateKeyFile /etc/ssl/private/samhobbs.key
Then reload Apache:
sudo service apache2 reload
Postfix
Postfix' SSL cert configuration can be found in /etc/postfix/main.cf:
smtpd_tls_cert_file=/etc/ssl/certs/samhobbs.crt
smtpd_tls_key_file=/etc/ssl/private/samhobbs.key
...and reload Postfix:
sudo service postfix reload
Dovecot
Dovecot's SSL configuration is in /etc/dovecot/conf.d/10-ssl.conf:
ssl_cert = </etc/ssl/certs/samhobbs.crt
ssl_key = </etc/ssl/private/samhobbs.key
NB: the < at the start of the path isn't an error, if you miss it out Dovecot won't load. Reload dovecot:
sudo service dovecot reload
Hopefully you found that useful! If you have anything to add or a question, please feel free to leave a comment!
Comments
Apache
Thanks for the really helpful guide.
Sorry to ask a silly question - but when you copy and paste the certificate content - do you include (or not) the "BEGIN CERTIFICATE" and END CERTIFICATE" text?
Also when I do the final step to restart apache I get
Could not reliably determine the server’s fully qualified domain name, using 127.0.1.1 for ServerName
Tried the fix below but still get the same error.
http://aslamnajeebdeen.com/blog/how-to-fix-apache-could-not-reliably-de…
Those statements are part of the certificate
ServerName samhobbs.co.ukin your main config somewhere (not in a VirtualHost). In newer versions of Ubuntu, you can create separate config files and then enable them withsudo a2enconf foowherefoo.confis the name of a config file in/etc/apache2/conf-available/, which will symlink it into/etc/apache2/conf-enabled/so that it's read when Apache starts up. You don't have to do it this way, though. In Debian/Raspbian (or Ubuntu, if you don't like the suggestion above), just put the statement in your main Apache config file (/etc/apache2/apache2.conf). ...and reload/restart. Samroot certificate
Can you elaborate on this - What you probably need to do is create your own root cert for your local domain and use it to sign a cert for the Pi
I have tornado running on my pi and I have a webpage which uses the microphone on my pc - browser is chrome. I need to get the pi to serve the page up as https so that I don't have to keep enabling the mic each time. The web page will only be accessed by my pc and it only has an ip address and is set up as an access point through wifi.
cheers,
Dani
Easier to make an exception for the snakeoil cert
- your computer runs windows?
- you access the web page using an IP address for the pi, which is static
It's not that difficult to generate your own root cert, but you might just want to make a security exception for the snakeoil (default) cert for that IP address, particularly if you'll always be using the same browser on the same machine... much less hassle! SamEasier to make an exception for the snakeoil cert
Thanks I seem to have got it working now with the snake oil cert. Just it comes up with an annoying message when I first go to the page and the https is crossed out. Is there a way to avoid that - by using frames or something? Otherwise I can live with it. To confirm the setup is exactly as you say.
Every browser is different
My Dad just pointed out
Aliases
Hi Sam,
Thanks for the great tutorials. Really the best I've found on the internet.
One thing to consider is the use of a virtual alias table instead of creating user aliases. I did this as I have multiple domains but all mapped to one email and didn't want to use up all those usernames. It's explained well here (2nd answer):
http://serverfault.com/questions/23717/postfix-how-do-you-redirect-all-…-→-userex
All the best,
Yannimoto
Very useful
luser_relayor the virtual way - I never considered virtual users because it's just me using my server) so thank you very much for that. The link is going in my bookmarks! Samthanks
Good stuff, thanks.
tutorials
Thank you so much, Sam, for both the SSL certificate and the email server tutorials.
Both were (relatively) painless to follow on my pi. In fact all the problems I had turned out to be fat fingered ones.
Hehe, I know the feeling. Few
raspberry pi tutorials
Hello Sam,
thanks a lot for the dedication and care that you put into achieving these useful pages.
These pages has helped me a lot and has reduced my learning curve on postfix very well
Well done Sam
Thanks!
Everything went smoothing but...
Sam,
Thanks for this guide, it proved to be well done. Everything went smoothly on my pi and everything seems to happen like your guide says. The only thing is now that i'm done, no page from my pi server seem to be https. I am checking from outside the network too...
Anything you can suggest to help troubleshoot this?
Thanks,
Brian
Rewrite, port forwarding
- Do you have a rewrite rule rewriting to HTTPS?
- Do you have an enabled virtualhost config file for HTTPS?
- Is
- Is port 443 forwarded from your router to your pi? If you manually type https in the url, does it connect?
Sammod_rewriteenabled? (sudo a2enmod rewrite,sudo service apache2 reload)Gmail Spam
Hi Sam.
I've done everything you write here but after sending an email to a Gmail account I got my message in spam box.
How do I fix this (if possible)?
Thanks!
PTR and SPF records
SPF Namecheap
Do you think this will do?
namecheap[dot]com/support/knowledgebase/article.aspx/317
I'm not finding any PTR info.
Thanks
SPF record example, PTR
v=spf1 mx a ~allmeans use SPF version 1, allow messages submitted from IP addresses with a matching MX or DNS A record, softfail the rest (i.e. don't bounce messages, but the 3rd party server can decide what to do - normally mark as spam). Old versions had the PTR record in there too along with MX and A but messages sent from a host with a matching PTR record are accepted by default, so that's a depreciated option. SamHi
Hi
Thanks for the great tutorial , I really like the idea of owning my emails, owning all my data and not have it read by un-invited guests!
my question is that if I setup postfix mail server on my domain and update mx records of my domain. do i still need the ssl cert for email so that other external mail-servers can accept my email and I can accept their email. I doubt that they will accept snakeoil cert from my mx email server. Thanks again!
Certificate requirement for mail servers
CAcert error message: sec_error_unknown_issuer
Hi Sam,
Thank you for your tutorials! I'm using the new Raspberry pi2 and it is excellent to run mailserver (finally working :)), host website and time lapse the emoto rice experiment with my webcam.
I followed your tutorial the third now and keep ending up with this error: sec_error_unknown_issuer
It seems the browser does not find/recognise the issuer: CAcert
Thanks again, great site you are hosting.
Best regards,
Sander
Which browser?
Browser: Chrome, IE, FireFox and Opera
Hi Sam,
Thanks for your reply. I have tried all different browsers (Chrome, IE, FireFox and Opera) on different computers. The OS on the Pi is Debian Wheezy.
Best regards,
Sander
Install CAcert root
CAcert install package for Windows
Hi Sam,
I have downloaded the CAcert windows package from:
http://www.cacert.org/index.php?id=3
Now the certificate is signed and valid. It is only a pity that you have to install the certificate on every computer you want to use SSL. So for a random visitor on the website this is not something you can ask.
Thank you for your help. Keep up with your much appreciated work.
Best regards,
Sander
Personal use
Web and Mail on different servers
I have my www site hosted by a private company. At my home, I use my raspberry pi for mail and owncloud. Am I correct in assuming that I will have to make two certs without a wild card for my mail and owncloud, in other words mail.mydomain.com and owncloud.mydomain.com?
Many thanks for your numerous tutorials.
Rob
One wildcard should do it
Add new comment