Intro
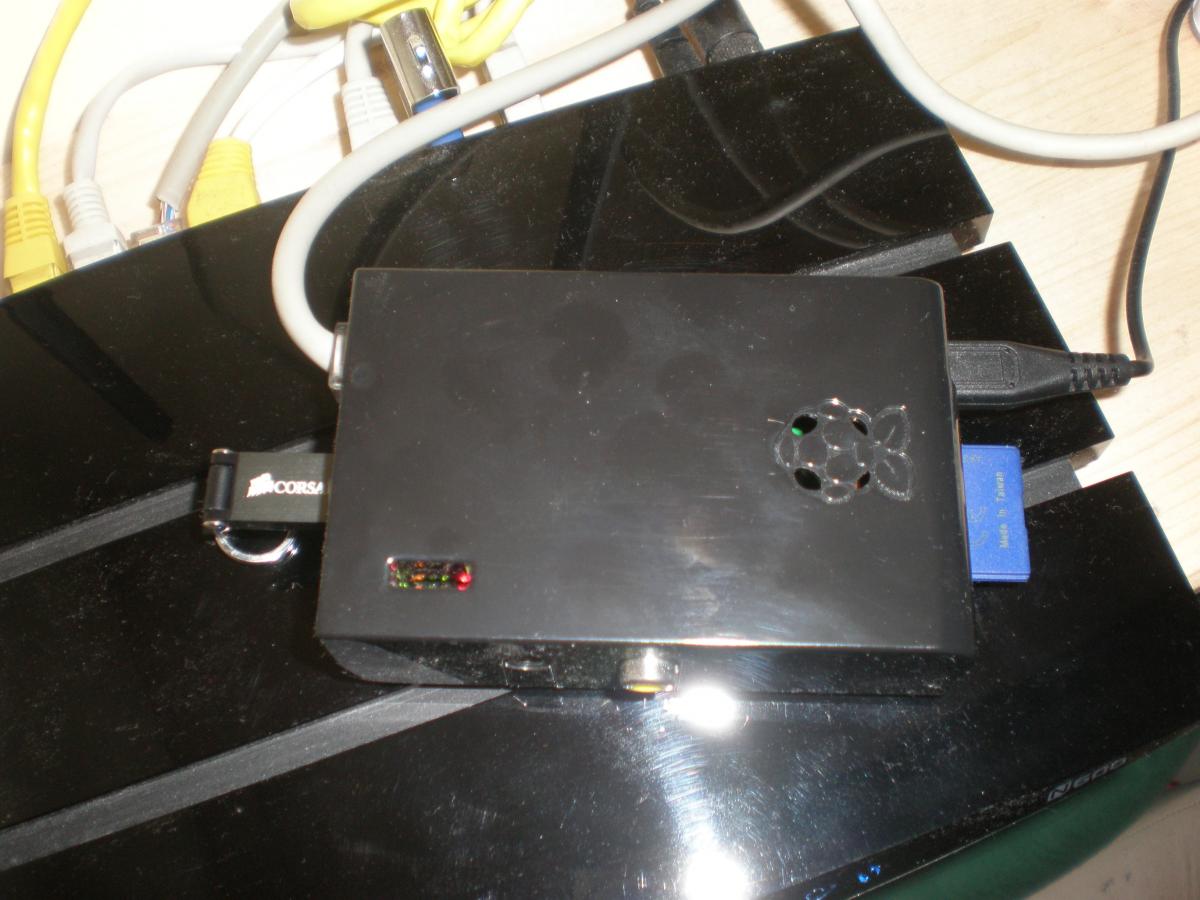
If you’ve read some of the other articles on the site, you may have gathered that I have three RasPis doing useful things around my home:
- Pi #1 is running Raspbmc, an XBMC media centre port for the Raspberry Pi.
- Pi #2 is running this website plus an email server.
- Pi #3 is running the Dropbox replacement OwnCloud.
All three of these ran reasonably quickly out of the box, but because the Pi is such a low powered device, every little performance boost helps. Having said that, this is no small improvement, and the performance gain is instantly apparent.
To Business
Raspbmc’s installer has a built-in boot to SD card function – the first time you power it on, if you have a USB plugged in it will automatically set things up for you. So #1 is taken care of. That leaves #2 and #3, for which the solution is the same (the solution applies to anything running Raspbian, and may work for some of the other Pi distributions too, although I haven’t checked). The first thing to understand here is that a Raspberry Pi is currently incapable of booting without an SD card. So although you can move your filesystem to a USB, you still need to keep the SD card plugged in. A normal Raspbian image contains two partitions. One is the boot partition and the other is the root filesystem. The boot partition contains all the bits that your Pi looks for when it starts up, and the root filesystem contains all of the programs that you run once the system is up and running, organised in the familiar filesystem hierarchy. What we are about to do is tell the Raspberry Pi that the root filesystem is on a USB stick, and then delete the old root on the SD card, leaving only the boot partition. I’m going to assume that you have already made changes to your Pi that you would like to keep, and are not starting from scratch, as I doubt many people will have been foresighted enough to know that they would like to do this when they started tinkering (I certainly wasn’t!). All of these modifications are done on a Linux laptop or desktop (the Pi is off for the duration).
Step 1 – back up your SD card
Make a note of which drive your SD card is (you can check this in your partition manager). Now to make an image of your card and save it to your hard drive, run the following command:
sudo dd bs=4M if=/dev/sdb of=~/backup.img
(Where /dev/sdb is your SD card) This should take about 5 minutes, just be patient.
Step 2 – copy the image over onto the USB stick
Once you have a backup image, you can insert your USB drive and copy the image over.
sudo dd bs=4M if=~/backup.img of=/dev/sdc
(where /dev/sdc is your USB stick – again, you can check this in your partition manager) NB: we could have copied directly from the SD card to the USB stick, but it’s useful to have a backup just in case you mess it up, or your drive gets corrupted at a later date.
Step 3 – remove the partitions you don’t need
You should now have one SD card and one USB drive with identical content. You don’t need the boot partition on the USB drive, and you don’t need the root filesystem on the SD card. You don’t have to do this, but you can open your partition manager and delete those partitions to keep things neater (this will also stop you from getting confused about which is the one in use). You may find it easier if you remove the SD card to edit the USB drive and vice versa, it’s easy to mix the two storage devices up. Now is also a good time to resize the root filesystem on the USB drive using your partition manager. Extend it to use the free space at the end of the disk, but leave 10 MiB free at the end. I’ll explain why later.
Step 4 – work out how you are going to identify your root filesystem
Now all you need to do is tell the RasPi where the root filesystem is. This is done in a file called cmdline.txt. The key parameter is root=/dev/mmcblk0p2. If you are never going to plug another USB device into the Pi, then you can change this to root=/dev/sda2 (the second partition on /dev/sda). Note that even if you deleted the first partition, the second will still identify itself as /dev/sdX2 unless you create a new partition table, so stick with /dev/sda2. BUT, if you think you might use another USB device with the Pi, then you may run into problems. You might think that the RasPi always assigns the top USB /dev/sda and the bottom USB /dev/sdb… not so. Which device gets which slot is random, so /dev/sda2 might not be the partition you think it is if more than one USB device is attached. Usually, on Ubuntu and other Linux distributions, you can refer to USB drives by their Universally Unique ID (UUID). Undortunately, the Raspberry Pi bootloader isn’t as sophisticated as Ubuntu’s GRUB. I’ve tried assigning the root location by UUID, but it doesn’t work. However, I did manage to find a solution here. While you can’t use the UUID, you can use the PARTUUID. First, you need to convert your partition table from DOS to GPT. To do this, you’ll need the commandline tool gdisk. * If you didn’t leave that extra 10MiB at the end of the disk, you’ll get an error at this stage about the partition table and a partition overlapping.
sudo apt-get update
sudo apt-get install gdisk
gdisk /dev/sdb
(where /dev/sdb is the usb drive). You will now be greeted with a prompt. Type ? and press enter to list your options. Now choose “recovery and transformation options (experts only)”. Again, type ? and then choose “load MBR and build fresh GPT from it”. Finally, type ? and choose “write table to disk and exit”. Now take the USB drive out, re-insert it, and run gdisk again:
sudo gdisk /dev/sdb
Now press “i”, and then “2″ to display detailed information on the second partition on the drive /dev/sdb2. You should get output like this:
Partition number (1-2): 2
Partition GUID code: 0FC63DAF-8483-4772-8E79-3D69D8477DE4 (Linux filesystem)
Partition unique GUID: CA9D1961-4627-46BB-BACA-7C7106977E5C
First sector: 122880 (at 60.0 MiB)
Last sector: 60545023 (at 28.9 GiB)
Partition size: 60422144 sectors (28.8 GiB)
Attribute flags: 0000000000000000
Partition name: 'Linux filesystem'
The “Partition unique GUID” is what we’re after. Paste it into a text editor for now, you’ll need it later.
Step 5 – edit the boot partition on the SD card
Mount the boot partition on the card, locate the partition, and then edit cmdline.txt. We need to change root=/dev/mmcblk0p2 to root=PARTUUID=XXXXXX (fill in your Partition Unique GUID in the place of XXXXXX).
cd /media/boot
ls
sudo nano cmdline.txt
Press CTRL+X when you’re done, and say yes when prompted to save. Close the terminal window and unmount the USB drive.
Step 6 – Boot your Pi to the USB drive
Now all that’s left is to insert your SD card, your USB drive, and reconnect the power cable. If all goes well you should boot into a much speedier system, with greater stability and reliability.
Important note!
I wrote this tutorial in October 2013, and was running an email server and a WordPress website on the Pi from then until March 2014... and then the flash drive bricked and I lost everything because I didn't have a backup! So, just remember: USB flash drives are faster and more reliable than SD cards, but they aren't really meant to be used for this kind of application. As a result, you should keep regular backups! The website I was running was generating 1100 visits and about 10k hits every day - imagine how different that is to the occasional reads and writes that the USB drives are designed for. If you want a more reliable server, you can use a self powered HDD and use this tutorial to put the root filesystem on that.
Comments
Resizing partition
Hi Sam,
Awesome site - sorry to hear about the pi-crash. I've followed your email server steps 1-3 but couldn't manage to get the https access working so I'm starting from scratch. I'm struggling with the "speed up the pi by booting to USB" step now however. I was going to go with the simpler /dev/sdc option rather than installing gpt and going that route. What I cannot seem to do however is resize the partition on the USB!
I have a Mac and a PC, neither of which appear to allow me to resize the partition - in OSX, I cannot edit the partition because it's MBR and on the PC (Win7), I don't have fdisk. I used fdisk on the Mac, but while the partitions appear to be correct, when the pi boots up, it's not showing the resized space.
Would you happen to be able to point me to a clear, easy to understand way to resize the partition on the USB?
Thanks!
Hi Chris! The Pi crash was
install GParted on your Mac or PCuse GParted from a live CD or USB: http://gparted.sourceforge.net/download.php The download link is to an .iso file, which you burn to a disk (search for free iso burner, there are loads of gratis and open source programs out there for Mac and PC). This is the same app I would use on Linux and is very easy to understand (you can drag the partition dividers around to resize, that kind of easy). Let me know if you have any problems with it, but I expect you'll be fine! SamYou don't need a separate PC or Mac
Hi,
First of all, thanks for the great tutorial Sam. It was easy to understand and follow. That link you included to the PARTUUID info was broken but thankfully you already incorporated the info into the tutorial.
Chris, I did everything on the Pi itself. I didn't go through the step of backing up my SD card and then writing the backup to the USB drive. As Sam mentioned, you don't have to go through that step. I just merged both commands from step 1 and step 2 like this:
sudo dd bs=4M if=/dev/sdb of=/dev/sdc
Also, I made sure I had gparted (Partition Editor) and gdisk installed before I cloned the SD card onto the flash drive just to make sure they were available no matter which device I booted from.
Lastly, you don't have to delete your old root partition from the SD card but I did it just to see if I was indeed booting from the flash drive although as soon as you complete the tutorial and reboot you'll immediately notice the difference in boot up speed.
Thanks again for this very helpful tutorial Sam.
Terry
To resize your partition, you
To resize your partition, you should use a linux machine (I prefer Ubuntu). In case you do not have a physical one handy, try installing a virtual one using VirtualBox. You can attach a physical USB device to ubuntu running on VirtualBox.
Of course, once you are on linux the usual tools are available for you to use: gparted, etc.
Great tutorial! I
Great tutorial! I successfully copied the SD card and installed it to a 2TB harddrive but
I think it's alot slower than on the SD card. Is it to heavy for the RPi or is it something I
could do? Like clear cache or something? :)
Not sure to be honest, I've
2 yeard I think.. It's a 3.5"
2 yeard I think.. It's a 3.5" and 5400rpm, but it was faster writing when i used it on the laptop than the SD card...
Hmm...I honestly don't know
Of course I will, sharing is
Of course I will, sharing is caring!
Yeah it's self powered.. It would be funny though to see a device 5 times bigger that's
powered through usb on the RPi.. haha
MOAR power
Yeah and it should be USB 3
Yeah and it should be USB 3 and have at least 2gb RAM :D
Any how.. I have now found a fix for slow performance on the external hard drive,
or maybe it was something I missed in the installation?
First did I check the read speed with hdparm
And it looks pretty normal, so the hard drive should be ok!
After some searching on DuckDuckGo I found out about FSTAB and how the
partitions is integrated into the file system. So I looked it up on the Pi via ssh..
sudo nano /etc/fstabAnd what do I find if it isn't the good old root partition /dev/mmcblk0p2 that
was on the SD card that doesn't exists anymore and is equipped with "noatime"
that gives it a performance gain!
I changed the old root partition "/dev/mmcblk0p2" to the new root partition on my hard drive "/dev/sda2".
CTRL-X and save!
Then...
sudo mount -oremount /Then...
sudo rebootBefore.. I had over 10 seconds page load on the wordpress site..
Now I am down at 2 seconds flat! :D
Still room for improvement though! ;)
Why should it be USB 3? The
Why should it be USB 3? The RPi doesn't support USB 3.0, so what difference does the drive make?
It was over a year since I
It was over a year since I wrote that.. What I meant was what I would like to see in next generation of RPi..
Pure and simple.
Any way you get it done (and I didn't do it your way...) it still is a great improvement! The performance boosts to the system make it feel "every day" usable to me. Thank you for taking the time to post information like this, you are a boon to the community.
Hi Josh,
Hi I followed your steps and
Hi I followed your steps and when booting the pi up I got cannot execute bin/bash exec format error... do you have any advice
Hmm, I don't know really,
If I follow this tutorial, does that mean I can...
If I follow this tutorial, does that mean I can just have a boot partition on my SD card which mounts all my hardrware like external usb drives, dvd player... and then it calls the usb stick/drive and loads an os? So all I'd need to do is replace the root file system and I could instantly change from like raspbian to kali linux...?
Thanks,
Good question
Sucessful with one issue
I am running off my USB drive now and the performance boost is awesome! Thanks for the great write up! My issue is that even though I was able to grow the partition on the USB drive sucessfully, raspbmc thinks it only has 8% left. The origonal image was on a 4 gig sd. raspbmc sees all the drive it just thinks its mostly full. Any idea as to why it thinks the drive is just about full, and or how I might recover that space to use?
Did you delete the root FS
BerryBoot
Hi
I find your guide to be interesting as I am looking for to also separate the boot from the root.
But what is the difference by using BerryBoot ?
Thanks in advance
Never used it
Thanks for your reply anyways
Thanks for your reply anyways :)
Wireless collapsed my system
Hi Sam.
I read your tutorials and tried this one.
This was something I was looking for some time (as I'm a RPi newbie) since I wanted to use my "minimum storage" SDCard avaiable (4 GB).
I installed latest NOOBs and done what's in your tutorial. However I did not have success with the PARTUUID step but "sda" was OK to me because I only use one passport drive with this RPi (partitions work fine so I got what I wanted anyway).
Despite this I got this weird failure:
1) I set up my Raspbian and changed "root" to USB. Everything was OK.
2) I connect to internet via ethernet cable and everything was OK.
3) I set up my wireless connection (before or after using ethernet) and after I get wireless connection status "connected" my system begins to fail in cascade. First icons disappear and if I restart my RPi, booting screen reads a lot of missing files.
Since I wanted to use my RPi as a multisystem machibne (Raspbian, RetroPie and Raspbmc), using an external harddrive would be awesome if I even could get to use it via wi-fi.
Have you experienced this or read about it before?
Thanks in advance.
Possibly a power issue...
Wrong scenario
I'm sorry Sam but I said the wrong thing in my comment...
I have a passport working fine with a powered usb hub. The problem was with a SATA HDD powered with it's own power source. My fault... I was thinking in another thing when writing last comment.
I have that HDD working with an owncloud server and it's OK but when I was preparing it I tried to do the installation via Wi-Fi and got that errors.
It was missing some "lib*" files so it could not boot.
I load the original image again into the SDCard and with the ethernet it ran OK.
As I can't find this specific error with google I will try other things during this week, like making an upgrade and wi-fi connection before doing my SDCard image.
I will give feedback then.
I will try to make root fs as well from a dualboot system (raspbian+raspbmc) to run in an external USB drive. Have you tried this already?
Thank you
Wifi Issue
Hi there Sam.
So here's the thing:
I've done all my tests and I got everything working.
Somehow I figured out that I must set up my wi-fi connection first (perhaps to load all files for my dongle) and then make my backup image.
I installed latest Raspbian via NOOB, set my wi-fi connection, reboot, tried ethernet, reboot, tried wi-fi and got success in all operations not losing data and using an USB external drive (a 4GB pen with root fs inside).
So my conclusion is that we need to setup our wifi dongle before thinking to make the backup image in order to not lose some needed library files to run in our USB drive after that.
Picking up the point I told you in my last comment, about using a multisystem, not having an sdcard just for Kodi (Raspbmc) is pointless because after all any extra files (like movies) we can run them directly from USB.
My multisystem machine will be composed with three SDcards and one 1TB passport HD. I will use the SD's to boot Raspbian, Raspbmc and Retropie. My passport will be to store root partitions and a partition set as an usb hdd.
Hope first part of this comment help somebody in the future.
Cheers!
Copy to existing fs?
Hi
I have a 2TB USB disk with 1 partition and formatted with ext4. And I have alot of data on it that I like to keep.
Can I somehow copy or rsync the root fs into my existing drive without repartition?
Cheers
Jacob
Nope, partitioning required
/dev/sdb1might be your data partition and/dev/sdb2the new root FS partition). SamAdd new comment